What Are Embossing Tools and How Do You Use Them?
7 minute readAre you looking to add some extra flair to your card making? If so, DIY embossing is the perfect way to do it! However, with various paper crafting tools available in the market, it might be challenging to know which ones are worth investing in. That's why we've put together a list of our nine must-have embossing tools for paper crafting. Whether you're a beginner or an experienced crafter, these tools and embossing tips for beginners will help take your handmade creations to the next level!

What tools do you need for embossing?
Embossing adds dimension and texture to your papercrafts. It's a great way to add interest and complexity to your handmade cards and make them look professional. But what are embossing tools, and which ones should you use? Before we take a closer look into these tools, you need to know the two different types of embossing commonly used in paper crafting: heat embossing and dry embossing. These techniques are widely used in card making, scrapbooking, art journaling, and even mixed media art.

Interested in embossing? Check out this article.
Embossing tools for card making
If you're new to DIY embossing or simply looking for some new crafting tools to try out, it’s essential to get a few embossing tools for paper crafting. Here are nine basic tools for both heat embossing and dry embossing techniques that you need to add to your crafting tool kit.

Antique Gold Crisp Embossing Powder
-
Heat embossing tools
To achieve a shiny, raised impression on your paper crafting project, you need the help of three main supplies: a heat gun, an embossing ink pad, and embossing powder. This process is called heat embossing. Here are the tools you’ll need for this technique:
- Heat gun. During the heat embossing process, a heat gun or heat tool is used to melt the embossing powder and create that shine and dimension. The most common type of heat gun is the long, tube-shaped one, but some may look like your regular hairdryer.
Can you use a hairdryer instead of a heat gun?
No. A heat gun is designed specifically for heat embossing. It reaches 650 °F (around 340 °C), and its gentle airflow ensures that the embossing powder stays in place. On the other hand, a hairdryer won’t be hot enough to melt the powder and will most likely blow it away because it produces too much airflow.

- Embossing ink pad. This is a clear, thick, and sticky type of ink with a slow drying time. Its stickiness allows the powder to stick to the stamp’s design. Basically, it’s like glue for DIY embossing. Embossing inks are often called watermark or resist inks. This comes in either large ink pads or mini cube ink pads like dye and pigment ink pads.

Anyday Essentials Embossing Powder Bundle
- Embossing powder. This might look like a regular powder, but it’s part of what makes embossing fun and magical. It is crushed and ground plastic bits that come in regular, fine, and thick sizes. It also gives various effects like simple shine, metallic, or distressed. Using embossing powder is essential in heat embossing because it adds that shiny and glittery look to your raised images.
How to use embossing powder:
- Sprinkle the powder generously over your stamped image. Make sure that every area is covered with powder evenly.
- When using embossing powder, there will always be lots of excess powder. You can simply place this back into the container and reuse it later.
- Start heat embossing using your heat gun!
Buy embossing powders from Altenew now!
- Stamps. Another must-have embossing tool for paper crafting is clear stamps. A clear embossing powder is definitely a staple in every card maker’s arsenal. It’s great for adding an instant shimmer to any stamped design. Colored embossing powder, on the other hand, is ideal for adding color and shine to your solid stamps.

- Anti-static tool. While some crafters agree that an anti-static tool is a must-have, others think it’s unnecessary. It usually comes in a small bag filled with anti-static powder. This powder prepares your surface for the embossing powder. The unseen oil in your fingers can cling onto your surface (especially on paper or cardstock), so the powder might grab onto parts of the paper that you’ve touched. Just like magic, the anti-static tool will cover up those oily areas.
-
Dry embossing tools
Dry embossing adds dimension and texture to your projects, just like heat embossing, minus the shiny look. It simply adds an embossed pattern or design. Don’t let the simplicity fool you, though. This technique allows you to experiment with other coloring mediums, textures, and other card making techniques.

- Embossing folders. An embossing folder is a translucent white plastic folder with embedded designs or patterns. It has a positive or raised side and a negative or recessed side. The two types of embossing folders are regular or standard and 3D.

Mini Blossom Die Cutting Machine
- Die-cutting machine. It might surprise you that a die-cutting machine is needed for DIY embossing. While most die-cutting machines work as embossing machines, some only work for die-cutting. Make sure to follow the manufacturer’s guide because every company has a different “sandwich” for embossing.

- Dies. Your wafer-thin metal dies are more valuable than you thought! Using an embossing mat can turn your beloved dies into embossing tools for paper crafting! Simply place an embossing mat underneath your cardstock. The mat will prevent the die from cutting the shape into the paper. Thus creating a beautiful embossed effect, just like any embossing folder.
- Embossing Mat. This is a piece of silicone rubber that helps create an embossed impression using your dies. When dry embossing using a mat, the cutting edge of the die should be facing up.
The video below showcases a few more dry embossing ideas and hacks that are a must-try!
What surfaces can you emboss on?
You can emboss on paper, cardstock, wood, fabric, leather, and metal surfaces. But, of course, this depends on whether you’re using embossing powder or embossing folders.
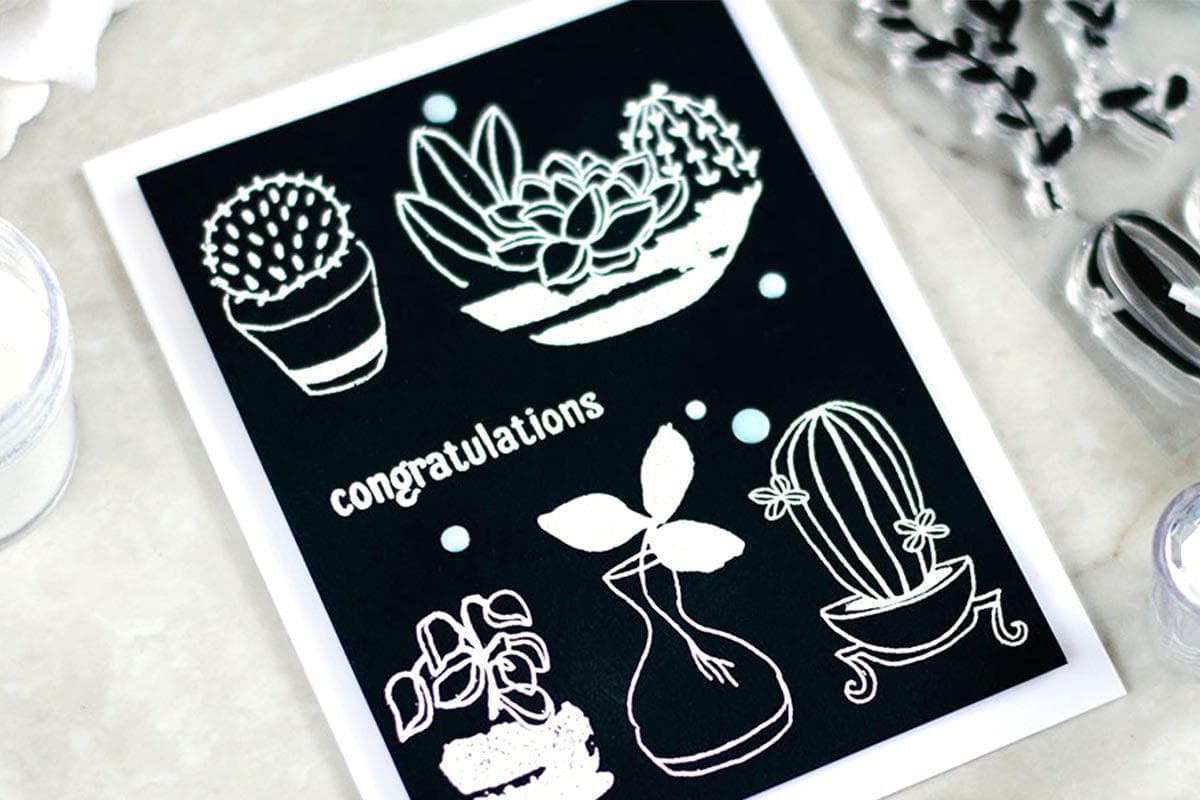
Indoor Garden Stamp & Die Bundle
What is the best embossing heat tool?
The Wagner Precision Heat Tool comes highly recommended by expert crafters. It is the best heat embossing tool for paper crafting! This tool has a dual heat setting, a stand for hands-free heat embossing, and a more ergonomically designed shape.
A good heat embossing tool has features that a regular hair dryer doesn’t have, such as heat control, high-speed setting, durability, and a better and even airflow. It is also designed specifically for DIY embossing, so it’s comfortable to grip for long periods and lightweight. Invest in a proper heat gun because it will get the job done.
Cards Made With Embossing Folders

- Eclipse Technique on an Embossed Card. The lovely card above shows a brilliant card making technique using our 3D embossing folder and a few other supplies. First, Michelle dry embossed her card panel, die cut her DIY tag out of the panel, and ink blended on the die-cut tag. The die-cut/embossed tag was then added into the simple white embossed panel, making it pop off the page!

- Faux Dry Embossing on a Card. If you don’t feel like using embossing folders, Svitlana has a fun and cool idea for you! All you’ll need are cardstock, dies, and some sentiment stamps. In her technique, she created a few die-cuts from the same die set and adhered them onto a cardstock of the same color. This is an excellent embossing tip for beginners, not to mention a creative way to stretch the use of your craft dies!

Brick Wall 3D Embossing Folder
- Quick and Simple Embossed Card. If you’re in a hurry and need to whip up a quick (but beautiful) card, try recreating Emily’s card above! She simply embossed her cardstock, adhered some floral ephemera to it, and it’s done! That’s the magic of embossing!

Mega Hello Debossing Folder
- Clean and Simple Embossing on White Cardstock. One of the best embossing tips for beginners is to start simple. Embossing (or debossing) on white cardstock is a classic. And it’s super easy too! It will turn your card from basic to elegant and professional!

- Embossing With Stencils. Yes, you read that right! Aside from your trusty ol’ dies, you can also use stencils for dry embossing! It’s the same concept as embossing with dies - you just need to use an embossing mat. Quick, simple, and easy!
Explore more high-quality embossing tools! Check out our products here.
DIY embossing, whether it’s heat embossing or dry embossing, is a fun and easy way to add texture, dimension, and interest to your paper crafting projects. These nine must-have embossing tools will help jumpstart your creativity and take your paper crafting skills to the next level! So grab these essential supplies today and start embossing like a boss! Visit our All About Crafting page for more incredible and unique DIY paper crafting ideas!
Your Ultimate Guide to Paper Crafting
Click on each topic and subtopic to read more!
- What is Card Making? Everything You Need to Know About This Popular Paper Crafting Hobby
- 10 Best Stamping Ideas for Card Making (With Video Tutorials!)
- 15 Card Making Supplies You Need In Your Stash
- Card Making Tips and Tricks That Every Card Maker Should Know
- Advanced Card Techniques to Elevate Your Cardmaking Skills
- How to Make a Card: Step by Step Guide
- Paper Crafting Tools: Essential Craft Items and Tools
- Basic Paper Crafting Tools Every Crafter Should Have
- Organize Craft Supplies and Tools Easily With These Hacks!
- Different Types of Paper Crafting Tools and Their Purpose
- How to Organize Markers, Pens, and Pencils: A Comprehensive Guide
- The Ultimate Guide on How to Clean and Store Craft Supplies
- A Comprehensive Guide to Greeting Card Envelopes
- What Is the Stampwheel and How to Use it?
- Types of Embellishment in Paper Crafting - A Complete Guide
- A Guide to Hot Foil Plates and Press Plates