How to Make a Dynamic Shaped Card | Circular Base Tutorial
by Jaycee Gaspar July 26, 2026

KEY TAKEAWAYS
Conceal Your Hinges: When engineering shaped card bases, scoring a small $1/4$-inch tab on the back panel allows you to hide the adhesive seam entirely behind your front panel, keeping the overall card look clean and professional.
Emboss for Structure: When working with intricate die-cuts like the Emboss & Cut Decorative Frames, emboss every single scrap layer individually before stacking them. Because cardstock naturally puckers and shrinks slightly under pressure, this step ensure your elements nest flawlessly without warping.
Flick for Texture: Move away from seamless blending by using a detail blending brush to flick ink from the petal tips toward the center. This leaves behind natural-looking veins that add unmatched realism to multi-layered floral sets like the Craft-A-Flower: Gerbera Daisy.
Give Blooms Breathing Room: To achieve a stunning, realistic dome effect on heavy multi-layer flowers, separate your petal layers into groups (e.g., layers 1–5 and 6–10), shape or curl them separately, and then layer them together.
Ditch the Envelope Stress: Don't let unique card shapes stop you from mailing them. Keep an A2 card template nearby during layout design to ensure your overhang elements don't exceed standard mailing constraints, or upgrade to an A6 envelope or small flat-rate box for maximum dimensional protection.
Hey there everyone, it’s Jaycee! Welcome back to another Perfect Pairings session with me.
If you couldn't tell, I am still completely riding the shaped card trend wave, and I couldn't resist making another one for you today. I received some wonderful feedback on my last shaped card video, and I thought this project would be the perfect opportunity to demystify some of your questions. Let’s dive into how you can easily take your cards from boring to beautiful by shopping your stash!

The Foundation: Engineering a Concealed Hinge Base
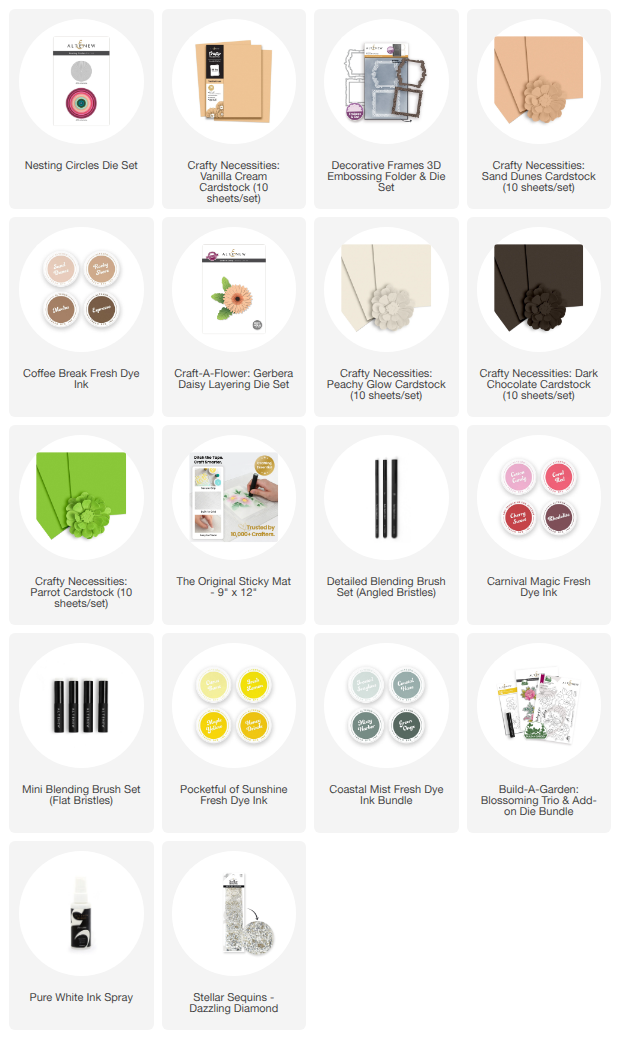
For this project, we are starting with a card-making classic: the Nesting Circles Die Set from Altenew. While the largest die in this staple set cuts a 4.25-inch circle, I chose to play with the third-largest size (3.75 inches) to give us an interesting frame layout.
Step-by-Step Base Assembly:
Cut Your Panels: Die-cut two circles from heavy 110lb Neenah Solar White cardstock (my go-to choice for sturdy card bases) and a third panel from Vanilla Cream Crafty Necessities Cardstock.
Score the Hinge: Place one of the white circles face-down on your Crafter’s Essential Scoring Board. After stamping your watermark on the back, score a 1/4-inch line just to the right of it.
Conceal the Hinge: Apply a strong liquid adhesive to this small, scored tab, and adhere the second, unscored white circle panel directly to it.
This gives you a flawless, hidden hinge that serves as the most accessible shaped foundation you can build on! Set the base and the Vanilla Cream panel aside for now.

Adding Texture: The Faux-Wood Frame
As much as I love a clean circle, adding a secondary shape creates a wonderful contrast against a predictable round edge. For this, I reached for the Emboss & Cut Decorative Frames set—a new favorite I just know I'm going to overwork in my stash!
To build a dimensional, sturdy frame that can securely overhang the edge of our circle, I die-cut four layers of plain white cardstock and one top layer of Sand Dunes Crafty Necessities Cardstock.
Pro Tip: Don't just emboss the top layer! Emboss all five layers individually using the coordinating embossing folder. Cardstock naturally tends to pucker and shrink slightly when embossed, so doing this ensures every layer nests perfectly, giving you a much more structured piece to glue together.
Once the frame layers were stacked and glued, I lightly distressed the edges with Rocky Shore Fresh Dye Ink. Because it's from the same ink family as the Sand Dunes cardstock, it gives the paper a gorgeous, subtle maple wood quality.

Making a Color Impact: Faking Nature's Veins
For our focal element, I am thrilled to feature the new July 2026 Craft-A-Flower: Gerbera Daisy. Gerbera daisies naturally boast incredible color variegations, making them perfect for high-impact card designs.
This beautiful bloom features Altenew's signature keyhole alignment system and packs a hefty 10 layers of petals, plus 2 layers for the flower center. I pre-cut two full blooms and five multi-sized leaves using these cardstocks:
Flower Centers: Dark Chocolate Cardstock
Leaves: Parrot Cardstock
The Ink Flicking Technique
Inspired by a stunning variegated daisy image I found online, I wanted to ditch my usual seamless blending style for an imperfect, realistic veined look.
Secure the Pieces: Arrange all your petal layers onto a 9x12 Original Sticky Mat to keep them perfectly in place.
Flick the Color: Using a #7 detail blending brush and Cherry Sweet Fresh Dye Ink (from the Carnival Magic family), start at the very tip of the petals and flick the color inward toward the center. This creates gorgeous, intentional vein marks rather than a smooth transition.
Vary the Depth: For the top petal layers (1–5), pull the color further toward the center. For the bottom layers (6–10), keep the ink concentrated heavily at the tips.
Saturate the Centers: Use a mini ink blending tool to fully saturate the base layers (6–10) with the Cherry Sweet ink.
Add a Pop of Sunshine: To prevent a flat center, use a mini blending tool to add an uneven touch of Fresh Lemon Fresh Dye Ink (from the Pocketful of Sunshine set) to the centers of the top petal layers.
Let the ink dry for a few minutes before assembling the flowers in numerical order. To create a gorgeous, lifelike raised dome effect, I assembled and curled petal layers 1–5 and 6–10 separately before adhering them together!
Deepening the Foliage
To tone down the bright green Parrot cardstock, I used a mini ink blending tool to add Misty Harbor and Green Onyx (Coastal Mist Fresh Dye Ink Set) to the leaves. The subtle blue shift beautifully complements the warm primary palette of our daisies once it dries and settles.

Final Assembly & Mailing Tips
Before gluing anything down to your circular card base, grab the Vanilla Cream panel and lay it on your Altenew Cutting and Alignment Mat.
To maximize the frame's impact, I cut the distressed Decorative Frame directly in half to elongate it, gluing it so it overhung the top and bottom of the Vanilla Cream circle. I then arranged my daisies and five leaves to seamlessly hide the cut marks of the frame.
Sizing Check: If you want your card to fit nicely in an envelope, make sure all your overhanging florals and frames stay within the 4.25 x 5.5-inch alignment guide on your mat!
To finish, I stamped a "Happy Birthday" sentiment from the Build-A-Garden: Blossoming Trio set in Sand Dunes ink, stacked it three layers thick for sturdiness, and nestled it into the arrangement. A quick splatter of Pure White Ink Spray and a few scattered Dazzling Diamond Stellar Sequins completed the panel before it was glued onto the main circular base.
Let's Talk Post Office Realities ✉️
To address the envelope questions from my last video: Yes, this fits in an envelope!
Because I love thick, highly dimensional cards, my preferred size to stock at home is an A6 envelope (4.75 x 6.5 inches). In the US, these still only require a standard Forever stamp if they stay under weight guidelines. However, because my cards often exceed 1 ounce or a 1/4-inch thickness threshold, they are classified as non-machinable.
To bypass any sorting machine damage, I personally prefer to mail special cards like this inside a USPS Small Flat Rate Box or Flat Rate Envelope, often slipping in a few extra goodies for the recipient. It is well worth the extra postage to ensure a work of art arrives safely!
Thank you so much for joining me for this week's Perfect Pairings! I hope this inspires you to take a look at your classic circle and banner dies in a brand-new way.
What flower are you excited to try this ink-flicking technique on? Let me know in the comments below, and I'll see you in the next one!

Parents' Day Special Offer:
Get 40% off on Instant Dimension Foam Tape Bundle - Black (3 Sizes) from July 26, 2026 at 12:01 AM EDT untul 11:59 PM EDT. Shop here: https://altenew.com/products/instant-dimension-foam-tape-bundle-black-3-sizes
Supply List for Jaycee's Gerbera Daisy