Make Your Own Glitter Cardstock for a Stunning 3D Poinsettia Christmas Card
by Nicki Baxley July 28, 2026

Key Takeaways
Custom Sparkle: Learn how to create custom DIY glitter cardstock using Iridescent Glitter Relief Paste over colored paper so your glitter matches your project perfectly.
3D Texture & Depth: Combining die-cutting with 3D embossing folders adds realistic dimension to paper florals.
Layering Technique: Expand a traditional paper flower arrangement into a bold focal point by die-cutting extra layers and tucking them underneath.
Hello, crafty friends! It’s Nicki here, and today I’m sharing an elegant 3D poinsettia Christmas card featuring the Lush Botanicals: Poinsettia 3D Embossing Folder & Die Set.
If you've ever wanted to add custom shine to your handmade holiday cards, you're in the right place! In this tutorial, I’ll show you how to make your own glitter cardstock using Iridescent Glitter Relief Paste. Afterwards, we'll die cut and emboss it to add beautiful sparkle, rich texture, and dramatic dimension. I also added extra paper layers to make the poinsettia even larger and more eye-catching. Let’s take a closer look at how this holiday paper craft comes together!

How to Create a Bold 3D Poinsettia Christmas Card
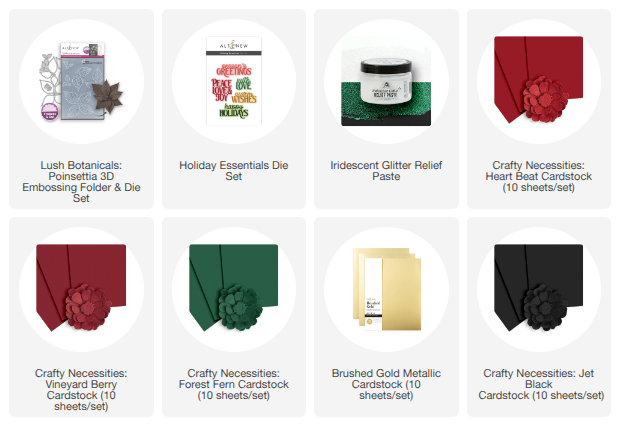
First, I used the Lush Botanicals: Poinsettia 3D Embossing Folder & Die Set to create the large floral focal point. This coordinating set combines precision dies with detailed 3D embossing, which makes it effortless to add intricate, realistic texture to every petal and leaf.
For a classic, sophisticated Christmas color palette, I chose Vineyard Berry Cardstock and Forest Fern Cardstock. The deep red and rich forest green tones work together beautifully to establish an elegant, traditional holiday aesthetic.
I also wanted my paper poinsettia to be much larger and fuller than a standard arrangement. To achieve this, I cut additional flower pieces and tucked them strategically beneath the main flower to build up extra layers. This simple technique made the finished poinsettia feel much fuller, more dynamic, and dramatically dimensional on the card front.

How to Make Your Own DIY Glitter Cardstock
Next, I wanted to add a special touch to the Vineyard Berry Cardstock. Instead of using standard, off-the-shelf glitter paper—which can sometimes be thick or difficult to emboss cleanly—I decided to create custom DIY glitter cardstock using Iridescent Glitter Relief Paste.
Here is how the process works:
Apply a thin, even layer of relief paste over your chosen cardstock color.
Allow the paste to dry completely.
Pass the customized paper through your die-cutting and 3D embossing machine.
This technique gives you incredible sparkle while still allowing the fine, embossed details of the 3D folder to show through crisp and clear. Even better, making your own glitter cardstock gives you complete creative control to coordinate your sparkle color with any cardstock in your craft stash.

Adding Dimension and Visual Impact With Paper Layering
The close-ups of this card really show off the magic of combining iridescent paste sparkle with deep 3D embossing. However, the secret to making this design truly pop is the layering technique.
By cutting and prepping additional poinsettia die-cuts, I expanded the floral design far beyond its traditional size constraints. As a result, the oversized poinsettia easily became the dramatic hero focal point of the entire greeting card.
To balance the design, I paired the glittered red poinsettia petals with Forest Fern Cardstock for the leafy background greenery and incorporated Heart Beat Cardstock accents to complete the rich, festive color palette.
Finishing Touch: Adding a Clean Holiday Sentiment
Finally, I added a simple, classic “Season’s Greetings” sentiment using the Holiday Essentials Die Set.
Because the central 3D poinsettia is so large, sparkly, and detailed, I intentionally chose a crisp, minimalist sentiment. You want your greeting to complement the focal point rather than compete with it for attention. A clean die-cut sentiment offers the perfect balanced finish for an intricate holiday card like this.
Watch the 3D Poinsettia Christmas Card Video Tutorial
Learning how to make your own glitter cardstock is an easy, budget-friendly way to customize both the shade and texture of your paper crafting projects. Plus, pairing custom glitter paper with 3D embossing folders adds unmatched detail to your handmade cards.
Want to see the step-by-step process in action?
Watch the full video tutorial below to see how I apply the relief paste, die-cut the custom cardstock, and layer the 3D poinsettia from start to finish!

I hope this project inspires you to experiment with paste and add a little extra custom sparkle to your holiday cardmaking this season!
Happy Crafting!
-Nicki

Get a FREE Billowing Blossoms Stamp Set (worth $6.99) on orders over $29 from July 28, 2026 at 12:01 AM EDT until July 29, 2026 at 11:59 PM EDT. Shop here: https://altenew.com/collections/all-the-paper-crafting-supplies-you-need (until supplies last)
SUPPLY LIST