2 Creative Card Ideas Using the Mini Delight Sweet Popsicles
by Erica Andersson August 30, 2026

Key Takeaways
Exceptional Value: The Altenew Mini Delight: Sweet Popsicles Stamp & Die Set delivers multiple card designs for under $16.
Technique Versatility: Combine colored cardstock, tone-on-tone stamping, and texture pastes (like Shimmer and Glitter Relief Pastes) for depth and dimension.
Pro Crafting Tip: Keep a bowl of water nearby when using detailed stencils and texture pastes to prevent paste from drying on your tools.
Hello, hello Altenew friends and fans! It’s your die-cut-loving gal Erica, back on the blog with the small but VERY mighty Mini Delight: Sweet Popsicles Stamp & Die Set. This is easily one of my favorite Mini Delight sets ever—it is so fun, versatile, and creates paper popsicles that look good enough to eat!
The Versatility of the Mini Delight: Sweet Popsicles Stamp & Die Set
Before getting into today's cardmaking tutorial, I have a quick confession. The cards shown here were not original plan A! I initially designed, filmed, and photographed two completely different cards. However, technology had a temporary vendetta against me, and the footage corrupted before editing.
Instead of giving up, I grabbed my cardstock, die-cuts, and glue to start over. The silver lining? Instead of just two designs, you get five papercrafting ideas featuring this single set! It truly reinforces how versatile this set is—especially at an affordable price point of under $16 for both the stamp and die-cut set.
Even if you only use the die-cut set on its own, it offers hours of creative crafting fun.

Selecting Cardstock & Stamping Details on Die-Cuts
This stamp and die-cut combination works seamlessly with various cardmaking techniques. For my first batch of cards, I relied heavily on the die-cuts and only used stamps for sentiments. For these new designs, I wanted to use the stamps to add detailed sprinkles and toppings onto the popsicles.
1. Choosing Your Color Palette
I drew color inspiration from my favorite Magnum ice cream flavors:
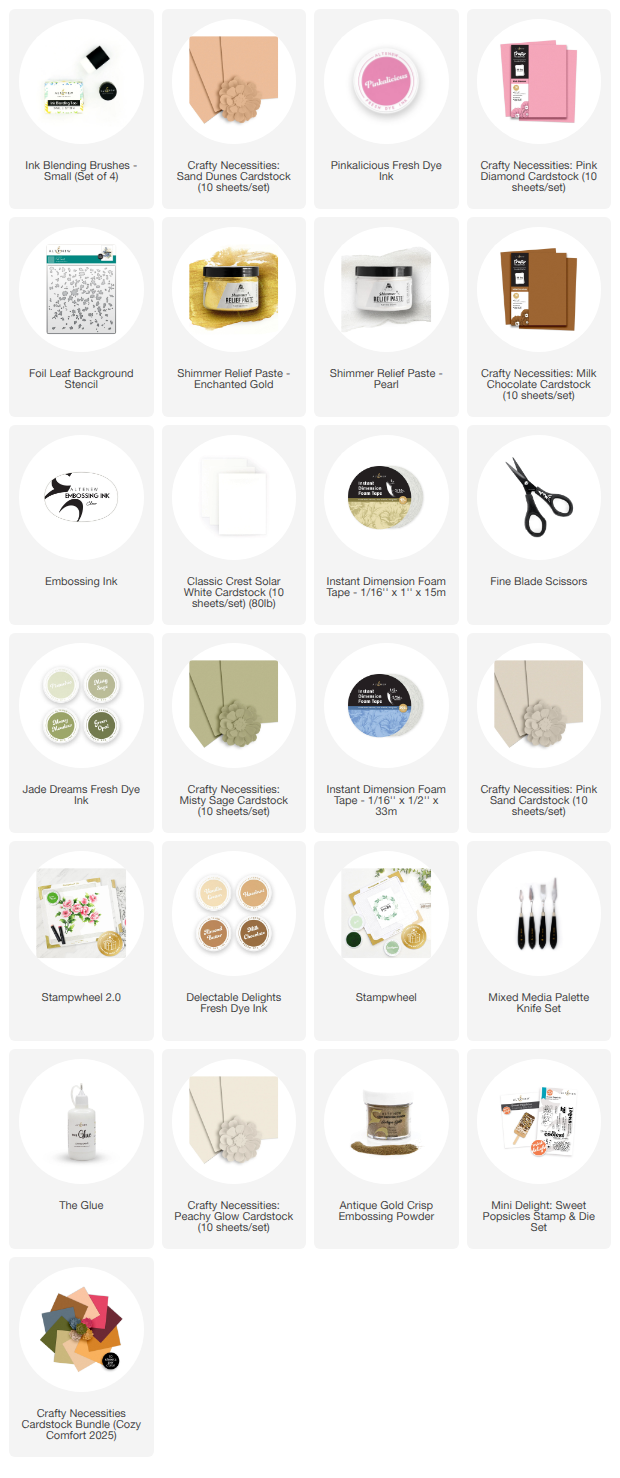
I raided my Crafty Necessities Colored Cardstock stash to match these exact shades. Having your cardstock visual prepped makes the assembly process much smoother.

2. Stamping Sprinkles Tone-on-Tone
To add realistic toppings:
Prep clear stamps with a stamp conditioner (like the StamPerfect Conditioner) to ensure smooth ink coverage.
Test ink shades on scrap cardstock before stamping directly onto final die-cuts.
For the chocolate pistachio popsicles, layer Misty Sage Fresh Dye Ink (matching the green cardstock) and Milk Chocolate Fresh Dye Ink (matching the base chocolate die-cut). Stamping tone-on-tone creates a subtle, tactile texture that looks remarkably like crushed nuts and sprinkles.

Adding Dimension with Instant Dimension Foam Tape
Once all die-cut pieces are glued together, add Instant Dimension Foam Tape to the back of each popsicle.
Assembly Tip: Trim the foam tape carefully using fine-blade scissors so it fits behind both the popsicle body and the stick without showing from the front.
Craft Room Hack: Save the backing paper peel-offs from 1-inch foam tape rolls—they make great temporary masks and protective sheets while crafting!

Creating Textured Backgrounds with Stencils & Relief Pastes
Card backgrounds offer the perfect canvas for stencil techniques using Shimmer and Glitter Relief Pastes.
Background Technique Steps
Ink Blending & Stenciling: Place the Foil Leaf Background Stencil on cardstock and blend your base ink.
Offset Stenciling: Remove and clean the stencil, then rotate it 45 degrees before reapplying over the background. This creates a multi-layered pattern without overlapping awkwardly.
-
Applying Relief Paste:
For the Pink Lemonade card, mix Enchanted Gold and Pearl Shimmer Relief Paste to mimic a white-chocolate sheen.
For the Chocolate Pistachio card, blend Misty Sage Fresh Dye Ink with Brushed Pyrite Shimmer Relief Paste for an elegant finish.
For an extra glam look, try Smoky Quartz Shimmer Relief Paste.
Important Paste Tip: Work quickly with texture pastes and avoid overworking fine-detail stencils to keep paste from bleeding underneath. Place used stencils and spatulas into a bowl of water immediately after use, so the paste doesn't dry on your tools.

Finalizing Card Assembly & Sentiment Placement


While the textured backgrounds dry, prepare the sentiments from the Mini Delight: Sweet Popsicles set:
Heat Embossing: Heat emboss one sentiment in gold for an elevated, glossy finish.
Crisp Stamping: Stamp another sentiment using vibrant Pinkalicious Fresh Dye Ink to coordinate with the pink popsicles.
When assembling, adjust your layout balance as needed. For example, reducing the number of focal die-cuts from four to three on smaller card fronts allows more of the shimmering, stenciled background to show through.

That wraps up today’s card showcase! Now it's time to treat myself to a real chocolate pistachio ice cream. Happy crafting!
With sparkle, sprinkles, and creativity,
Erica