One Simple Die, Big Impact: The Power of Repetition in Card Design
by Mindy Eggen August 28, 2026

Key Takeaways
Create Visual Rhythm: Repeating a single shape across a card creates natural unity and balance, letting you play with vibrant color palettes without overwhelming the viewer.
Maximize Supplies: Use small die-cuts and cardstock scraps in grid or radial layouts to maximize your existing stash efficiently.
Balance Shapes & Depth: Anchor sharp geometric elements with rounded focal points (like circular sentiment plates) and use foam adhesive to add subtle, dimensional contrast.
Hello, friends! It’s Mindy back with you today, and I’m sharing a simple rainbow die-cut card featuring the Breezy Day Layering Die Set. This fun set creates three different styles of kites, but for today’s card, I’m focusing on just one of those designs.
While this card may look simple at first glance, there are actually quite a few card design concepts happening behind the scenes. Repetition, color, spacing, and symmetry all work together to create a clean and balanced card—and these are techniques you can recreate with so many different supplies in your craft room.

Using Repetition in Card Design
One of the easiest ways to create a cohesive card design is through repetition. Instead of using all three kite designs included in the Breezy Day Layering Die Set, I chose one kite and repeated that same shape across the entire card front.
Repeating a single element gives your eye something familiar to follow throughout the design. Because the shape stays consistent, you can introduce more variety through color without the card becoming too busy.
This is especially helpful when working with a rainbow color palette. We already have quite a bit of color happening, so keeping the shape of the kites consistent helps everything feel connected.
You can use this same idea with almost any small die-cut image in your collection—flowers, hearts, stars, butterflies, leaves, or other small geometric shapes would all work beautifully.

Creating a Rainbow with Cardstock Scraps
This type of card is also a great opportunity to dig through your cardstock scraps!
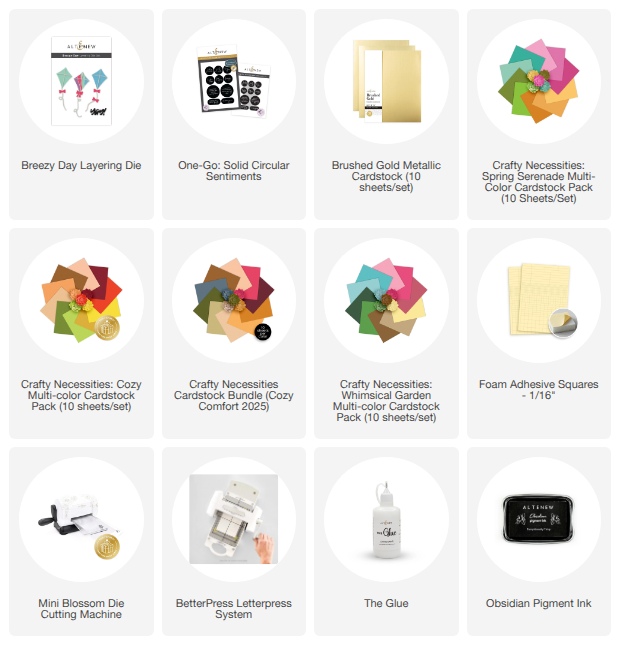
I selected a rainbow assortment of Altenew cardstock and die-cut each kite using the Mini Blossom Die Cutting Machine. This little machine is perfect for projects like this when you are working with smaller dies. It may have a small footprint, but it can handle a big job!
Another option is to start with one of Altenew’s curated cardstock color palettes and let that guide your entire design. These bundles take the guesswork out of choosing colors that work well together:
Using a coordinated palette would give this same repeating kite design a completely different look and feel. It’s an easy way to adapt the idea for different seasons, occasions, or styles.
For the additional layering piece in the center of each kite, I used Brushed Gold Cardstock. Repeating that same gold accent on every kite gives the colorful pieces another element that ties them together.
I attached the gold layers with liquid glue and then added foam squares behind each finished kite so they would eventually be popped up from the card front.
Plan the Sentiment Before the Layout
Before attaching any of my die cuts, I needed to decide on my sentiment and its placement.
For my greeting, I’m using the One-Go Solid Circular Sentiments Press Plate. You can use this plate with your Glimmer Hot Foil System and foil for a beautiful touch of shine, or pair it with a BetterPress Letterpress System.
I wanted a nice, bold sentiment to anchor all of the colorful kites, so I used my BetterPress along with Obsidian Ink. I then used the coordinating die to cut out the sentiment.
The circular shape works especially well with this design. The kites have strong angles and straight edges, so introducing a circle in the center provides a little contrast while also giving the eye a clear focal point.
Creating a Grid-Style Card Layout
Once my sentiment was ready, I could start planning the placement of the kites.
I created a grid-style card design, placing the sentiment in the center and arranging the colorful kites around it in rainbow order. Everything was then popped up onto a clean white card panel.
The added dimension also plays an important role in this clean design. Popping up the kites and sentiment with foam squares creates subtle shadows against the white background, helping each element stand out without adding more color or embellishment. It’s a simple way to add interest while still keeping the focus on the repeating shapes and colorful cardstock.
If you like very precise placement, a grid surface or ruler can be helpful for keeping your spacing consistent. You can also lightly position all of your pieces before removing the backing from your foam squares. This gives you a chance to make adjustments before anything becomes permanent.
The white background plays an important role here, too. With so many bright colors, leaving plenty of white space keeps the card feeling fresh and allows each individual color to stand out.

Why Repetition Works
Repetition is such a useful design tool because it creates rhythm and unity. Your eye recognizes the repeated kite shape and naturally moves from one to the next.
The trick is to keep something consistent while changing another element.
For this card, the shape, gold accent, and spacing remain consistent, while the cardstock colors change. That combination gives us enough repetition to make the design feel intentional and enough variety to keep it interesting.
The centered sentiment also breaks up the repeated pattern and gives your eye a natural resting place. Rather than competing with all of the colorful die cuts, it becomes the focal point around which the rest of the design is built.
This is a great concept to keep in mind when you have a small die that you love but aren’t quite sure how to turn into a complete card. Repeat it! Choose a color palette, create several of the same image, and experiment with arranging them in rows, a grid, a circle, or even diagonally across your card front.

Try This Design with Your Supplies
I hope this card inspires you to take another look at the smaller images and dies in your collection. You don’t always need a large focal point or complicated technique to create an eye-catching card.
Try choosing one small image, repeating it across your card front, and using color to add variety. It’s simple, easy to recreate, and a wonderful way to use up some of those cardstock scraps we all seem to collect!
Thanks so much for joining me today. I hope you enjoyed this colorful card featuring the Breezy Day Layering Die Set and picked up a few card design ideas that you can use on your next project.
Happy crafting!

SUPPLIES