Vibrant Two-Tone Tulips with Layering Stencils
by Erum Tasneem November 15, 2026


Have you ever seen parrot tulips? With their beautifully ruffled petals and striking combinations of pink, orange, and yellow, they're truly a sight to behold!
Inspired by these colorful flowers, I'm using the Build-A-Garden: Soft Tulips Stamp and Layering Stencil Set to create vibrant, two-tone tulips with beautiful color transitions and added depth.
But this project isn't just about coloring! I'll also share how to balance bold floral elements with a soft background, subtle details, and intentional white space. The goal is to create a card that's full of color and dimension without overwhelming the design.
VIDEO: Vibrant Two-Tone Tulips
Watch the video tutorial below or CLICK HERE to learn more about this cardmaking technique! Or read step-by-step instructions after the video.

Step 1: Stamp the Tulips for a No-Line Effect
Stamp the tulip image twice onto Classic Crest Solar White Cardstock using Buttercream Fresh Dye Ink and the Stampwheel 2.0.
Buttercream is a pale yellow ink that provides just enough of an outline to guide the stencil placement without leaving a prominent stamped border.
This creates an almost no-line coloring effect, allowing the vibrant ink-blended colors to take center stage while maintaining a softer appearance.
Tip: Any very light yellow ink will work for this technique, provided it doesn't interfere with the colors added through the stencils.
Step 2: Prepare the Layering Stencils
The coordinating stencil set includes four stencils, two for the flowers and two for the foliage.
Some of the stencil openings have delicate, narrow sections that may lift or shift during ink blending.
Apply a small amount of Glue Tape behind these areas to temporarily secure them against the cardstock. Position the stencil over the stamped image, secure it to a sticky mat, and gently press down the delicate sections.
This helps prevent unwanted movement and keeps the ink blending clean.
Step 3: Create Two-Tone Tulips with Snapdragon and Fuchsia
- Position the first floral stencil over the stamped image.
- Begin blending Snapdragon Fresh Dye Ink from the tips of the tulips toward the middle, using medium hand pressure to create a vibrant orange. Leave the lower portions of the flowers uncolored for the pink.
- Clean the stencil lightly to remove excess orange ink, then blend Fuchsia Fresh Dye Ink upward from the base of the flowers using lighter hand pressure.
Allow the two colors to meet and blend naturally toward the center of the petals.
Since Fuchsia is highly pigmented, applying it lightly helps maintain a smooth transition without overpowering the orange.

Step 4: Add Depth with the Second Floral Stencil
- Position the second floral stencil to add detailed shading to the petals.
- Apply Fuchsia Fresh Dye Ink with heavier pressure near the base of the tulips, blending upward approximately halfway through the petals. Leave the tips relatively untouched.
- Next, blend Snapdragon Fresh Dye Ink onto the petal tips, building a stronger orange that transitions into the pink.
- Clean the stencil as needed before lightly blending additional Fuchsia into selected orange areas.This creates richer color transitions and adds dimension to the petals.
- For additional depth, use a Size 7 Micro Blending Brush to apply a small amount of Magenta Fresh Dye Ink near the base of the flowers. Keep the shading subtle to avoid darkening the entire tulip.
The combination of orange, pink, and magenta creates vibrant tulips reminiscent of the beautiful colors found in parrot tulips.
Tip: Adjust the amount of each color according to your preference. More orange will create a warmer flower, while additional Fuchsia will give the tulips a stronger pink appearance.

Step 5: Add Color Variations to the Foliage
- Position the third stencil over the stamped image.
- Begin by blending Buttercream Fresh Dye Ink onto selected leaf tips, adding a little Snapdragon Fresh Dye Ink where a warmer yellow-orange tint is desired.
- Next, blend Just Green Fresh Dye Ink through the stencil, allowing the green to transition into the yellow areas.
Vary the amount of yellow and green throughout the foliage rather than coloring every leaf identically.
These subtle variations add visual interest and prevent the leaves from appearing flat or uniform.

Step 6: Deepen the Foliage with Hunter Green
- Position the fourth stencil and apply Hunter Green Fresh Dye Ink to add darker details to the leaves.
- The deeper green creates contrast against Just Green, defining the foliage and adding depth.
- Repeat the coloring process on the second stamped tulip image.
- Once both images are complete, use the coordinating die to die cut them, securing the die with Satin Masking Tape to prevent shifting.
Step 7: Create a Soft, Diagonal Ink-Blended Background
- On a panel of Classic Crest Solar White Cardstock, begin blending Volcano Lake Fresh Dye Ink from the top-right corner toward the center.
- Repeat from the bottom-left corner, gradually fading the ink inward to create a soft diagonal ombré effect.
- Start with a large blending brush for a smooth, diffused application.
- To deepen the color around the edges, switch to a Mini Blending Brush, keeping the center lighter.
Because Volcano Lake is a relatively soft ink color, it's possible to build intensity with a smaller brush without creating harsh patches. However, if you tend to apply heavier pressure, gradually transition through smaller blending brushes for better control. The finished background should have a soft halo toward the center, providing breathing room for the vibrant floral arrangement.
Step 8: Add Subtle Texture
- Press a little Hunter Green Fresh Dye Ink onto a craft mat and dilute it with water.
- Add splatters across the ink-blended background to introduce texture and interest.
Design Tip: Balancing Vibrant Colors with Soft Details
Just because your focal elements are bold doesn't mean every other element needs to be equally bold.
Although the tulips feature vibrant pinks and oranges, the absence of a dark stamped outline gives them a softer appearance.
Adding black splatters would introduce stronger contrast, potentially competing with the flowers and changing the overall feel of the design.
Instead, diluted Hunter Green adds texture without overwhelming the background.
Neither approach is right or wrong. The choice depends on the look you want to achieve.
For this project, the softer splatters help maintain balance while allowing the colorful tulips to remain the focal point.

Step 9: Arrange and Adhere the Tulips
- Adhere the completed background panel to a card base.
- Arrange the die-cut tulips around the edges, allowing portions of the flowers and foliage to extend beyond the card.
- Experiment with the placement until the tulips frame the design while leaving some of the background visible.
- Once satisfied, use a little Glue Tape to temporarily secure the floral images.
- Flip the panel over and trace along its edges onto the back of the die cuts with a pencil. These pencil lines serve two purposes: they indicate where the excess die cuts need trimming and guide the placement of Instant Dimension Foam Tape (Foam Squares).
- Apply the foam adhesive within the marked boundaries to provide support without extending beyond the card edges.
- Secure the floral images permanently and trim away the excess portions for a clean finish.
Step 10: Maintain Balance with Intentional White Space
After trimming the floral images, you may have leftover pieces that can be added to fill the open areas.
While these can create a fuller floral background, leaving some space uncovered allows the design to breathe.
The vibrant tulips already contain plenty of detail, color, and movement. Filling every available space could make the arrangement feel crowded.
By keeping some of the softly ink-blended background visible, the flowers remain the focal point while the splatters and subtle color transitions complement the composition.
Design Tip: White space doesn't necessarily have to be white. Any relatively quiet area that provides visual relief can help balance a detailed composition.
Step 11: Add the Sentiment
- Stamp the sentiment "sending love and comfort" onto a strip of white cardstock and trim it to size.
- Tuck the sentiment strip slightly beneath the surrounding flowers.
This placement is intentional. The direction of the flowers naturally guides the viewer's eye toward the sentiment, helping it become part of the overall composition rather than appearing as a separate element.
It's a simple design decision that adds cohesion and reinforces the balance of the finished card.

I love how these vibrant tulips turned out! The combination of Snapdragon, Fuchsia, and Magenta creates beautiful color transitions, while the additional shading adds depth and dimension to the petals.
Despite the bold colors, the no-line effect, soft ink-blended background, and diluted green splatters give the card a surprisingly gentle appearance.
The arrangement also demonstrates how intentional white space and thoughtful placement can keep a detailed floral design from feeling overwhelming.
I hope this project inspires you to experiment with combining multiple ink colors through your layering stencils. Remember, vibrant colors don't mean every element needs to be bold. Sometimes, subtle contrast, softer details, and a little breathing room are all you need to create a beautifully balanced composition.
Thanks so much for stopping by! Happy crafting!
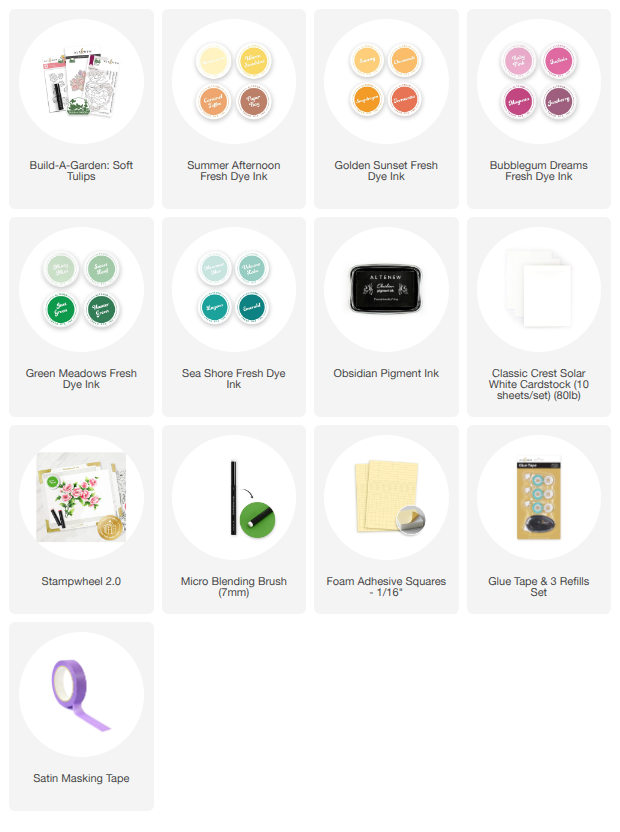
SUPPLY LIST