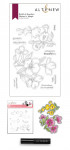
Watercolor Flower Card (with How-to Video!)
by Erum Tasneem June 13, 2022

Hello friends! Erum here with a watercolor flower card and a process video to share with you. My project today features the Build-A-Garden: Nature's Magic.

- Create a 4 1/4″ x 5 1/2″ card base. Set aside.
- On an A2 Watercolor Cardstock, stamp images from the Build-A-Garden: Nature's Magic in Embossing Ink. Cover with Pure White Crisp Embossing Powder and heat set it.
- Use Artists' Watercolor 24 Pan Set to color the images. For the flowers use, Tea Party and Red Cosmos pigment. And for the leaves, use Tropical Forest and Rain Forest pigments.

- Once dry, use the coordinating die to die cut the images. Set aside.
- On another A2 Watercolor Cardstock, apply water on the lower section and add a light green color wash, extending it towards the top right. Do the same at the top half of the section and extend it towards the bottom left.

- Once dry, add splatters of the same green paint to both the watercolor sections. Dry again completely.
- Add fine black paint splatters.
- Place the watercolor flower die-cuts and stamp sentiment in Obsidian Pigment Ink.

- Adhere watercolor flower die-cuts with Instant Dimension Foam Tape.
- To finish, add Satin Gold Sequins.

How-to Video: Watercolor Flower Card
I hope you got inspired to create your own watercolor flower card using the new Build-A-Garden: Nature's Magic Set! Thank you for stopping by!
~SUPPLIES~
|