5 Mistakes to Avoid When Using Alcohol Markers for Cardmaking
Last Updated: June 30, 2025
If you’re a cardmaker or DIY paper crafter who loves using alcohol markers to add vibrant colors to your projects, you may have encountered some common pitfalls that can affect the quality of your work.

In this blog post, we’ll explore 5 mistakes to avoid when using alcohol markers for cardmaking, scrapbooking, journaling, and other crafting projects along with practical solutions to help you elevate your coloring game and create stunning, professional-looking cards.
Alcohol Marker Mistake #1: Color Blending Issues
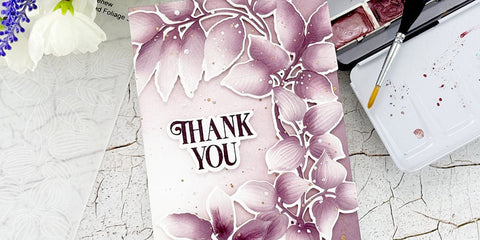
One of the most sought-after effects when using markers is smooth and seamless color blending. However, many crafters struggle with achieving this desired look due to uneven or patchy blending. The main causes of this problem are improper blending techniques and using the wrong type of paper.

Try These Tips!
- Tips for smooth color blending! Experiment with layering colors, feathering the strokes, and using a blender marker to soften harsh lines and create a more polished blend. TRY OUR COLORLESS BLENDER MARKER HERE.
- Look for papers specifically designed for use with markers, such as marker paper (Yupo), glossy photo paper, or smooth, heavyweight cardstock. These papers are more receptive to the ink and allow for better blending and color saturation.
Are alcohol markers beginner-friendly? Learn more here!

Alcohol Marker Mistake #2: Paper Warping
Paper warping is a common issue that can occur when using alcohol markers, resulting in unsightly curling, buckling, or warping of the paper surface. This can detract from the overall appearance of your card designs and make them look less professional. Using the wrong type of paper and applying too much ink are the primary culprits behind this problem.

Try These Tips!
- Consider using dedicated marker papers such as Yupo paper, as these options are thicker and more resilient to ink saturation, thus minimizing the risk of warping.
- Use a lighter touch when applying the ink, and allow each layer to dry completely before adding more color. This will help prevent excessive saturation and reduce the likelihood of paper warping.
Do you want to improve your artist alcohol marker coloring skills? Sign up for these alcohol marker classes now!

Alcohol Marker Mistake #3: Marker Bleeding
Marker bleeding occurs when the ink seeps through the paper, resulting in unintended smudges and blotches on the opposite side of the cardstock. This issue is often caused by using the wrong type of paper, applying too much pressure when coloring, or not allowing the ink to dry properly between layers.
Try These Tips!
- Practice using a lighter touch when coloring, and work in layers to gradually build up the intensity of the colors without oversaturating the paper.
- We might sound like a broken record… but USE proper marker paper or smooth, heavyweight cardstock.
Why use alcohol markers for cardmaking? FIND OUT HERE.

Alcohol Marker Mistake #4: Lack of Marker Storage Organization
Proper marker storage is essential for maintaining the quality and longevity of your alcohol markers. Disorganized storage can lead to lost or dried-out markers, making it challenging to create consistent and cohesive color schemes across your card designs.

Try These Tips!
- Invest in marker cases, racks, or other organizational solutions to keep your markers neatly arranged and easily accessible. Alternatively, consider creating your own DIY storage system tailored to your specific collection of markers. Read more on 7 Tips for Storing Colored Pencils, Markers, and Pens.
- Remember to cap your markers tightly after each use, clean the tips regularly to prevent clogging, and store them in an airtight container to preserve their moisture and prevent premature drying.

Alcohol Marker Mistake #5: Incorrect Paper Selection
Choosing the right type of paper for your cardmaking projects is crucial when working with alcohol markers. Using the wrong paper can result in poor ink absorption, color saturation, and overall rendering quality.
Try These Tips!
- Familiarize yourself with different paper options such as Bristol board, marker paper, and heavyweight cardstock. Each type offers distinct qualities that can enhance the performance of your alcohol markers.
- Consider the specific requirements of your project, such as blending techniques, layering effects, or surface texture. Select a paper that aligns with your intended outcome and complements your coloring style.

Have you encountered any of these alcohol marker mistakes? Got more questions on how to use alcohol markers or how to deal with these “mistakes?” Comment below!
By avoiding these common mistakes and implementing the suggested solutions and tips, you can enhance your experience with alcohol markers and elevate the quality of your cardmaking endeavors. Smooth color blending, minimal paper warping, controlled ink flow, organized marker storage, and appropriate paper selection are key factors in achieving professional-looking results that will impress both you and your recipients.

Remember, practice makes perfect, so don’t be discouraged if you encounter these alcohol marker challenges along the way. Embrace each mistake as an opportunity to learn and improve your skills. Happy crafting!

In This Article