3 Creative Ideas For Sweet Valentine’s Day Cards!
Hello Altenew friends! Hannelie here and today I’m excited to share sweet Valentine's day card ideas, saying I love you three different ways!
The focal point of these cards is the Sweet Sugar Cookies Layering Die Set, paired with three beautiful colors from Altenew’s Crafty Necessities Cardstock collection. This versatile die set features layers of floral sugar cookies, including four flowers and one leaf ensemble, offering endless creative possibilities.

For today’s designs, I embraced simplicity to illustrate the power of repetition to create a cohesive design. The examples I am sharing today repeat the same shape, colors and textures. It’s a subtle yet impactful way to create visually stunning cards!
Each card uses repetition in a different way:
- First card – Repetition in a row or curve
- Second card – Random repetition
- Third card – Repetition in grid form
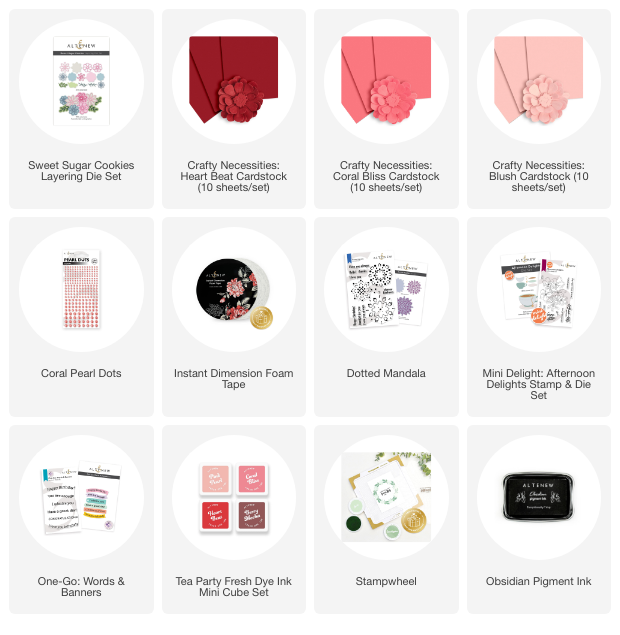
To make today's Valentine's Day cards you will need:
- White Cardstock
- Sweet Sugar Cookies Layering Die Set
- Crafty Necessities Cardstock: Heart Beat, Coral Bliss and Blush
- Large Heart Die of your choice
- One-Go Words & Banners sentiment stamp set
- Afternoon Delights Outline stamp set
- Dotted Mandala stamp set
- Obsidian Black ink
- Coral Bliss Fresh Dye Ink
- Coral Pearl Dots
- Instant Dimension Foam Tape
- Stampwheel
- Die cutting Machine
- A die to cut a curved edge, or alternatively a small glass plate and craft knife to cut a curved edge.
- Printing paper

Step by step instructions to make the first Valentine's Day card:

- Trim and fold the white cardstock to create an A2 size card.
- Cut colored cardstock strips, measuring 2,8 cm x +- 6 cm. One strip of Heart Beat and two each of Coral Bliss & Blush.
- Adhere the cardstock strips to a sheet of printing paper, following the order Blush-Coral Bliss Heart Beat-Coral Bliss-Blush.
- Cut the curved edge. I used a small plate and my craft knife. You can use a die if you have one large enough.
- Adhere the panel you just created to the bottom of the card base and trim the bottom and sides if necessary.
- Use the Stampwheel to stamp the sentiment onto the card base using Obsidian Black ink.
- Die cut five flowers. The smallest flower works beautifully with the size of the stripes. Cut the bottom part or shadow layer in white, and use Heart Beat, Coral Bliss and Blush cardstock to cut the top layers of the flowers. Adhere the top layer of the flower to the bottom white part.
- Use Instant dimension foam tape to adhere the flowers to the card base, following the curve, and matching flower colors to the stripe colors on the card base
- Embellish with Pearl Dots.

Step by step instructions to make the second Valentine's Day card:

- Trim and fold the white cardstock to create an A2 size card.
- Cut another piece of white cardstock just smaller than the card base.
- Use a heart die to cut an aperture in the upper card panel.
- Use a pencil and the panel with aperture you just created, to draw the heart shape onto the card base to determine the placement of the flowers.
- Die cut the flowers using the colors Heart Beat, Coral Bliss and Blush cardstock. For this design I used two different sizes of flowers.
- Adhere the flowers to the card base, following the pencil drawn shape.
- Adhere the panel with heart aperture to the card base using Instant Dimension foam tape.
- Stamp the sentiment using the Stampwheel and Obsidian black ink. Die cut the sentiment. ** Bonus: With the “one go system” you now also have 5 more sentiments ready for a next card!
- Adhere the stamped banner to the card base. I used Instant Dimension Foam Tape because I LOVE the extra dimension.
- Embellish the card with Pearl Dots.

Step by step instructions to make the third Valentine's Day card:

- Trim and fold the white cardstock to create an A2 size card.
- Cut a piece of Coral Bliss cardstock just smaller than the A2 card panel and adhere it to the card base.
- Die cut 9 flowers using the bottom layer of the smallest flower die from white card stock
- Use the upper layer of the smallest flower die and cut 3 flowers from Heart Beat card stock, 2 flowers from Coral Bliss, and 3 flowers from Blush cardstock.
- Adhere the upper layers of the flowers to the bottom layers.
- Use the Stampwheel to stamp the sentiment onto the remaining white flower using Coral Bliss Fresh Dye ink.
- Adhere the flowers to the card base using Instant Dimension Foam tape, starting with the darkest flowers at the top, to the lightest flowers at the bottom, to create an ombré effect and the flower with the stamped sentiment in the middle.
- Embellish the flowers with Pearl Dots.

Thank you for joining me today as I shared my creative ideas for using the Sweet Sugar Cookies Layering Die Set! With Valentine’s Day just around the corner, it’s the perfect opportunity to craft a heartfelt card for someone special. By incorporating repetition of shapes, colors, and textures, you can create a cohesive and striking design. Plus, with a few tweaks to the colors and elements, these designs can easily be adapted for a variety of other occasions!

Do you have a favorite technique or color combination for Valentine’s Day cards? Let me know in the comments—I’d love to hear your ideas! Happy crafting!