2 Handmade Cards To Celebrate Beautiful Life Milestones - Garden Swing Layering Die Set
If you’re looking for one die set that’s perfect for those cards to celebrate life’s beautiful milestones, you don’t have to look any further!
Hello Altenew friends, Hannelie here today, and I’m sharing two cards made with the Creative Cuts: Garden Swing Layering Die Set — one, an elegant wedding card, and the other, a sweet anniversary card. By simply changing up the colors and design details of these handmade cards, you can see just how adaptable this set can be — perfect for any romantic or celebratory occasion!
I used both versions of the Garden Swing for my cards, and I absolutely love every little detail in this set — from the ornate scrollwork on the seat to the sweet flowers and that cute, cozy pillow!
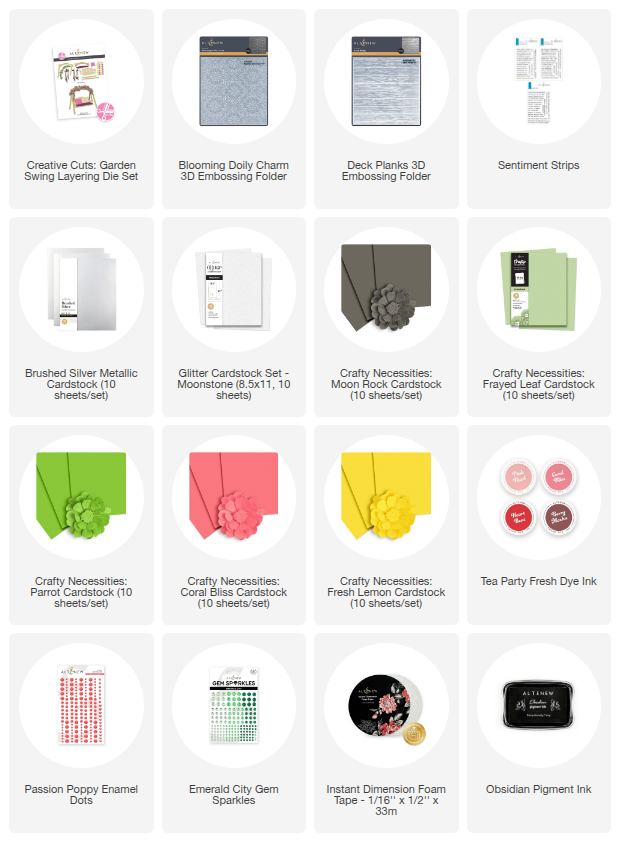
To make today's cards you will need:

- Creative Cuts: Garden swing layering Die set
- Die cutting machine
- White card stock
- Crafty Necessities cardstock: Moon Rock, Frayed Leaf, Fresh Lemon, Parrot, Coral Bliss.
- Metallic cardstock: Brushed Silver
- Glitter cardstock: Moonstone
- Sentiment strips
- Obsidian Black Ink
- Rectangle die
- Blooming Doily Charm 3D Embossing Folder
- Deck Planks 3D Embossing Folder
- Stampwheel
- Coral Bliss Fresh Dye ink
- Passion Poppy Enamel Dots
- Emerald City Gem Sparkles
- Instant Dimension Foam tape
- Glue Pen/Adhesive of choice
Step by Step Instructions to Make the Wedding Card:
1. Prep the card base.
Trim and fold white cardstock to an A2 card (4.25" × 5.5").
2. Cut the panel and frame.
Trim a second piece of white cardstock to use as your textured panel. Use a rectangle die to cut a frame from that panel.
3. Add texture to the frame.
Place the frame inside the Blooming Doily Charm 3D embossing folder and run it through your die-cutting machine to give it rich texture and dimension.
4. Die-cut the Garden Swing elements.
Cut the Garden Swing pieces from the following cardstock: Brushed Silver for the swing, Frayed Leaf for the branch, Moon Rock for the seat cushion and the lower flower layer, and Moonstone glitter cardstock for the top flower layer. Cut the pillow (twice if preferred) from white cardstock.
5. Assemble the focal point.
Build the swing using the Garden Swing layering guide on the packaging — the key-hole alignment system makes this quick and accurate.
6. Plan sentiment placement.
Secure the card base onto the sticky mat of the stampwheel. Position the assembled Garden Swing and the embossed frame on the card front to determine the best spot for your sentiment.
7. Stamp the sentiment.
Remove the Garden swing and frame, then stamp the sentiment in Obsidian Black ink in the space you planned.
8. Add dimension and adhere pieces.
Use Instant Dimension foam tape to adhere the embossed frame and then the Garden Swing focal point to the card base.
9. Final touches.
Finish with a few Gem Sparkles around the arrangement for subtle sparkle.

Step by Step Instructions to Make the Anniversary Card:
1. Prep the card base
Trim and fold white cardstock to create an A2 card (4.25" × 5.5").
2. Cut and add texture to the upper panel
Trim a second piece of white cardstock to fit the card front.
Place the lower portion of this panel inside the Deck Planks embossing folder and run it through your die-cutting machine to add texture. This partial embossing technique grounds your focal point while leaving space at the top for a clean sentiment area.
Adhere the embossed panel to the card base using your preferred adhesive.
3. Die-cut the Garden Swing elements
Cut the Garden Swing pieces from the following cardstock: White for the swing, Parrot for the branch, Fresh Lemon for the seat cushion and lower flower layer and Coral Bliss for the top flower layer and pillows.
4. Assemble the focal point
Assemble the die cuts following the Garden Swing layering guide on the packaging. The key-hole alignment system makes it easy to position each piece precisely.
5. Plan sentiment placement
Secure the card front onto the sticky mat of your Stampwheel. Position the assembled Garden Swing on the card to visualize where the sentiment should go. I chose to stamp mine above the arched branch, curving slightly to follow the swing’s gentle arc — it ties the whole design together beautifully.
6. Stamp the sentiment
Remove the swing and stamp the sentiment using Coral Bliss Fresh Dye Ink in the space you planned.
7. Add dimension and adhere the swing
Use Instant Dimension foam tape to attach the Garden Swing to the card base, adding depth and a subtle shadow for visual interest.
8. Final touches
Finish the card by placing two enamel hearts — one at the beginning and one at the end of the sentiment — or scatter them around for a more playful look.

Both of these cards show just how versatile the Garden Swing Die Set can be — whether you’re creating something elegant for a wedding or cheerful for an anniversary, a simple change in color palette and texture completely transforms the mood.
I love how this set can adapt to so many special occasions, making it a true staple in any die collection.

I can also see myself using this set for the following handmade cards : Retirement cards, Valentines day cards or even birthday cards! I am sure you can add a few to my list as well!
Happy crafting!
Save up to 50% off Stamp Sale Showcase from November 12, 2025 at 12:01 AM EST until November 14, 2025 at 11:59 PM EST. Shop here: https://altenew.com/collections/stamp-sale-showcase