Rolling Hills Stencil Set - A Creative Twist on Scenic & Modern Card Designs
One stencil — two very different designs!
Hello Altenew friends, Hannelie here and I’m back today with two creative ideas featuring the Rolling Hills Stencil Set.
For my first design, I stayed true to the stencil’s original intention and created a serene lavender-inspired landscape. For the second card, I masked off the trees and used the curves of the hills to build a modern, dreamy background for a floral arrangement.
Exploring two dreamy interpretations of the Rolling Hills Stencil Set reminded me just how fun it is to stretch a single product in new ways!

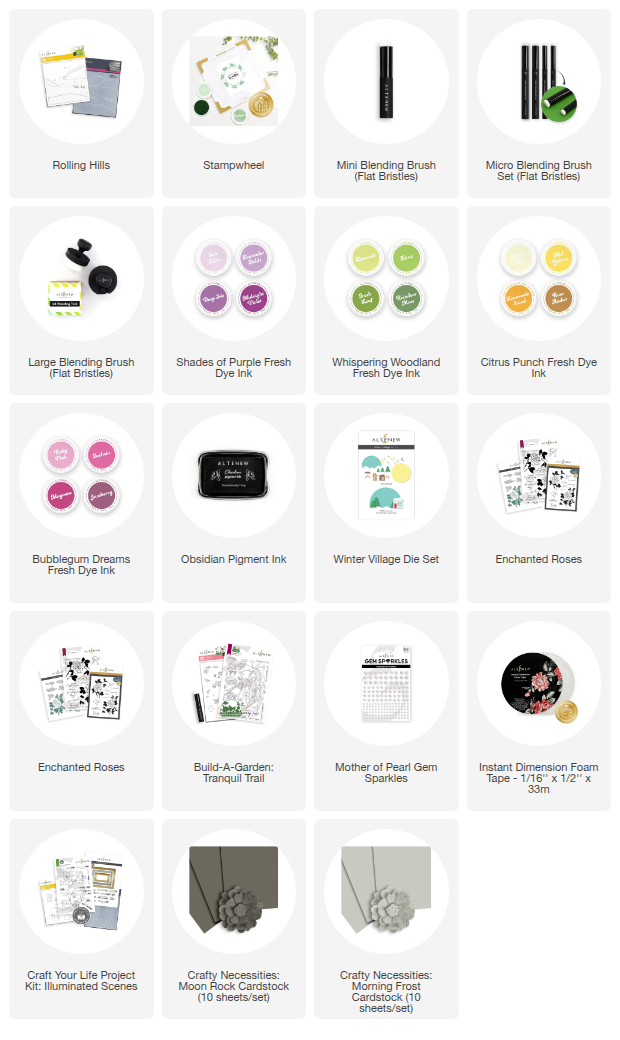
To make today’s cards you will need:
- White cardstock
- Rolling Hills Simple Coloring Stencil Set
- Stampwheel / Stampwheel 2.0
- Blending brushes: Large, Mini & Micro
- Fresh Dye inks: Shades of Purple, Whispering Woodland, Baby Pink & Mid Yellow.
- Obsidian Pigment Ink
- Winter Village Die Set
- Enchanted Roses Stamp Set (sentiment)
- Die cutting machine
- Tranquil Trail stamp and add on die set (sentiment)
- Mother of Pearl Gem Sparkles
- Instant Dimension Foam Tape
- Craft Your Life Project Kit: Illuminated Scenes (Frame Die and Embossing Folder)
- Moon Rock & Morning Frost cardstock
- Rectangle die
- Vellum
- Washi tape for masking
- Adhesive of choice
Step-by-step instructions to make the lavender–fields–inspired card
1. Prepare the card base
Trim and fold a piece of white cardstock to create an A2 card base (4.25" × 5.5").
2. Stencil the background
Secure another piece of white cardstock to the sticky surface of the Stampwheel. Begin blending your chosen ink colors using a large blending brush for a smooth finish and a mini or micro blending brush for the smaller detail like the trees. I applied darker shades of purples and greens to the areas closest to the viewer and lighter shades to the hills in the distance.
3. Trim the panel
Remove the stenciled panel from the Stampwheel and trim it to fit the card base.
4. Adhere the panel
Attach the panel to the card base using your adhesive of choice.
5. Create the frame
Use the frame die to cut the frame from white cardstock, place it in the coordinating embossing folder, then run it through the die cutting machine to add dimension and detail.
6. Die-cut and assemble the focal point
Die cut the houses from white cardstock, the roofs from Moon Rock cardstock, and the doors from Morning Frost cardstock. For added interest, place a small piece of vellum behind the window openings.
7. Stamp the sentiment
Secure the card base on the Stampwheel’s sticky mat. Position the frame and houses where you want them to sit, use them as a guide to plan your sentiment placement, then remove them. Stamp the sentiment using Obsidian Pigment Ink.
8. Complete the card
Use Instant Dimension Foam Tape to adhere the frame and houses to the card base.
9. Embellish
Finish off the design with a few Mother of Pearl Gem Sparkles.

Step-by-step instructions — Floral card with a dreamy background
1. Prepare the card base
Trim and fold a piece of white cardstock to create an A2 card base (4.25" × 5.5").
2. Stencil the background
Secure another piece of white cardstock to the sticky surface of the Stampwheel. Using a large blending brush, blend your chosen ink colors for a smooth finish. This time I added soft touches of Baby Pink and Mid Yellow to create a gentle, balanced backdrop.
3. Trim the panel
Remove the stenciled panel from the Stampwheel and trim it with a rectangle die. (Mine measures 4.5" × 3.25".)
4. Stamp the focal image
(I used the Stampwheel 2.0 because of the stamp size.)
Secure the folded card base on the Stampwheel’s sticky mat and stamp the image in Obsidian Pigment Ink. Next, place the trimmed stenciled panel on the card base (centered) and secure it with small pieces of low-tack washi tape — make sure the tape doesn’t cover the stamped area. Ink the stamp again and stamp a second time so the image transfers onto the stenciled panel. Carefully remove the washi tape and then remove the card base and stamped panel from the sticky mat.
5. Stamp and die-cut the sentiment
Stamp your sentiment using Obsidian Black Ink and use the coordinating die to cut it out.
6. Adhere the upper panel
Use Instant Dimension Foam Tape to adhere the stamped stenciled panel to the card base, aligning the stamped image on the upper panel with the image on the base. Use foam tape to attach the sentiment to the upper panel.
7. Embellish the card
Finish off the card with a few Mother of Pearl Gem Sparkles.

From lavender landscape, to a modern dreamy background, take a look !

The Rolling Hills Stencil Set truly shines when you let your creativity take the lead!
For today’s cards, I used only the Simple Coloring Stencil Set, but if you’d like to create even more landscape variations, there’s also a coordinating 3D Embossing Folder available.
I hope these two ideas inspire you to play, experiment, and see your stencils in a whole new light.
Happy crafting!
Early Black Friday Sale Alert!

Get a jumpstart on your holiday crafting with our Early Black Friday Special! From November 24th through November 26th, you can save Up to 50% OFF a wide selection of beautiful Altenew Stencils. Don't miss this limited-time opportunity to stock up on layering, coloring, and background stencils to create stunning paper crafts and mixed media projects. Shop early and save big! Exclusions apply. Offer valid while supplies last.