Painting Moody Florals with the Moody Brights Watercolor Palette
Hi there, everyone! Welcome to Creative Coloring with Erum.
Today's post/video is a relaxing color-along watercolor session, and it’s extra special because this is my first time using the Moody Brights Watercolor Palette. If you’ve just received your palette or want to explore how these colors behave, you can paint right along with me. I’ll test blends, layering, color intensity, and even add detailed stippling — all while painting a panel and getting to know the palette.

VIDEO: Watercoloring Florals | First Impressions of the Moody Brights Palette
Watch the video tutorial below or CLICK HERE to learn more about this cardmaking technique! Or read step-by-step instructions after the video.
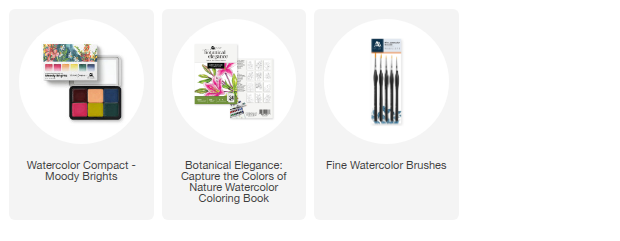
Colors Used
Flowers: Magenta Crimson, Velvet Berries, Lemon Drops
Leaves: Mermaid Green, Lemon Drops
Background: Starry Night

1. Activate the Palette
Start by unboxing the Moody Brights Watercolor Palette.
Spray water generously using the Fine Mister water bottle over all the pans to activate them.
You’ll notice right away that the texture is creamy and easy to load onto the brush.
First Impressions:
The colors stay surprisingly intense even after drying. Unlike many traditional watercolors that lighten significantly, these maintain their vibrancy.
2. Paint the Florals – Wet-on-Wet
Choose any page from the Botanical Elegance Watercolor Coloring Book.
Using the Fine Watercolor Brushes, apply clean water to the first petal.
Drop in Magenta Crimson, letting the color softly spread.
Add Velvet Berries to the base for depth.
Repeat this process around the bloom.
Note:
My first flower looks a bit different from the second — I was learning the water-to-pigment balance, and you’ll see how the results improve with each bloom.

3. Paint the Leaves – Dry-on-Wet for Details
For leaf areas where you want crisp veins or color variation, use dry-on-wet: apply pigment directly onto damp paper.
Layer Lemon Drops and Mermaid Green to create luminous gradient leaves.
Watch how beautifully the palette layers — even when repainting a bud that was accidentally colored pink!
4. Add Layered Details + Stippling
Once the first layer is fully dry, or if you prefer, use a heat tool to speed up the process.
Add stippling to the petals and leaves using a slightly damp brush and stronger pigment.
Keep this texture subtle but visible; it enhances realism without overpowering the soft watercolor look.

5. Create a Soft Background
Lightly wet the space around the florals.
Drop in diluted Starry Night for a dreamy, cloudy wash.
Soften the edges outward to keep the card airy and balanced.
6. Final Touches
Reinforce shadows, deepen color transitions, or add sharper details as needed once everything dries.
Add Lemon Drops flicks to the stamens for contrast and brightness.
Thank you so much for joining me for this color-along session! I hope this helps you understand the Moody Brights Watercolor Palette and gives you confidence to explore its vibrancy, layering strength, and beautiful flow. If you recreate this project, please tag me — I’d love to see your stunning floral artwork. Until next time, happy watercoloring!

To get the most out of your Moody Brights Watercolor Palette (or any watercolor set!), we highly recommend using a color swatch card and a dedicated practice sheet.
Get Your Free Swatch Cards & Practice Sheets Now! Download the free printable swatch card and practice sheet templates today! Download it HERE.
SUPPLY LIST