November 2025 Guest Designer of the Month


Get to Know Lana
My name is Lana Taber, a graphic and UX/UI designer with a strong passion for modern paper artistry, refined detail, and clean, intentional design.
Design has always been my language, from digital interfaces to handmade stationery, but my heart belongs to crafting spaces where creativity becomes experience. I’m passionate about teaching, sharing, and helping others discover confidence and joy through paper art. Whether it’s through tutorials, workshops, or behind-the-scenes peeks into my studio, I want everyone to feel welcome, inspired, and excited to try something new.
And let’s talk about my favorite medium… if we can call it a medium: wax seals! Elegant, old-world, slightly dramatic, and absolutely captivating — wax seals are my signature.
People often ask me: “Besides sealing envelopes, what else can you do with wax seals?” Everything.
Wax seals aren’t just an embellishment, they are a moment.
They tell a story.
They elevate a card from beautiful to unforgettable.
They make giving feel personal, meaningful, and full of heart.
Today, I’m opening another door of creativity for you, and I am inviting you into the magical world of wax seals, where texture meets tradition, and modern design meets timeless charm. Let’s step into this world together and let the wax work its magic.
With that in mind, let’s take a closer look at today's project.
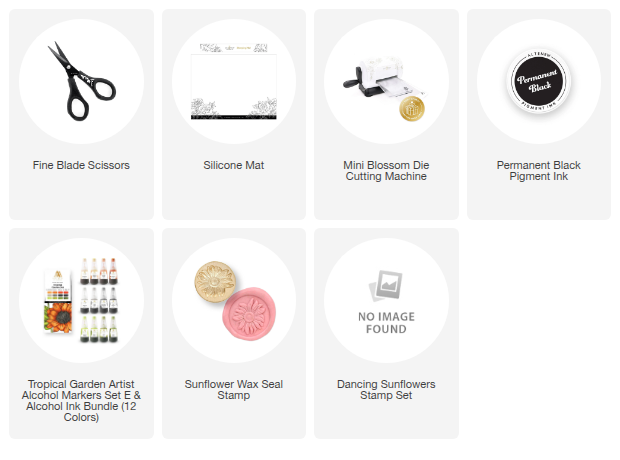
I used the Sunflower Wax Seal Stamp and paired it with the Dancing Sunflowers Stamp Set and the Tropical Garden Alcohol Markers Set. Both of my cards use the same approach, and I wanted to show how the outcome can change simply by shifting color choices, even when the products and techniques are the same.
I began by stamping and coloring multiple leaf clusters. Since I knew this design required quite a few, I took my time here. I stamped the leaves using Altenew Permanent Black Pigment Ink (perfect for alcohol marker coloring), colored them with the Tropical Garden set, and then cut them using the Mini Blossom Die Cutting Machine - a perfect little tool to use for small and detailed images.
Once all my foliage was ready, I moved on to the wax sealing.

Puzzle In - Wax Seal Technique
For this technique, you will need two different wax colors, one for the center of the flower and one for the petals. I would normally go with 4 - 5 beads; it is good to have extra wax, because you will need more than just one seal.
Start by pouring the first wax color directly on Altenew Silicone Mat, and then, just simply stamp. Once it cools, trim out the center of the flower with a pair of scissors, such as Altenew Fine Blade Scissors.
TIP: Don’t throw away the trimmed pieces; simply put them back into your wax burner and re-melt them.
Next, take the cut off center and “puzzle” it back into the stamp. Press firmly to make sure the piece does not fall out.
Then, place the trimmed center piece back into the wax seal stamp, fitting it into the engraved center like a puzzle piece and pressing firmly so it stays in place.
Next, pour your second wax color and pour it on the silicone mat. Stamp again with the center piece already inside the seal. Let it cool fully before removing the stamp.
Depending on what you want to do with your seal, you can simply be done and use your seal as and put it on an envelope, or a scrapbook page. You can also:
Trim it around the flower, puzzle it back, and stamp it yet one more time in a different color. This will create a fun background.
Or, like in my case here, trim the wax around the flower (re-melt the extra wax) and use the flowers as embellishments, or the focal point on your cards.

Card 1 - Sunflower in Neutrals (Masculine Style)

For the first card I wanted to show how floral elements and wax seals can take on a completely different personality when paired with a more neutral, grounded palette. Sunflowers are often associated with bright color, but here I shifted the focus to earthy tones to create a masculine, modern botanical look.
I started by arranging the die cut foliage on my card panel to determine exactly where my sentiment should go. This step is important. Always stamp your sentiments first, especially when using a stamp tool like the Stampwheel. Once elements are adhered, stamping becomes much more difficult and less precise.
After stamping the sentiment, I returned to my foliage and adhered the cut-out pieces using liquid adhesive. I arranged the leaves in the way that mimics a neutral trailing vine, which works especially well on slimline card designs.
Next, I adhered the wax seal sunflowers directly on top of the foliage, again, using liquid adhesive, and allowed everything to dry for a few minutes.
For the background, I purposely kept it clean and untouched. I love that sleek, minimal look. It allows the wax seals and foliage to truly shine without distraction.
Card 2 - Bright & Free Spirited Sunflowers

The principle behind this card is exactly the same as the first one. The only difference here is the color story and mood.
For this version, I embraced a brighter, more vibrant palette along the leaves and sunflower seals to take on the cheerful, almost free-spirited personality, giving a fresh, lively, and joyful vibe.
I arranged the foliage and wax seals in the same flowing, organic style, giving the card, movement and slightly whimsical feel. The colors create a sense of warmth and openness, more playful than structured, but still elegant and intentional.
Keeping the background clean allows the vibrant elements to be the star, proving that the same supplies and technique can deliver completely different styles, simply by letting color guide the emotion of the design.
Thank you so much for spending time with me today in stepping into this creative space where wax seals and paper artistry meet. I hope this inspired you to explore this magical world of wax seals a little deeper and to see how small, thoughtful details I can transform a design in the most beautiful way.
Whether you try this technique as is, or use it as a starting point for your own ideas, I hope it encourages you to look at your supplies differently, experiment, freely, and enjoy the process, for creativity truly grows when we stay curious.
A heartfelt thank you to Altenew for inviting me. It is always an honor to create with such stunning products and share inspiration with an amazingly talented, welcoming community of crafters.
Until next time, happy crafting and may your creative path be lined with paper, ink, and a little wax seal magic.
Sincerely,
Lana D. Taber
Leave a Reply