June 2026 Guest Designer of the Month | Two-for-One Die Cutting Technique

Get to Know Our Guest Designer - Jennifer
Hello, Crafty Friends!
I am so incredibly honored to be here with you today! Altenew has asked me to be a guest designer for the month of June 2026, and I couldn't be more excited to share my passion for paper crafting with this amazing community.
Before we dive into the projects, here is a little bit about myself: I started crafting in 2014 because I wanted to create a DIY wedding. I was under the impression that DIYing would be cheaper—and it was, to a certain degree—but boy, was it a lot of work!
That experience truly launched my crafting journey. I began by making crepe paper flowers. I am a huge fan of florals and love the idea of creating something beautiful to give away to others. That love of florals actually led me to Altenew. Thanks to the crafty algorithm, Altenew products started popping up on my feed, and I was immediately hooked. They have the most gorgeous flowers! I absolutely adore their layered florals—whether you are stamping, stenciling, or die-cutting, the results are always stunning.
Fast forward to today: I am now an Altenew Certified Educator, having earned my certification in 2023.

The Two-for-One Die Cutting Technique: One Technique, Two Cards
The projects I am sharing in this post feature a specific two-for-one die cutting technique that I originally developed for my Altenew Educator Level 3 final project. It is a fantastic way to stretch your stash and get a "two-for-one" deal out of your favorite paper crafting supplies!
Step-by-Step Card Prep:
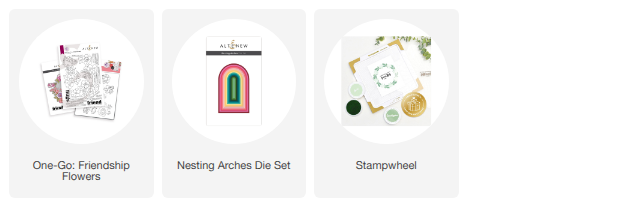
Ink Blending & Stamping: To start, I used the One-Go Friendship Flowers set. I ink-blended all of the stencils using a vibrant combination of pinks, yellows, and greens.
Die-Cutting the Florals: Once the stenciling and stamping were complete, I used the coordinating dies to cut out each individual floral piece.
Arranging the Panel: Next, I arranged all of those die cuts onto an A2-sized card panel. To keep my arrangement perfectly in place before running it through the machine, I used a little bit of Press 'n Seal.
The Magic Cut: Then, I took the Nesting Arch Die Set and ran the entire arranged panel through my die-cutting machine.
Because of the Press 'n Seal, all the die cuts stayed perfectly together. This allows you to use the main arch die-cut flowers on one project, and the remaining negative space piece on a completely separate project!

Card Project 1: Mastering Negative Space & My Favorite Altenew Stampwheel Hack
For the first card, I did a little ink blending using a square stencil and soft shades of yellow. The background felt a bit too plain without it, and these tones really brightened up the card, giving it a beautiful, light feeling. I used the negative die-cut flowers with Instant Dimension Foam Tape and adhered it to my panel.
To finish this card, I used a handy trick that truly showcases the versatility of the Stampwheel:
Step 1: I took a dry erase marker and traced the shape of my arch directly onto the clear Stampwheel lid.
Step 2: I flipped the lid over and lined up my sentiment stamp, curving and arching the clear photopolymer stamp so it perfectly matched the traced line.
Step 3: I stamped the sentiment in the arch using Jet Black Ink.
Jennifer's Crafty Tip: I have been saying for years that if you don't have a dry erase marker in your craft stash, you need to get one! It is incredibly helpful for outlining exactly where you want a stamp to land on your Stampwheel, or even marking where you want to apply ink on an embossing folder.

Card Project 2: Crafting the Floral Arch with Nesting Dies
The next project features the main arch die cut created from our two-for-one die cutting technique, with an added piece of vellum behind it to soften the look and add elegant texture.
Design Tip: You can also use the Nesting Arch Dies to create your own masks. By cutting a blank piece of paper or masking paper with a solid arch die, you can easily ink-blend a soft arch directly onto your card panel. These nesting dies are incredibly versatile and easy to incorporate into so many different layouts!
This masking method is exactly what I did for this second project: I die cut the arch and used a beautiful combination of green and soft pink to blend the background for the main arch negative space.

Frequently Asked Questions
What is a two-for-one die cutting technique?
A two-for-one die cutting technique involves arranging die-cuts on a single card panel, using a temporary adhesive sheet (like Press 'n Seal) to hold them in place, and cutting a shape out of the entire layout. This creates two usable pieces for two separate cards: the central shape (positive die-cut) and the surrounding background frame (negative die-cut).
How do you curve photopolymer stamps on a positioning tool?
To curve a clear photopolymer stamp to match a specific shape, trace the shape onto the clear lid of a stamping tool (like the Altenew Stampwheel) using a dry erase marker. Flip the lid over and manually bend the flexible photopolymer stamp along the traced guide line before inking.
Thank you so much for joining me today! I hope these projects inspire you to stretch your stash, try this two-for-one die cutting technique, and experiment with your Stampwheel.
Let me know in the comments below which card layout is your favorite! Happy crafting!
Supplies