How To Create Double Sided Layered Die Cuts – Lydia’s Crafty Corner
by Lydia Evans December 18, 2020

Hello there everyone! Happy Friday! Lydia here. Today I'll be sharing a technique that hides the back of over-hanging die-cuts and makes them just as pretty from the back.

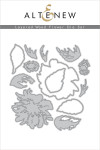
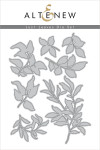
I started by cutting 6 of each of the flower and flower center layers from Layered Wood Flower Die Set. For the flower I used Frosty Pink and Coral Berry Cardstocks and Caramel Toffee and Paper Bag Cardstocks for the flower centers. The leaves come from Just Leaves Die Set and were cut from Forest Glades Cardstock. When adhering the flower layers I did 3 in the normal way but for the other 3 I flipped the die cuts over to create a mirror image.

I cut 2 1/4″ from the card front to create a small flap on the front of the card. Then added a 4 1/4″ x 5 1/2″ panel of vellum to the front of the card, just adding glue to the flap. I then added a 2″ x 5 1/2″ strip over the flap to hide the adhesive. Once this was done I could then add the die cut flowers into place on the front of the card. Now when you open the card the adhesive may be seen through the vellum, to hide this I then added the mirror image die cuts behind the other die cuts to hide it.
The sentiment is from Circled Sentiments Stamp Set and was stamped using Obsidian Ink.
 For a video to see how this card came together please watch the video below. Or over on YouTube:
Thanks so much for stopping by!
|