How to Create a See-Through Shaker Tag | Interactive Tagmaking Made Easy
Key Takeaways
The Core Technique: A see-through shaker tag is created by die-cutting identical windows into two matching tags, sandwiching acetate sheets on the inside of both, and separating them with dimensional foam tape to hold the shaker elements.
Flawless Window Alignment: To ensure the clear windows line up perfectly, temporarily adhere the front and back tags together before running them through your die-cutting machine with the window die.
Mess-Free Acetate Gluing: When adding decorative die-cuts (like the Pond Lilies) over the clear window, apply liquid glue only where the cardstock overlaps the tag's solid frame. This prevents ugly adhesive smudges from showing through the acetate.
Versatile Shaker Fillers: While this project uses Shimmering Pool sequins to mimic water, the clear window can be filled with a variety of materials including glitter, tiny die-cut cardstock pieces, gems, or seed beads.
Creative Display Uses: Because the transparent design leaves no room to write a traditional gift message, these tags double beautifully as dramatic 3D gift-bag ornaments or keepsake holiday decorations.
Hello there, Michelle here with another edition of Terrific Tags with Michelle. Today I have a fun project to share - a see-through shaker tag!
Shaker cards and shaker tags are already a fun thing to both make an recieve. Adding in the see-through element elevates them even further! I thought it would be fun to have the shaker element be the water, and use the Pond Lilies Layering Die Set to decorate it.

The Pond Lilies
I started off my project by die cutting the Pond Lilies Layering Die Set from Classic Crest 110lb Solar White Cardstock. I added ink blending on top using Micro, Mini and Small Blending Brushes:
- Cherry Blossom Fresh Dye Inks (Pink Diamond, Pinkalicious and Razzleberry) for the flower petals.
- Golden Sunset Fresh Dye Inks (Sunray and Chamomile) for the flower centers.
- Green Valley Fresh Dye Inks (Firefly and Grass Field) and Sweet Dreams Fresh Dye Inks (Aqualicious) for the lily pads.
The water lilies were assembled using the keyhole system and adhered using liquid glue.

The Shaker Tag
To create the shaker tag, I furst die cut two of the largest tag dies from the Labels & Tags 1 Die Set from Classic Crest 110lb Solar White Cardstock. I then used the die in the set to cut holes at the top.
I then temporarily adhered the two tags back to back. I placed one of the Nesting Circles Dies on top, in the middle, and ran the tags through my die cutting machine. This will create the shaker window.
TIP: My machine cut the circle out from both tags without an issue, but if yours does not, the pressure of the machine will have made an indentation of the circle die on the tag. Place the circle die back on top, it will slot in easily with the indentation lines and run it back though your die cutting machine to cut the circle out. This ensures that the window will line up on both tags.

I die cut two slightly larger circles from acetate and adhered them to the back of both tags using Ultra Sticky Tape.
I added Instant Dimension Foam Tape around the shaker window on the tag that will be at the back. I then added Shimmering Pool Stellar Sequins inside the window. The other tag was adhered on top to create the see-through shaker tag.
I added sequins inside my shaker tag but you could add anything inside the shaker tag - glitter, die cut cardstock pieces, gems; there are lots of possibilities!
Adding the Pond Lilies to the Tag

I adhered the lily pads to the shaker tag first, adhering with liquid glue, just where the lily pads overlap the tag. This ensures that you cannot see any adhesive through the acetate. The water lilies were then adhered on top.
I stamped a sentiment from Bold Sentiments Stamp Set onto Classic Crest 110lb Solar White Cardstock using Obsidian Pigment Ink. It was cut into a strip and the edges of the strip "painted" using a black pen.
It was adhered to the shaker tag using Instant Dimension Foam Tape. To finish, I added black twine through the top of the tag and tied in a bow.
Video Tutorial: See-Through Shaker Tag
I hope I have inspired you to try creating a see-through shaker tag! If you didn't want to create the see-through part, you can easily eliminate cutting the window on the back tag and just have the window on the front tag. That would work great too for a normal shaker tag, but I like having the see-through element as something different! Since there is nowhere to writre a personal message on the shaker tag, I would add it to a gift or gift bag as a decorative element. It could even be used as an ornament!
You can watch the video tutorial below or over on YouTube.

Thank you so much for stopping by today, I hope you have a wonderful day!

Enjoy FREE U.S. Shipping on orders over $49 from June 20, 2026 at 12:01 AM EDT until June 22, 2026 at 11:59 PM EDT. Shop here: https://altenew.com/collections/all-the-paper-crafting-supplies-you-need
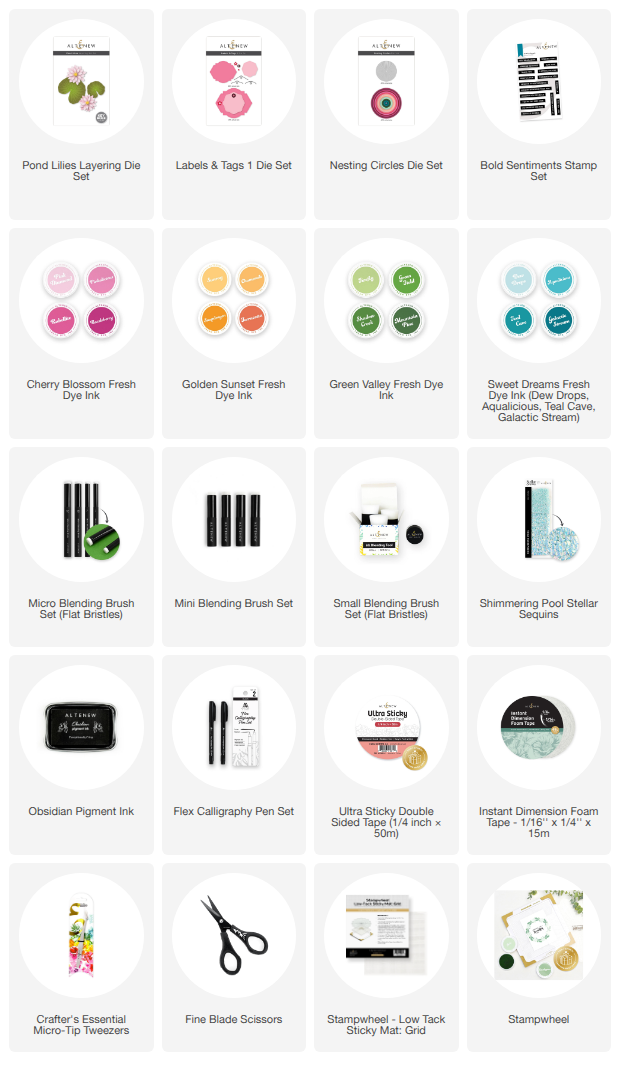
SUPPLY LIST