Creating Unique Designs with Multiple Stencils
Key Takeaways
Maximize Supply Value: Master the art of creating unique designs with multiple stencils by mixing geometric background patterns with focal floral stencils to double your layout options.
Extend Patterns Seamlessly: You can easily elongate shorter stencils for larger memory-keeping pages by carefully aligning the stencil lines with your initial ink impression and blending continuously.
Create Custom Embellishments: Turn flat stencil designs into dimensional, standalone icons by using coordinating metal dies or fussy cutting your inked images with detail scissors.
Boost Visual Dimension: Build eye-catching depth in your paper crafts by forming three distinct embellishment clusters and lifting them off the page using foam adhesive.
Craft Faux-Shadow Sentiments: Design high-impact titles by cutting your sentiment out of contrasting materials—like glitter and metallic cardstock—and gluing them together with a slight offset.
Hello, crafty friends! It's Nathalie here with you today to share a fresh, creative idea for creating unique designs with multiple stencils.
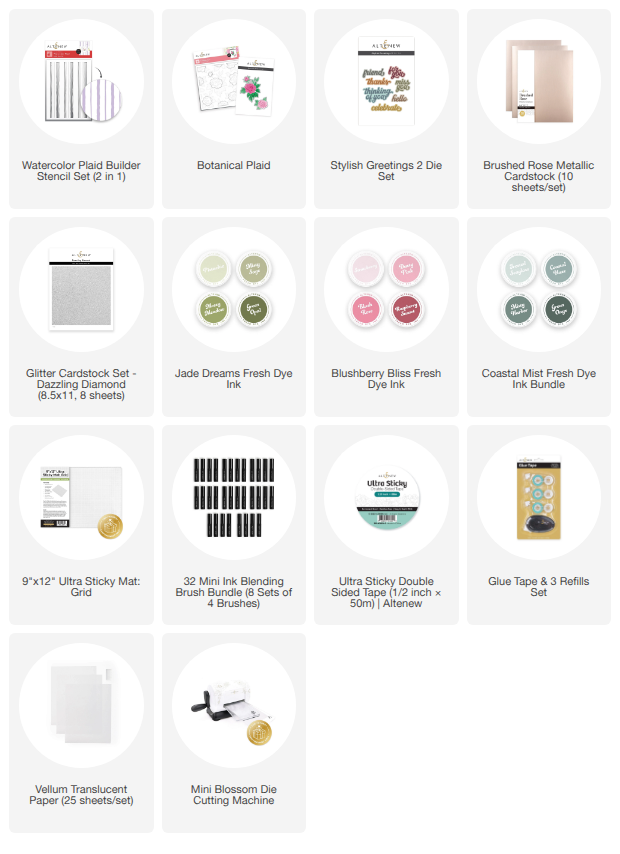
I absolutely love making one-of-a-kind projects, regardless of the crafting format. Custom paper crafts really showcase your mood, convey the perfect sentiment, and allow for a personalized touch that fits your exact vision. Today, I am combining the Watercolor Plaid Builder Stencil Set and the Botanical Plaid Stencil to create a brand-new memory-keeping layout for my 6x8 album.
The linear, free-style look of the watercolor plaid serves as a fantastic background base. Meanwhile, the gorgeous floral elements in the second stencil allow us to create standalone icons that can be die-cut and used as custom embellishments.
Let's take a closer look at how mixing and matching your supplies can elevate your memory-keeping layouts!

Why You Should Try Mixing Stencils for Customized Projects
If you are looking for a quick way to elevate your paper crafts, stencils are one of the easiest and fastest ways to add visual interest to any project with very little effort. Embracing the technique of creating unique designs with multiple stencils is the ultimate way to maximize your stash and get more value out of your crafting supplies.
For instance, the freehand impression of the lines in a watercolor plaid stencil can easily be extended seamlessly across your page. This seamless extension helps when elongating a background design for larger layouts, which in turn makes creating unique designs with multiple stencils incredibly versatile for various project sizes.

Step 1: Building the Stenciled Background Base
The first step in creating unique designs with multiple stencils is to establish a solid background base. Here is exactly how I created the custom textured background for this memory-keeping project:
Prepare Your Cardstock: Trim a standard letter-size sheet of white cardstock into two pieces: one measuring 4.75'' x 8.5'' and the other measuring 6.25'' x 8.5''. Set them side by side on an Original Sticky Mat to keep them secure.
Ink the First Layer: Use Frosted Sea Glass Fresh Dye Ink alongside Stencil #1 from the Watercolor Plaid Builder Stencil Set to blend a vertical line impression along the entire width of the paper. Crafty Tip: Be careful when moving your stencil to avoid shifting and causing ink bleeding on the page.
Add the Second Color Layer: Switch to Misty Harbor Fresh Dye Ink and use Stencil #2 from the same Watercolor Plaid Builder Stencil Set to create your second interlocking line impression.
Extend Your Pattern: To extend the pattern seamlessly, carefully slide the stencil over until the design matches up perfectly with the existing line width, then apply your ink to complete the impression. Repeat this process until the entire length of the first impression is covered with the second set of lines. Set the pages aside to dry completely.

Step 2: Creating Custom Die-Cut Embellishments with Stencils
The stunning floral design found in the Botanical Plaid set offers another brilliant avenue for creating unique designs with multiple stencils. Because this specific set features a coordinating die set, it allows you to separate the stenciled images from the base cardstock and use them freely as dimensional pieces throughout your projects.
Here is how to bring those floral elements to life:
Blend the Florals: Using vibrant shades from the Blushberry Bliss Fresh Dye Inks and Jade Dreams Fresh Dye Inks, follow the layering order on the Botanical Plaid stencil. Focus your blending strictly on the floral designs to isolate the images.
Mass Produce: Repeat this blending process until you have gathered enough floral images to complete your specific layout.
Die-Cut and Fussy Cut: Use the coordinating Botanical Plaid die set to cleanly cut the stenciled images from the paper. For any trickier edges or extra elements, carefully fussy cut the rest of the images using detail scissors.

Step 3: Assembling the Layout and Sentiments
Now that your background and embellishments are ready, it is time to assemble the final layout:
Arrange Your Clusters: Place your stenciled floral images on the paper to create three distinct clusters of embellishments across the page.
Pop for Dimension: Always use foam adhesive when creating your clusters! This simple trick instantly enhances the dimension and shadow play of the pieces in your project.
Craft the Sentiments: Utilize Dazzling Diamond Glitter Cardstock, Brushed Rose Metallic Cardstock, and the Stylish Greetings 2 Die Set to construct a gorgeous, shimmering sentiment for this project.
Layer the Sentiment: Glue the glitter cardstock die-cut directly on top of the metallic cardstock piece, keeping it slightly offset to create a beautiful faux-shadow effect.
Final Assembly: Using thin strips of foam adhesive, attach your completed sentiment to the base right next to your major floral cluster. This serves as the perfect title or focal sentiment for your project page.

Tips for Maximizing Stencil Usage Across Different Layout Sizes
Though I am personally using this technique of creating unique designs with multiple stencils for a 6 x 8 spread in my memory album, this design theory can easily be adapted for all sorts of paper crafting projects, from pocket scrapbooking to A2 cardmaking.
Due to the larger size of this specific memory-keeping project, the number of floral icons in the clusters has multiplied. However, the fine detail hidden within these stenciled images provides incredible movement, flow, and dimension to the final layout without making it look cluttered.

I truly hope these practical ideas for creating unique designs with multiple stencils give you an inspiring starting point for your next crafting session!
Remember to share your creations with us in the community—we absolutely love to see your finished projects and how you put your own unique twist on these stenciling techniques!
XO,
Nathalie

Enjoy up to 40% off Stencils Collection from June 17, 2026 at 12:01 AM EDT until June 19, 2026 at 11:59 PM EDT. Shop here: https://altenew.com/collections/stencils
Supply List