Eclipse Card Technique for Handmade Cards
by Mindy Eggen July 7, 2026

Key Takeaways
The Eclipse Card Technique Definition: A paper crafting method that creates a subtle, dimensional 3D effect by die-cutting a word or shape directly from a finished card panel, stacking it with multiple cardstock layers, and inlaying it back into the original opening.
Two-Step Stamping for Sharp Outlines: Stamp the initial background image in a light ink (e.g., Limestone) to act as an ink-blending guide without smearing, then restamp with dark ink (e.g., Obsidian Black) after blending to restore crisp details.
Advanced Ink Blending: Utilize layered stencils, blending brushes, and a gradient technique (light to dark shades) to add depth, while masking off adjacent sections to prevent color contamination.
Building the 3D Sentiment Stack: Die-cut the focal word or shape from the main panel, cut the same shape three additional times from plain cardstock, and glue the layers together to build the raised "eclipse" height.
Final Card Assembly: Secure the blended panel to an A2 card base, glue the stacked dimensional letters back into their exact negative spaces, and accent with metallic watercolor splatter for non-bulky texture.
Hi everyone! It's Mindy Eggen and I'm back with a unique card design that I don't know if I've ever created myself, but it's definitely a technique I'll be doing more often. Today we're creating a card using the eclipse card technique. It's a fun way to add dimension to your cards while keeping the overall design clean and elegant.

If you've never tried the eclipse technique before, don't worry—it's much easier than it looks! The idea is to die cut a word, shape, or image directly from your finished card panel, stack several additional die cuts behind it, and then place it back into the opening. The result is a subtle raised design that almost blends into the background until the light catches it. It's one of those techniques that's simple to create but has a big impact.
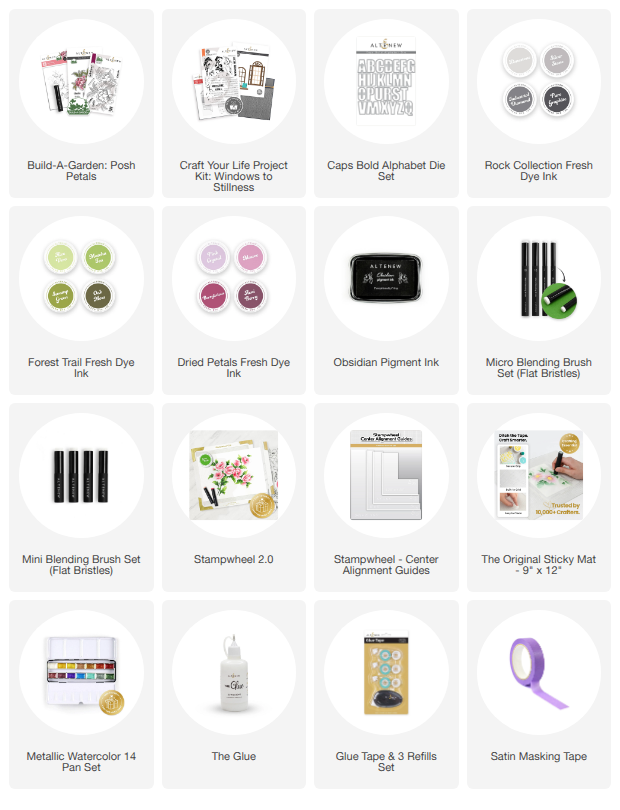
For today's project, I'm mixing some older favorites with a few newer products. I'm using the Build-A-Garden Posh Petals, Bold Alphabet Die Set, and the Craft Your Life Project Kit: Windows to Stillness. While I'll be using the Bold Alphabet Dies for my eclipse sentiment, don't be afraid to experiment with other word or shape dies from your own collection. This technique works with so many different designs!
Stamp Your Floral Image First
The first step is creating the floral background.
I stamped the Build-A-Garden Posh Petals image in the lower left corner of an A2 card front in the landscape orientation. Thanks to the Stampwheel 2.0 and Center Alignment Guides, I was able to let part of the stamp hang off the edge of the cardstock without any trouble.

Instead of stamping in black right away, I used Limestone Ink first.
Why?
- Reduces the risk of smearing while ink blending
- Gives you a guide for coloring
- Allows you to restamp crisp black details later
One important tip—leave your stamp exactly where it is in the Stampwheel. You'll come back to it after all of the ink blending is finished.
Ink Blend with Layers for Extra Depth
With my image stamped, I moved over to my 9" x 12" Sticky Mat to keep both my cardstock and stencil perfectly in place while blending.
I also switched between Micro Blending Brushes and Mini Blending Brushes depending on how much detail each section required.
Rather than using just one color per stencil layer, I like to start with the lighter shade and then blend in a darker color around the edges. That little bit of extra contrast gives the flowers and leaves so much more dimension.
One thing to watch for with this stencil set is that several layers contain both flower petals and leaves. You'll want to mask off the sections you're not working on to keep your colors nice and clean.
Bring Back the Black Details
Once all of the ink blending was finished, I placed my cardstock back into the Stampwheel in the exact same position. This is where leaving everything set up pays off!
I restamped the floral image using Obsidian Black Ink, instantly bringing back all of the crisp details that softened during the ink blending process. It's one of my favorite tricks whenever I'm working with layered stencils.
Create the Eclipse Sentiment
Now for the fun part—the eclipse technique!
I found a sentiment I loved from the Windows to Stillness Project Kit, but instead of stamping the larger word, I decided to make it the focal point using the Bold Alphabet Dies.
I spelled the word "REST", holding the letters together with Satin Masking Tape before die cutting them directly from my completed card panel.
Next, I die cut the same word three more times from white cardstock and stacked all four layers together using liquid glue. This creates the raised "eclipse" effect once the letters are placed back into their original openings.
To finish the sentiment, I stamped the smaller coordinating greeting from the Windows to Stillness stamp set just above the die-cut word.

Assemble the Card
Assembly is nice and simple once everything is complete.
- Adhere the ink blended panel to an A2 card base using a tape runner.
- Glue the stacked die-cut letters back into their matching openings.
- Mask off the stamped sentiment.
- Add gold metallic watercolor splatter across the background.
The splatter adds just enough shimmer without taking attention away from the floral design or dimensional sentiment.

Why I Love the Eclipse Card Technique
There are so many reasons to love this technique.
- Creates dimension without adding a bulky focal point.
- Lets your background become part of the design.
- Works beautifully with word dies, shapes, and even images.
- Can be customized with almost any die set you already own.
- Looks impressive but is surprisingly easy to make.
It's one of those card designs that really makes people do a double take when they see it in person.
Give It a Try!
I had so much fun creating this card and I already have several ideas for using the eclipse technique again with different die sets and backgrounds. It's a great way to stretch your supplies and create something that's a little unexpected.
Thanks so much for stopping by today! Have you ever tried the eclipse card technique before? I'd love to hear what you've created—or what die set you'd use first!

SUPPLIES