Easy Watercoloring on 3D Embossed Florals | Winterberry Poinsettias Card Tutorial
by Erum Tasneem July 8, 2026

Key Takeaways
Easy Watercoloring for Beginners: Working on one petal at a time provides maximum control, prevents colors from bleeding into adjacent areas, and makes watercoloring 3D embossed images highly approachable for beginners.
Gradual Layering for Depth: Because watercolor dries lighter than it appears when wet, build depth and dimension gradually by layering pigments and softening harsh edges with a clean, damp brush.
Custom Holiday Palette: The tutorial achieves a soft, muted holiday look using Altenew Artist Watercolor Tubes, blending Quinacridone Magenta, Toluidine Red, and Permanent Yellow Deep, with Payne's Gray and Van Dyck Brown added for deeper shadows.
Embracing Organic Texture: Achieve a natural, artistic look by embracing watercolor "blooms," lightly stippling with the brush tip, and leaving intentional white highlights on the petals.
Soft Atmospheric Backgrounds: A highly diluted, loose wash of Olive Green around the floral arrangement creates contrast, helping the poinsettias pop without overwhelming the design.
Artistic Splatter Finishes: Add rich visual texture to the final card by layering diluted watercolor splatters, Titanium White Gouache splatters, and delicate Carbon Black splatters.
The Re-Embossing Pro-Tip: Run the painted watercolor panel through the Winterberry Poinsettias 3D Embossing Folder a second time after it dries to perfectly restore the crisp, crushed details lost during the wetting process.

Embossed florals are beautiful on their own, but adding watercolor brings them to life with soft layers, depth, and dimension. If loose watercoloring feels intimidating, today's project takes a much simpler approach.
Instead of watercoloring the entire image at once, we'll work one petal at a time, gradually building color and shading. This method gives you plenty of control, making it perfect whether you're new to watercolor or simply want a relaxing way to color embossed images.
Today's card features the Winterberry Poinsettias 3D Embossing Folder paired with Altenew Artist Watercolor Tubes to create a soft holiday-inspired floral design.

VIDEO: Watercoloring on 3D Embossed Panel
Watch the video tutorial below or CLICK HERE to learn more about this cardmaking technique! Or read step-by-step instructions after the video.

Emboss the Background
Emboss an A2 panel of Cold Press Watercolor Cardstock using the Winterberry Poinsettias 3D Embossing Folder. Position the floral design so it sits along the bottom edge of the card, leaving plenty of open space above for the sentiment.

Watercolor the Poinsettias
Mix Quinacridone Magenta with Toluidine Red, adding a touch of Permanent Yellow Deep to slightly mute the mixture. If you need deeper color, mix in a small amount of Payne's Gray.
Apply pigment near the base of each petal, then use a clean, damp brush to pull the color toward the tip. Work on one petal at a time, allowing petals to dry before adding additional layers for deeper shading.
Tip: Work on non-adjacent petals while the previous petal dries to avoid colors bleeding together.

Add Texture and Definition
Once the first layer has dried, deepen selected areas by adding another layer of pigment. Create subtle texture by lightly stippling with the tip of your brush.
Next, add a little Van Dyck Brown to bring definition to the petals. It's the perfect color for creating extra depth while maintaining the soft watercolor look. After applying the color, soften it with a damp brush so it blends seamlessly into the previous layers.
Don't worry about small white highlights—they'll become part of the finished watercolor effect and can always be softened later if desired.
Tip: Watercolor dries lighter than it appears when wet, so build color gradually.
Paint the Flower Centers and Berries
Create the flower centers with a muted yellow base, then add Burnt Sienna in a C-shape to create depth.
Paint the berries using a watery yellow first. While still wet, touch in Olive Green and allow the colors to naturally bloom together for soft two-toned berries.
Tip: Don't be afraid of blooms or soft textures—they often add to the organic watercolor look.

Color the Leaves
Apply Olive Green near the base of each leaf and blend it outward using clean water. Add additional layers after drying if you'd like more contrast.
Tip: Use clean water to soften harsh edges for a more natural watercolor look.
Add a Soft Background Wash
Create a very diluted Olive Green mixture and paint a loose background wash around the floral arrangement.
Allow the color to fade naturally into the white cardstock, creating a soft, atmospheric background that helps the flowers stand out without overwhelming them.

Finish with Texture
Once everything is dry, add diluted watercolor splatters followed by Titanium White Gouache splatters for contrast. Finish with a few delicate Carbon Black splatters to add visual texture.
For extra definition, run the panel through the embossing folder one final time before adding your sentiment and adhering the panel to your card base.
Tip: Re-embossing the panel at the end restores the crisp embossed details after watercoloring.
I hope today's project shows that watercoloring embossed images doesn't have to feel intimidating. By working one petal at a time and slowly building layers, you can create beautiful depth while keeping the process relaxing and enjoyable.
Thank you so much for stopping by today! I hope this tutorial inspires you to pull out your watercolors and give this technique a try. If you create a project using this idea, I'd love to see what you make!
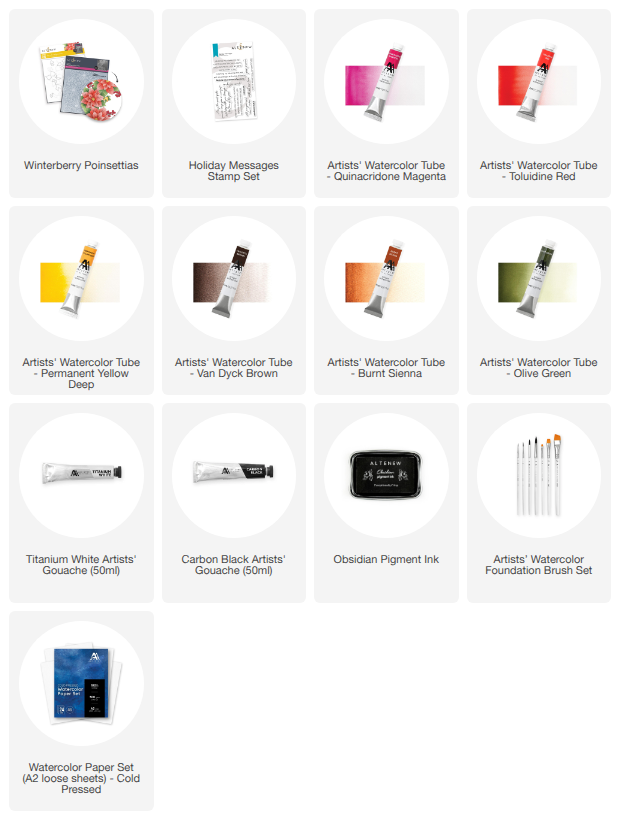
SUPPLY LIST