Suddenly Spring Stand-alone Dies Release Blog Hop + Giveaway ($300 in Total Prizes)
by Erum Tasneem April 19, 2021


Hello friends! Erum here, and I welcome you to another fabulous Altenew release and blog hop, the Suddenly Spring Blog Hop!
Let's not keep you waiting, shall we? Look at all the amazing goodness Altenew has come up with for you!

Check out our new stand-alone dies and foam tape HERE!
UNBOXING VIDEO!
Check out this quick unboxing video to see the creative possibilities of our NEW products! You may also watch this on YouTube HERE.
And to jump-start your creativity, I have several projects + a video to share with you. Let's begin the party!!!
Project 1: Whimsical Garden and Fancy Kisses

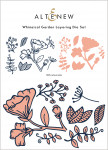
As you can see, my first card is an odd combination, but I really wanted to use as many dies as I could in this release so I combined the two together :) The card features the Whimsical Garden Layering Die Set and the Fancy Kisses Die.

I added a light color wash of rainbow colors on A2 Watercolor Cardstock using the paints from the Artists' Watercolor 24 Pan Set. Once this was dry, I added splatters of white chalk paint and black paint.
Next, I die cut the outline dies out of cream-colored cardstock and the base layers out of vellum. You cant see the vellum, but it's there and adds a nice softness to the card.

The Fancy Kisses Die was also die cut out of the same cream-colored cardstock. For interest, I added a gold glitter offset to it. To finish, I adhered a few Antique Gold Sequins.
Project 2: Mini Flower Cluster and Circular Elements

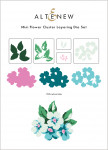
I used the Gradient Cardstock to die cut the Mini Flower Cluster Layering Die Set. I like how easy it is to create a quick card with this set. But of course, I have to complicate things for myself and can't be satisfied with CAS cards. Therefore, I chose to die-cut a panel using one of the dies from the Circular Elements Dies.

I am still using the leftover butterflies from the Radial Butterflies Cover Die from that one project I made a while ago. Can you imagine that? In the photos, it shows that my green watercolor doesn't match my leaves. But you know me right? I wouldn't let that happen, so that did NOT happen. It matches perfectly and goes well with the leaves in person ;) Take my word for it. Please.

To finish, I added some controlled splatters with a black marker.
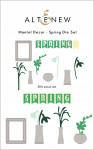
Project 3: Mantel Decor Spring Die

Look, Altenewees! My version of a clean and simple card! All that white space. I am SO proud of myself :D My card features the elements from the Mantel Decor: Spring Die Set.

If you know, I don't have the Halftone Nesting Circles, and I always forget to order them and end up cutting my circles by hand. So here is a hand-cut circle which I dry embossed using the Organic Line 3D Embossing Folder.

I adhered it onto my card base with foam tape. Over it, I arranged and adhered the watercolored elements. Then, I stamped the sentiment from the Sentiments Strips 2 Stamp Set in Obsidian Pigment Ink. To finish, I adhered a few Satin Gold Sequins.
Project 4: Decorative Swirls and 3D Baner Die

Before I begin, I have to tell you that I got the banner wrong on my card. But I had SO MUCH FUN creating this card, you guys!! SO MUCH FUN!! I even filmed it! Because I knew it would be something mesmerizing to watch later at high speed! So yeah! It was messy watercolor goodness, I tell you!
My card features the Decorative Swirls Die Set and the 3D Banner Die Set. I only used the two gorgeous leaves from the Decorative Swirls Die Set. For this, I colored a whole 9×12 cardstock from the 9 x 12 Watercolor Cardstock Pad. I used a bunch of Watercolor Brush Markers and Liquid Watercolors. I can list the liquid Watercolors as I only have a few, and I only used two of them: Ultraviolet and Ultramarine (both SO GORGEOUS). Then I also added splatters of the bright green from the Artists' Watercolor 24 Pan Set, Iridescent Shimmer Ink spray, and Metallic 14 Pan Watercolors.

Once dry, I die cut a whole bunch of leaves and set them aside to work on my card front. Do you see the brushed metal look to my background? It is so cool! I used the Jet Black and the Silver Metallic Watercolor Brush Markers to get the look. Once the panel was dry, I adhered the leaves.
Next, I stamped the sentiment and adhered the banner onto the card front.
Project 5: Mini Flower Cluster 2.0 + a VIDEO

When you are having fun, why not create one more project?! Absolutely!
So you have seen me share several videos showcasing layering florals that I often watercolor. In this one, too, I will watercolor my florals, but it's a tad different.
As I had to die cut so many floras to make my floral garden, I needed to think of an efficient way. I cut 4 panels out of 9 x 12 Watercolor Cardstock. These ended up measuring 3″ x 9″ and would fit perfectly in my Mini Blossom Die Cutting Machine. But I ended up using my other machine as I couldn't find my metal shim.
Next, Panel 1 needs to be the darkest so I started by applying water and then applied Ruby Red and Purple Wine pigment from the Watercolor Brush Markers. For Panel 2, I applied a lighter concentration of the same pigments. And for the third panel, I used up the leftover pigment on the watercolor palette and also added a bit of Rouge Watercolor Brush Marker pigment to add a bit of a coral hue.

For my fourth panel, I started by applying water just like all the panels and then Emerald, then Just Green, and Lime Watercolor Brush Marker Pigment. I kept this mostly towards the top of the panel. Then I used a wet paintbrush to create an ombre look. Once all my panels were done, I dried them with my heat tool.
Now, I wanted to switch up all my layers and not follow any rule of dark to light or vice-versa. Therefore, once dry, I adhered Double Sided Adhesive Sheets behind my panels. Then I die cut all my floral layers out of all the pink panels. Next, I adhered the layers randomly, switching them up.
So, as you can see, some of my flowers will have darker top-most layers and lighter bases, and vice-versa. This added to the variation without the extra work of additional watercolor.

I added a light color wash of Just Green pigment to the card front and then adhered the Garden Trellis Die with Glue Tape. Over it, I placed the florals after removing their backing. After this, I added white chalk paint splatters and then stamped the sentiment.
Video:
You can watch the process video below or on YouTube.
Gifts!

Here are TWO ways to get a FREEBIE to kickstart your creativity! Free gift will be added to cart automatically.
-
Get a FREE brand-new Suddenly Spring Stand-alone Dies Release Inspiration Guide (worth $5.99) with every order of Suddenly Spring Stand-alone Die Release Bundle. Shop HERE!
-
Get a FREE brand-new Suddenly Spring Stand-alone Dies Release Mini Inspiration Guide with every order from 04/19/2021 through 04/21/2021. Shop HERE!

Prizes!
$300 in total prizes! To celebrate this release, Altenew is giving away a $50 gift certificate to 2 lucky winners and a $20 gift certificate to 10 winners!
Please leave a comment on the Altenew Card Blog and/or each designer’s blog post on the blog hop list below by 04/25/2021 for a chance to win. Altenew will draw 12 random winners from the comments left on each stop of this blog hop and announce the winners on the Altenew Winners Page on 04/27/2021.
Blog Hop!
Your first stop on the hop is the one and only Nathalie DeSousa. Below is the complete hop list for your convenience. Don’t forget to leave a comment on every stop of the hop!
~Supplies~
|