Create A Pretty Card With Ink Blending
by Erum Tasneem October 18, 2021

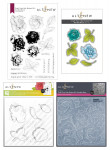
Hello there friends! Welcome to another session of Creative Coloring with Erum. I have an easy peasy card to share with you featuring the 3D Embossing Folder from the Craft Your Life: Garden Rose Project Kit.

To start, emboss a 4 1/4″ x 5 1/2″ panel of Crest Solar White Cardstock (80lbs) using the 3D Embossing Folder from the Garden Rose Project Kit.
Ink Blending
Next, use a brush from the Mini Blending Brush Set to apply the Frosty Pink and Coral Berry Pigment Inks to the roses on the embossed panel. For this, you will need to cover the entire rose with the Frosty Pink Pigment Ink. And then you will apply the Coral Berry Pigment Ink with a light touch, just adding a hint of color to the raised portions of the rose for a realistic look.

To apply ink to the leaves, use the Detailed Blending Brushes to get into the smaller areas and also to add details using the darkest ink which is Evergreen Pigment Ink (watch video). For the rest of the coloring, use another brush from the Mini Blending Brush Set. First, apply the Frayed Leaf Pigment Ink, next add a bit of Forest Glades Pigment Ink around the base of the leaves and move it outwards, halfway up the leaves. Try not to cover the tip of the leaves, this will give you an ethereal look.
To add a bit of interest and realistic look to the flowers, and also to cover any flaws, apply a bit of Frayed Leaf Pigment Ink onto the petals and blend it a bit with the pink.

Final Touches
Once you are happy with the ink blending, emboss the panel again. This is just so you can get back any lost dimension while ink blending. Then add a few white and black splatters. Make sure you give a few minutes between each of the two splatters so the first one dries a bit. Cut this panel to 5 1/4″ x 4″ and set it aside.
Die-cut the word “Hello” from the Craft-a-Flower: Primrose Layering Die Set from the Glitter Cardstock: Gilded.
Now, wrap and adhere a strip of vellum, about an inch or a bit more around the panel. And adhere the glitter “hello” over the vellum strip. To finish, adhere a few Antique Gold Sequins.
Video
You can watch the process video below or on YouTube in HD.
You can give this card to someone at their wedding or to your mum/aunt on mother's day, you will just have to change the sentiment! It does have that perfect feminine feel to it! Thank you for stopping by! See you next week.
~SUPPLIES~
|