ONE Crafty Die-Cutting Idea Turned into THREE Cards | Tremendous Texture With Erica + Video Tutorial
Hi Altenew friends and fans, I hope you are ready to get crafty! It's Erica back on the Altenew blog and YouTube channel today with a HUGE crafty session, which you will be happy to know I sped up a little bit in the video. On the negative side I don't have many progress photos as I was on a serious roll. Pun intended, thank you very much.

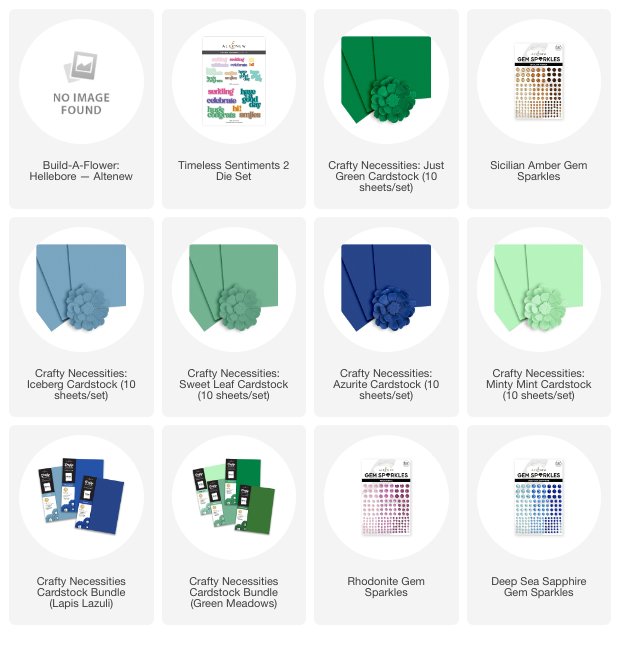
I know the CAF Hellebore Layering Die Set isn't the newest addition to the Craft A Flower family, but it is so lovely and I haven't had a real chance to get crafty with it yet. I picked out a bunch of gorgeous colors from the Crafty Necessities Colored Cardstock, including Iceberg, Ultramarine, Azurite, which you can get in single packs or in the Crafty Necessity Cardstock Bundle Lapis Lazuli. For the leaves and other little bits for the middle of the flowers I have used Minty Mint, Sweet Leaf and Just Green, which you can also get in single packs or in the Crafty Necessities Cardstock Bundle Green Meadows
If you prefer to ink blend your die-cut pieces, that is another way to add color, as well as ink smooshing, using sprays and water colors. So many ways to get creative and crafty with colors!
So, the reason I decided to do a video on the CAF Hellebore Layering die-cut is because I made the card below for the Crafty Necessities Instagram Hop and I got so many compliments on it!

First Crafty Idea: Layered Florals
I die-cut a whole bunch of flower pieces and made a big bouquet of them, but who can blame me? I was on a bit of a roll with my die-cutting machine and all that gorgeous Crafty Necessities Cardstock. It happens easily…
On the back of the CAF Hellebore Layering Die-Cut Set there are instructions on how to layer the flowers together, with the help of the brilliant Key Hole System. You simply match up the pieces with the same symbol and off you go! It really is a game changer when it comes to layering dies, as it's not always obvious which pieces go together and it is very easy to mix them up too. The Key Hole System will make this particular part of your crafting session a breeze!
If you don't want to end up with a whole orchard of flowers like I did, you can rein yourself in and just die-cut the pieces you need for one card, or however many you are making. No need to go as overboard as I have, but I mean.. I did it for you, LOL.
When I had all my flowers die-cut and glued together, and if you watch the video you will see that I went a little bit into rebel mode and puzzled some of the middle pieces randomly, rather than doing them exactly how you are supposed to do them. I think it adds to the individuality of the flowers, though. It makes them a little bit more interesting, so why not?
The next step was to start assembling some cards, and I have gone about this the same way as I did the first one: The background is completely white, and it doesn't even have any kind of texture from a cover plate or anything. I know, who am I??? The leaves and foliage kind of covers most of the card base anyway so it wasn't that difficult to leave it as it was. If you know me, you know white space is hard for me and this is a compromise I can live with.
Some of the leaves I have doubled up on, and I tried placing them so that as much of them would show as possible while not taking over the card completely. Does that make sense? Of course you also have to take into account your sentiment, if you are adding one. I love the ones from Timeless Sentiments 2, and the ‘have a good day' is probably my favorite. I have used one of them on the first card, and the flowers are arranged around it, in a half-wreath kind of way.

Second Crafty Idea: Have a Good Day!
For the second card I decided to use ‘celebrate' , also from the Timeless Sentiments 2 set. This one I had already assembled from another crafty session but never used so that came in handy.

The ‘celebrate' is a bit smaller, but it spans almost the entire card width so the placement isn't really up for discussion. Unless I had turned the card horizontally, I suppose. Which now that I'm looking at it, I think I should have done. Oh well, something for you to take into account if you decide to re-create one of these designs while you are getting crafty yourself.

Third Crafty Idea: Lots of Florals!
I nearly stopped there, at one inspiration card and one made in the video, but I had so many flowers left I decided to make a third. Might as well strike while the iron is hot and the crafty force is strong, am I right?

For the third card I used even more flowers than on the first two, which both have five on them. I don't know why I was on such a mission to use so many but I did. It didn't leave much space for a sentiment so I used one of the smallest from the Timeless Sentiments 2 Set, that simply says ‘hi'.

These blues are absolutely dreamy, I love how these cards came out, but I had an idea now that we are coming up to the holidays: Use reds or whites for the flowers and make them holiday themed instead! It doesn't matter that Hellebores are not typical or traditional holiday flowers. One of the beautiful things about being crafty and creative is that we can use our imagination! Don't let anyone tell you you can't use these gorgeous flowers for holiday cards if you want to! In fact, I think I might do just that… *adds yet another idea to my ever-expanding I-want-to-try-this-idea list*

I'd love to hear which one of these cards you like the most, I know they are quite similar but is there one grabbing your attention more than the others? I think I'm quite partial to the first one I made actually. I like that the sentiment is big and the flowers perfectly frame it, without taking over the entire show. The other two cards feel like they are trying to live up to the first one and coming up a little bit short, to me. Am I crazy? What do you think?

Also, anyone who is worried about the lack of bling on these cards, I'm fine, I'm not being replaced by a robot, LOL! I will make up for the absence of bling on these cards in my next post. I will be back sooner rather than later with another big crafty session, focusing on Fresh Dye Inks.
Ok, so that is it from me for today but I really hope you have enjoyed this post and will get a chance to watch the video too. It is another longer one, but I hope it will inspire you and get those creative ideas buzzing! If you do try the Hellebores in reds, I'd love it if you tagged me so I can see!

Lots of love and creativity!
Crafty hugs from Erica