Mastering Small Stamps for STUNNING Scenes! | Altenew Educators “Harvest Hues” Video Hop + Giveaway
by Erum Tasneem September 16, 2024


Hello everyone! Erum here! Welcome to the Altenew Educators Video Hop! The theme of this hop is Harvest Hues, and we have some amazing projects to share with you! Today, I’m sharing a vintage-inspired card featuring Altenew’s Mini Delight Afternoon Delights Stamp and Die Set and a VIDEO to go with it. But first, check out these amazing projects by our AECP educators:

Now, let's talk about my project! This delightful stamp set has a beautiful floral design and a charming teacup die that can be used together or separately for various creative possibilities. For this project, I focused on creating a soft, muted autumn floral scene that wraps around the page and balances beautifully with the vintage teacup. I can’t wait to show you how you can recreate this in your own style!

Creating the Floral Scene:
- Cut a 5″ x 7″ Hot Pressed Watercolor Cardstock to the size of your card front. I cut this to 4″ x 5″.
- Start by stamping the florals from the Mini Delight Afternoon Delights Stamp using Obsidian Pigment Ink to create a vine-like scene around your card. Leave the lower right corner unstamped to maintain balance in the design.
Color Wash for the Background:
- Apply water to the entire panel using a number 3 or 4 Altenew Artists' Round Watercolor Brush.
- Next, apply a light wash of Gold Ochre Watercolor pigment over the panel, covering the background. This will create a smooth base for adding details later. Tip: This is called underpainting, and it makes coloring the background easy for beginners. They don't have to struggle to add color to the background through the dense image at the end.
Watercoloring the Florals:
- Choose an autumn color palette and mix colors from Artists' Watercolor Tubes to create muted tones. Layer colors to add depth and use stippling techniques for texture. Tip: Always dry your panel before adding more color or layers! Drying between each layer helps keep the layers distinct.
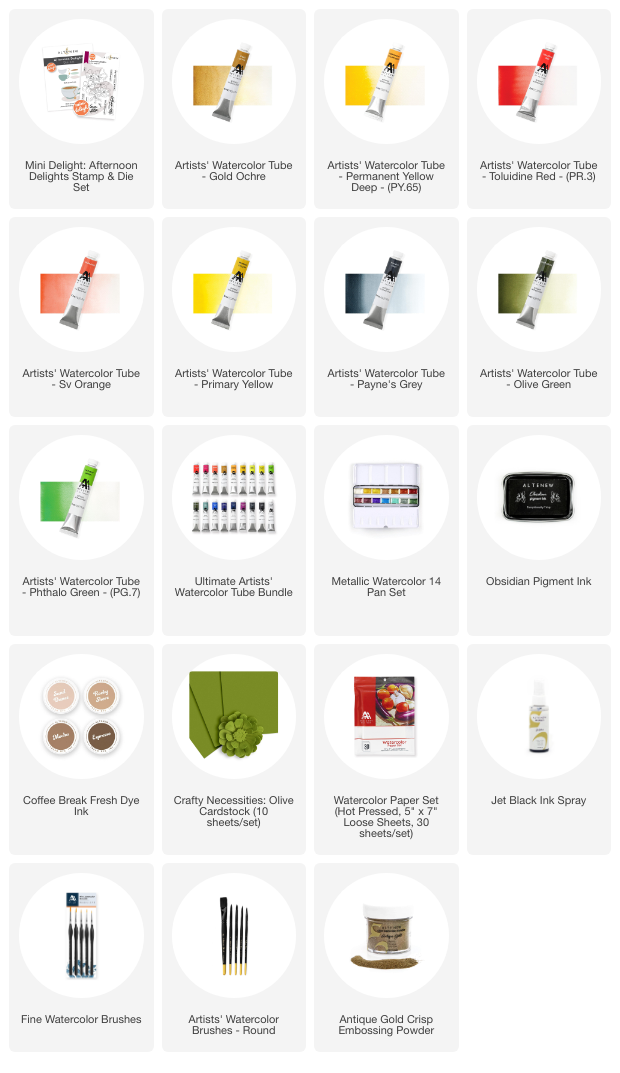
- The colors I used for the flowers are; Toluidine Red, Gold Ochre, Permanent Yellow Deep, SV Orange, Primary Yellow, and Payne's Grey.

Adding Depth to the Background:
- Use a concentrated brown watercolor (Gold Ochre) to dab around the edges of the panel, blending it inward for a soft, vintage feel and to add texture. Tip: You can go as dark as you want on the edges. You can also use a tissue to blot any excess pigment if you think it's too much. Use water to blend the dabs if the marks are too harsh on the white space.
Coloring the Leaves & Adding Green to the Background:
- Paint the leaves in Olive Green, and mix in Phthalo Green for brightness.
- Use the same dabbing technique for the background, this time using the diluted Olive Green pigment to tie everything together (watch the video).
Splattering & Ink Detailing:
- Use a Fine Watercolor Brush of size 4 or 6 to add diluted brown and green splatters for a natural, textured effect. Dry the panel.
- Next, add black ink splatters using Jet Black Ink Spray.

Teacup Accent:
- Die cut the teacup die using Olive and Chamomile Cardstock. Ink the edges of the “tea” with Mocha Fresh Dye Ink.
- Color the “rim” die-cut using a gold metallic marker or use Gold Watercolor from the Metallic Watercolor 14 Pan Set.
- Partially stamp the floral image on the tea cup die-cup in Embossing Ink and emboss with Antique Gold Crisp Embossing Powder.
- To add your unique touch to the design, use the gold metallic marker to add some dotted accents to the floral design.
Finishing Touches:
- Use the Metallic Watercolor 14 Pan Set for subtle and prominent gold splatters. Tip: To add shimmer to the card panel, dilute the gold pigment as much as possible. The shimmer will appear as a subtle shimmer instead of a prominent gold splatter.
- Stamp the word “Hugs” from the stamp set randomly, softly, for a worn, vintage paper effect using Sea Forest Fres Die Ink. Use first and second-generation stamping to do this (watch the video).
Video: Mastering Small Stamps for STUNNING Scenes!
Click the photo below to watch the whole card come together in HD! You can also use THIS LINK to hop to YOUTUBE!

This card has such a timeless feel, perfect for anyone who loves a vintage aesthetic. The muted autumn tones and delicate floral details really bring the card together, while the teacup adds a charming, cozy touch. If you try this card, be sure to share your work with me on Instagram—I’d love to see your creations! And if vibrant colors are more your style, don’t forget to check out the alternate version I shared on my feed.
Giveaway Prizes

$120 in total prizes! Altenew is giving away a $20 gift certificate to 3 lucky winners and a $15 gift certificate to 4 winners! Please leave a comment on the Altenew video and/or each designer’s YouTube video on the hop list by 09/22/2024 for a chance to win.
Altenew will draw 7 random winners from the comments left on each hop stop and announce the winners on the Altenew Winners Page on 09/23/2024.
Video Hop List
Here's a list of the amazing designers joining today's Harvest Hues video hop with their must-watch video tutorials!
***IMPORTANT! Please leave a comment on each video tutorial on the hop list below – NOT on this post – to be entered into the giveaway.
Altenew
Jennifer Johnston
Aditi Mahajan
Tamara
Teri Wilson
Donna Tuschoff
Aya Elsheshtawy
Nandini Karmarkar
~SUPPLIES~