All About The Sentiment- DIY Stenciled Backgrounds, 2 Ways
by Lydia Evans September 24, 2021

Hello there, everyone! Happy Friday! Lydia here. Today, I'll be showing you how to use both parts of a DIY stencil.

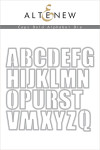
I started by cutting ‘hey' into place onto a 4 1/4″ x 5 1/2″ piece of Masking Paper using Caps Bold Alpha Die Set. Once this was cut, I added the positive die-cut masks into place onto a 4 1/4″ x 5 1/2″ panel of Classic Crest Solar White Cardstock. And also the negative mask die-cut onto another panel of the same size. I then ink blended over each of the panels using Sunray, Pink Pearl, and Dew Drops Crisp Dye Inks. Once I was happy with the ink blending, I then removed all of the masks.

For the additional sentiments, I used Gradient Sunset Stamp Set and stamped the sentiments into place using Obsidian Pigment Ink. I just love the mix of sentiment styles! For a little more interest, I also stamped the palm tree from the same stamp set onto each of the panels using Industrial Diamond Crisp Dye Ink.

To see how these cards came together please check out the video below. Or over on YouTube:
Thanks so much for stopping by!
|