Add Layers with Colored Cardstock and Just 2 Die Sets | Tremendous Textures with Erica (with Video Tutorial!)
Hi Altenew friends and fans! It's your layers loving gal Erica back on the Altenew blog and Youtube channel again, and while there is a whole new release available, we are actually going to look back on the colored cardstock and have some fun with that. Who doesn't love gorgeous colored cardstock to play with in the craft room?

Add Layers with Colored Cardstock and Just 2 Die Sets
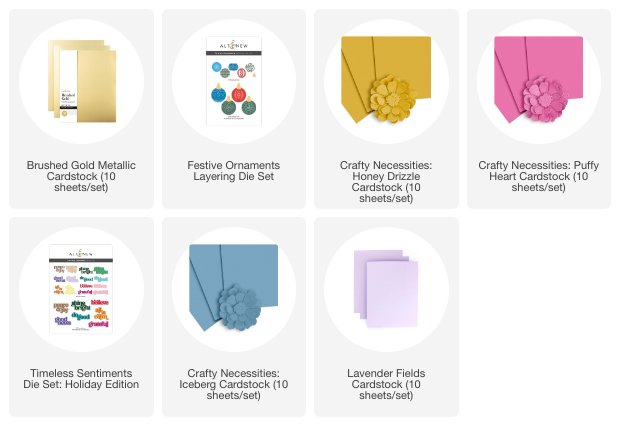
My package with the gorgeous colored cardstock was delayed, but it finally arrived and wow! The colors are gorgeous, the card stock is lush and smooth. I decided to immediately get some of them out and create some delicious layers and swatches. The Festive Ornaments Layering Die Set was PERFECT, as it has a bauble diecut as well as four different patterns to create layers easily.

I have used some colors already released, and some coming very soon, so you are getting a gorgeous sneak peek here too. First off, I got one sheet out of each packet, and I have used Puffy Heart, Lavender Fields, Iceberg, Sea Glass, Frayed Leaf, Honey Drizzle and Pumpkin Pie.

Ok, so if you are new to my blog posts and videos I have a small confession. It's nothing bad… or crazy. Not too crazy. Depending on what you consider crazy anyway, I suppose there are different layers to it.
Alright, here goes: Hi, I am Erica and I'm a teeny tiny bit extra and by a bit extra, it is entirely possible I mean E-X-T-R-A. If the above photo doesn't give you an indication about where I am going with this, let me explain. I like swatching things. Any excuse to swatch and I'm there. Which leads me to the two different tag die-cuts in the photo.
I have a swatch ring for every single brand that I have colored cardstock from, which is the stitched tag die pieces. Then, because I am an utter nutter, I make a second swatch for each brand too. Preferably with a tag diecut from that company, but I didn't have anything suitable from Altenew actually, so I need up using a tag puncher instead. I have a great tip on how to get perfect cuts every time, as well as minimising any cardstock waste. Make sure to check out the video on the YouTube channel called Lovely Layers | Lots of coloured card stock and just TWO die-cuts.
While I had my die cutting machine out I also cut out a whole load of bits using the Festive Ornaments Die set. As you can see… I have a bit of a problem, but all of these pieces are going to glued together for some lovely layers and textures.

I did use a liquid glue to layer these all up, it's a little bit fiddly, I'm not going to lie but the results are well worth it. In the video you will see me having a whale of a time creating my layers, trying different colour combinations and textures together. I did mention in the video that it might look super cool by adding the coloured layers on black ‘baubles' for some really unusual ornaments. That's one I have added to my ever-expanding things-to- try-list.
Having put a lot of the ornaments together, I pushed these to the side to let them dry and not get messed up, while I cut out some sentiments. It made perfect sense to use the Timeless Sentiments Die Set: Holiday Edition and there was no question that the sentiment to use was going to be ‘shine bright'.
These sentiments come with two pieces to create a really pretty focal point, with a shadow piece which you add the sentiment on top of. The layers you can create with this lends to so many possibilities, you can use the words on their own, or layer them up with the shadow piece. Mix and match with some coloured card stock, or mirrored card stock, like I have done with the Brushed Metallic Gold card stock.
I made a bit of a mistake when I prepped my card bases, which I show in the video too, because I was just on a roll and let things get ahead of me. I do think it's really important to show the good with the bad and how to fix mistakes, so if you ever feel like it's only you messing up, I'm here for you! You are not alone, I promise!

The photo above shows what used to be the inside of a card base, that I had to cut down to be a panel instead as I also decided to add string to the ornaments. If I had really thought about the design and layout properly beforehand, I would have gone straight for background panels and not tried to skip a step in the process. So, again, hi I'm here for you, LOL!
I added double sided tape to both hold the string in place, after folding the strings over the background, and to adhere this to a new card base, so there are a fair few layers here. I implore you to prep your steps ahead of time and not do what I did. You can save a few layers by doing what I say, rather than what I do.

Definitely add the string to the ornaments before adding them to the card too. That was a proper rookie mistake on my behalf, it really was but again, Hi I'm here for you to make you feel better about your own card making. Always a team player, me.

The backgrounds are splattered with gold watercolour to bring in the sparkle of the gold mirror card stock, and also compliment the sentiments that say shine bright. It would have been better to have had string in gold but I only had white and silver string, so I had to use that but I think it worked out ok anyway.

The downside with mirror gold card stock is that it is difficult to photograph to really show it off, but it looks so pretty in real life and it really brings in the layers on the card.

The second card is a bit darker with the coloured card stock being the base layers and the mirror gold card stock being the details, but it works too. I'd love to hear which one you like the best, and why, so please do leave me a comment and if you get a chance to watch the video that would be wonderful.
That's it from me today, I hope I have inspired you to get your layers in and have some fun with these gorgeous card stocks.
Big crafty hugs, from Erica
~Supply List~