September 2026 Guest Designer of the Month
by Altenew LLC September 15, 2026


Get to Know Our Guest Designer - Justine
Hi Crafty Friends! My name is Justine Dvorak, and I’m so excited and honored to be joining the Altenew blog as a Guest Designer. Altenew has been such a wonderful part of my creative journey, and I’m always inspired by the beautiful products and endless possibilities they bring to cardmaking.
A little bit about me — I’m a cardmaker and content creator based in the United States, and I love experimenting with different products and techniques to create cards that feel like little works of art. My style is bold, modern, playful, and sometimes a little weird—in the best way! I love unexpected color combinations, mixing textures, and using products in ways they may not have been intended. I’m a big believer in breaking the rules when it comes to art. Sometimes the best ideas come from trying something completely unexpected and seeing what happens.I love taking a product and thinking beyond its traditional use. I’m always looking for ways to add depth, movement, and unexpected details to my projects.
When I’m not creating cards, I’m a kindergarten teacher, where I get to watch my students learn, grow, and discover new things every day. I love seeing their confidence grow as they try something new, and I think that same sense of curiosity and discovery is something I bring to my own creativity. Outside of the classroom, you can usually find me sharing my projects and crafting adventures with the cardmaking community through my social media and YouTube channel. I’m so grateful to be part of such a creative community and thrilled to have the opportunity to share this project with you!
Connect with Me
Instagram: https://www.instagram.com/stationarybyjustine

Creating a Dimensional Seaside Scene
Layering stencils, die cuts, metallic watercolor, and relief pastes to bring a coastal scene to life. There is something so peaceful about being near the ocean—the movement of the waves, the clouds drifting across the sky, and the sound of the water along the shore. I wanted to capture that feeling on a card while creating a heartfelt way to let someone know just how grateful I am for them. For this project, I created an entire coastal scene using Altenew products, building the background with layered stencils and inks before adding dimensional die-cut elements, metallic watercolor, and shimmering relief pastes. The result is a bright seaside scene featuring a sailboat, three seagulls, rolling waves, and a sparkling shoreline.
Products Used
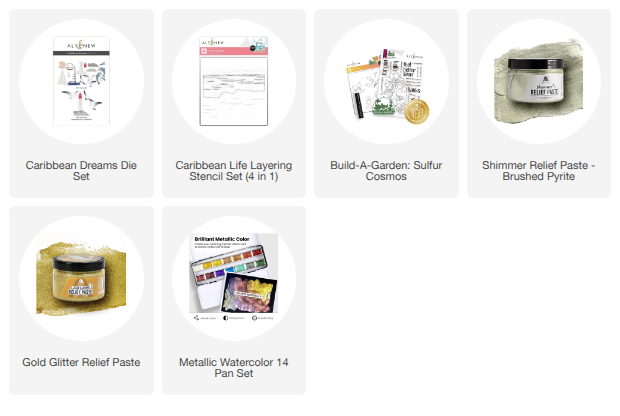
- Build-A-Garden: Sulfur Cosmos
- Caribbean Life Layering Stencil Set (4 in 1)
- Caribbean Dreams Die Set
- Shimmer Relief Paste – Brushed Pyrite
- Gold Glitter Relief Paste
- Metallic Watercolor 14 Pan Set – Sterling Silver
I also used Altenew Fresh Dye Inks in various shades of blue, red, brown, and black for blending and shading
Building the Coastal Background
I started with the Caribbean Life Layering Stencil Set, which provided the foundation for the entire scene. I used the different layers to create the sky, clouds, ocean, and sandy shoreline. For the sky and water, I layered several shades of blue ink to create variation and depth. I wanted the background to have movement rather than looking completely uniform, so I allowed the different shades of blue to blend and overlap. The layered clouds help create a soft, open sky, while the deeper blues toward the horizon and foreground give the ocean more depth.

Adding Shimmer to the Scene
One of my favorite details on this card is the subtle metallic shimmer throughout the design. I used Sterling Silver from the Altenew Metallic Watercolor 14 Pan Set to add shimmer throughout the card. Rather than concentrating the metallic watercolor in just one area, I used it across the sky and water to create subtle highlights throughout the scene. The silver catches the light as the card moves, giving the ocean the appearance of sunlight reflecting off the waves. It is a simple way to add shimmer throughout a project while keeping the overall design soft and natural.
Creating the Water Texture
To add even more interest to the ocean, I used Shimmer Relief Paste in Brushed Pyrite to highlight areas of the water. The combination of the layered blue inks and shimmering paste creates the appearance of light hitting the moving water. I applied the paste selectively so that some of the blue background remained visible. I love how this creates additional texture and shine without overwhelming the detailed stenciled background.

Creating the Sandy Shore
For the beach, I used Gold Glitter Relief Paste to create a warm, sparkling shoreline. I wanted the sand to have more variation and texture, so I used a semi-wet paintbrush with brown ink to add small speckles across the surface. The brown speckling breaks up the gold and creates a more natural sandy appearance, while the glitter underneath catches the light and gives the shoreline the look of sunlight sparkling across the beach. Using a semi-wet brush rather than a very wet brush allows you to create smaller, more irregular speckles instead of large drops. It was a simple way to give the shoreline more texture and make the glitter paste feel more like actual sand.

Creating the Sailboat
The sailboat from the Caribbean Dreams Die Set became the main focal point of my card. I die cut the boat from red cardstock and then used black ink to add shading. Instead of using several colors of cardstock, adding ink over the red cardstock allowed me to create darker areas and give the boat more dimension while keeping its vibrant red color. For the sails, I used white cardstock and added brown and black ink to create subtle shading along the edges and details. This is one of my favorite ways to customize die cuts. Starting with simple cardstock and adding ink gives you much more control over the final look and allows you to create dimension without needing multiple colors of cardstock.
Adding the Seagulls
The Caribbean Dreams Die Set also includes three different seagull dies, which were perfect for adding movement to the scene. I die cut the birds from white cardstock and added subtle shading to bring out their details. I positioned the three seagulls at different heights across the sky so they appear to be flying through the scene. The birds also help balance the sailboat and draw the eye around the entire card.

Adding the Sentiment
For the sentiment, I used the Build-A-Garden: Sulfur Cosmos Stamp Set. The bold “for you” sentiment makes a strong focal point, while “so very grateful” completes the message. I love using sentiments in unexpected ways, and this one worked perfectly with the coastal scene. Although the Sulfur Cosmos set has a completely different floral theme, the sentiment was exactly what I needed for this project.

Bringing Everything Together
Once the background was complete, I arranged the sailboat and seagulls to create a sense of movement and depth. I layered the die-cut elements so they sit above the background, giving the scene a dimensional, almost storybook-like quality. The final touches were the shimmer across the water and sky, the sparkling sandy shoreline, and a few small starfish embellishments from my stash to complete the beach scene.

Final Thoughts
I love how this card started with a simple piece of cardstock and became an entire little seaside scene. The Caribbean Life Layering Stencil Set created the foundation, while the Caribbean Dreams Die Set brought the scene to life with the sailboat and flying seagulls. Adding Sterling Silver Metallic Watercolor, Brushed Pyrite Shimmer Relief Paste, and Gold Glitter Relief Paste allowed me to build layers of shimmer and texture throughout the design. The sandy shore was another fun technique. The combination of Gold Glitter Relief Paste and brown ink speckles created a beach texture that feels much more organic than a solid layer of glitter alone.
And finally, the sentiment says exactly what I wanted this card to say: So very grateful for you!
Justine Dvorak
Altenew Ambassador

Buy 1 Shimmer Relief Paste and get the 2nd at 40% OFF from September 15, 2026 at 12:01 AM EDT until September 16, 2026 at 11:59 PM EDT. Shop here: https://altenew.com/collections/altenew-textured-pastes-for-cards-mixed-media-diy-projects Disclaimer: Choose any shimmer relief paste of your choice—at checkout, the discount will be applied to the item with the lowest price.
Supplies