Masculine card struggles? Let's make it easy with an embossing folder | Tremendous Texture with Erica + VIDEO
by Erica Andersson July 11, 2025
Hi Altenew fans and friends! It's your texture loving gal Erica back with a different take on a masculine card. First of all I need to confess that masculine cards are not my forte, nor do they come easy to me without the use of black and navy blue. So naturally (read 'because I'm a bit bonkers') I thought that would be a great theme for today's post and YouTube video to make a masculine card with some really cute products.. Why I set these challenges for myself I will never fully understand but hey ho, here we go!
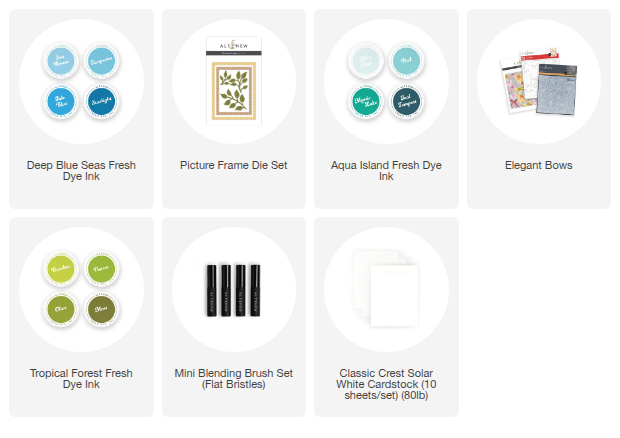
So here comes confession no2: I'm not sure how masculine it is to have cute bows on the card but I am a tiny bit obsessed with the Elegant Bows product suite. It comes with a 3D embossing folder, layering stencils to add colours and also a coordinating diecut if you want to cut the bows out. Oh, my gosh, so many options!!
If you are familiar with me and my style, you KNOW I have done this in a rainbow too, right? It comes out just as cute as you can imagine!! However, for this card we are going to go for greens, a touch of turquoise and a smidge of blue for that masculine look. The colours I used are Tide Blue from the Deep Blue Seas Fresh Dye Ink Bundle, Pool from Aqua Island Fresh Dye Ink bundle and Bamboo from Tropical Forest Fresh Dye Ink Bundle.

The coordinating Elegant Bows layering stencils are so clever in the sense that you don't need anything else to create the bows. All the layers are there, and you can make a true one-layer card using them alone. However, we are not doing that today, nooooo! Ha.
First things first is to emboss the card stock with the 3D embossing folder. Make sure to check your instruction manual for your particular diecutting machine for this part. I can not stress this enough! It should NOT be a workout rolling your diecutting sandwich through your machine, it can break it!
As I have a Platinum 6 machine the instructions are actually one the cutting plates, and for this particular machine you only need the bottom platform, your 3D embossing folder with the paper of your choice inside it, and then Adapter Plate D. It should roll through like nothing, but don't worry, it will emboss the pattern still. Don't ask me how, it's just pure magic.

Speaking of magic, let's add some colour to the embossed panel using the layering stencils and our fabulous masculine colour trio. You can use more or less colours, but I thought these three together would compliment each other for a fab masculine colour scheme.
I will say that I think I could have skipped Pool to be honest. The blue and green would have created that turquoise blend anyway, but I am also a real sucker for ALL THE COLOURS, lol. This part is where you can have so much fun trying colour combos and let your creativity lead the way.

If you like a little bit of extra depth and details, use some of the micro blending brushes to add more colour to different parts of the bows. It really makes such a difference to the overall 3D look. Going in with either more ink, or one shade darker even, will add a moodier and more masculine look with these colours. I think it will have a similar effect if you go for soft, pretty and feminine colours, but because of the fact this is going to be a masculine card, going for darker will go a long way.
With the embossed panel being all colourful and bright, these ink colours together kind of glow, don't you think? It was time for finishing touches. A frame cut out with the biggest of the Picture Frame die set, was perfect to add some texture and also draw the eye in. The sentiment I choose is from the Wrapped With love stamp set, but rather than stamp it up with black ink, I have gone for a dark grey. It feels more elegant masculine, than black which is like a harsh masculine to me. Does that make sense?

The ink is Moon Rock from the Warm Grey Fresh Dye Ink bundle. This is such a great grey ink family, it really should be a staple in everyone's craft stash. All four of these shades are versatile, masculine and elegant. Those are not usually words you put together when you are thinking of masculine stuff, is it?? If you are a woman and married, you might know this better than most, lol. Am I right or am I right?? (insert cackle here)
Anyway, back to the card making. The sentiment 'Wrapped with Love' was stamped up with the Moon Rock ink, using the StampWheel of course. I'm totally unable to stamp anything these days without my StampWheel or MISTI. In fact, I refuse because it's almost always a waste of time for me. I like having my stamped images crisp and solid, and I barely ever get that on the first try without a stamping tool.
I have also stamped up 'A gift for you, from all of us' on a banner to go with the Wrapped With Love part. Which is diecut out and stacked with another two pieces for some delicious height. Just because a card is masculine doesn't mean we have to make it boring, right?

To finish the card off I I had to do was adhere it to a card base, glue down the banner with the sentiment and then on top of that the diecut frame. Around the frame I have also tied some teal string tied into a bow. If you feel like this is too girly to make the card masculine, just skip this step.

The Wrapped With Love sentiment might not give off very strong masculine vibes (but let's roll with it) was glued down on the top half of the card and then it was time to step back and stop yourself from adding sparkles. Even I can admit that sparkles and bling probably will take this card from masculine to quite frilly and girly, despite the more masculine colours on it. There is only so much you can get away with. However, don't worry, I will be back with another Bring The Bling card soon. I usually can't go too long without making one (or four) of those.

That is it from me for today but I hope you found this post helpful and inspiring, even if it's not the most masculine card I have ever made. How about we set this as a challenge for you now? Take some not so masculine products, like this gorgeous set, and see what your creativity says. July is usually a 'Christmas in July' kind of theme but why not also try a Let's Make A Jolly Masculine Card July? I think the name might need some work, but you get the gist.
I might need to add more masculine themed products to my stash. Even as someone who isn't as good at them, I still do need the occasional masculine card. Goodness, talk about using any excuse to shop, just to make sure I have enough stuff to make those occasional masculine cards. The struggle is real, am I right?
I really will stop jibber-jabbering now, but than you so much for following along my attempt at making a masculine card and don't forget to check out the video too!

With love and light, sparkle and creativity from your (not so great at masculine cards but she will give it a try) gal Erica