How to Use Embossing Paste With Glitter on Stencils for Card Making
Last Updated: October 29, 2025
Are you in need of fun, easy, and quick ideas using card making stencils? If you are a card maker who wants to try something new, a scrapbooker who enjoys incorporating mixed media techniques into your project, or a simple paper crafter who wants to discover more stencil craft ideas, then keep on reading! This 5-minute read will guide you through your first stencil art project and other must-try crafty ideas with stencils.

What is an embossing paste?
First things first. If you are an avid paper crafter, you’ve heard of embossing paste and stencils. If you haven’t… Well, we won’t judge, but you might want to keep on reading!
An embossing paste is a type of paste, usually bright white. It is commonly used to add texture or dimension on a flat surface, usually a piece of paper or cardstock. The raised design is achieved through the use of card making stencils. These come in a wide variety of sizes, patterns, shapes, and designs. Crafting dies or dies for paper crafting are also used with embossing paste.
This 1-minute video will give you a better idea of what an embossing paste is.
Here are a few more things that you should know about embossing paste:
- It has a smooth texture.
- It dries solid when left to air dry.
- It dries quickly - VERY quickly.
- Depending on the amount of paste and the applied layer’s thickness, the drying time will vary.
- This paste is perfect for adding texture to your projects.
- You may use it with stencils, die cuts, or simply apply it free-hand.
- It’s very opaque, so you don’t see through it.
- It’s easy to clean up. Use clean tissue, towel, or any piece of cloth and lukewarm water, or just use baby wipes.
- Always make sure to close the lid tightly and don’t let it sit out without its cover. This will cause the paste to dry out.
One of the best things about embossing paste is that you can mix it with any coloring mediums to add different colors. To do this, simply transfer pigment onto a watercolor palette or acrylic block. Mix the pigment with the paste before applying it to your stencil craft. And there you have it! You can mix and match different colors to create your unique colored embossing paste or keep it monochromatic.

Add Shine and Shimmer to Your Cards Using Card Making Stencils, Embossing Paste, and Glitter!
As discussed in THIS GUIDE, stencils are a staple in every crafter’s tool kit. A stencil is a device that helps you apply a particular design onto a surface. The design can be in any form - letters, words, and patterns being the most popular. Stencil craft works best onto a flat surface, and depending on the ink or paint you use, and can be used on metal, cardboard, or any other material.
There are two parts to a stencil: the spaces that allow the color to seep through to the material below are known as ‘islands,’ and the areas that connect the stencil are referred to as ‘bridges.’
Wait! Do you wish to reignite your love for stencils? Need more fresh ideas, techniques, and inspiration? Here’s a fun and exciting stencils-themed online crafting class that you might want to check out:
Before you jump right into your first stencil art project, you need to know the different types of stencils and determine which one suits your needs.
- Background stencils - Introduced in our store back in 2017, these stencils could be a full 6x6 pattern that you can use as a background or a single design. The most popular ones are flower stencils and leaf stencils.
- Builder stencils - These might not look much at first, but once you start using them on your handmade cards, you will see the incredible 3D result and will surely love it. These stencils often create geometric patterns and shapes that will look good on neutral or masculine cards. These leaf stencils are also great for cards for every occasion!

- Scene building stencils - With a little bit of ink, you can add stunning scenery to any paper crafting project! Just like magic! Browse our unique scene building stencils HERE.
- Mask stencils - Introduced in 2018, these were created with matching stamps and die sets. Our mask stencils were total game-changers in the paper crafting world. They can be used to mask their corresponding stamp image and stamp another image behind it, therefore creating the super trendy masking effect. If you haven’t tried using mask stencils yet, you might want to check out these trendy flower stencils!
- Simple coloring stencils - Another trendy and game-changing stencil introduced in 2020 were our simple coloring stencils. These stencils also coordinate with a stamp set and are used to easily add color to the stamped image. You can also use them on their own to create amazing one-layered or 3D images. Try these flower stencils on your next handmade creation!
The video below will give you a quick insight into Altenew stencils’ evolution - from the classic layering stencils to innovative coloring stencils!
The question remains, how do you use embossing paste with glitter on your card making stencils? Here are six quick steps that you can easily follow!
- Using a palette knife, place some embossing paste onto your craft mat, acrylic block, or watercolor palette. It is recommended to use some translucent embossing paste instead of white embossing paste for this. Translucent embossing paste goes from white to clear when it dries up. For this reason, the glitter will show up better as compared to the white embossing paste.
- Place your chosen stencil design over a piece of cardstock using repositionable spray adhesive. Make sure you place a few scrap paper or copy paper underneath so you can clean up the excess glitter quickly afterward.
- Grab your chosen glitter (chunky glitter or fine glitter) and add a small amount onto your blob of embossing paste. You can always add more glitter, depending on your preference, but it’s always good to start with less.
- Mix the glitter and the embossing paste using your palette knife.
- Start applying the translucent embossing paste onto your stencil, making sure you’re spreading it evenly throughout the stencil.
- Once you’re satisfied with the consistency and coverage, carefully remove the stencil and let your cardstock air dry.

Easy peasy, right? You can also use embossing powder or embossing glitter for extra shine and shimmer. The process is the same as the one above, except for the heat-embossing part.
Before you get all sparkly with glitter and finger-deep in embossing paste, here are a few more tips and hacks on using embossing paste with card making stencils!
- Put the lid on after use; it will thicken up very quickly if you don’t.
- It dries very fast. Read that again and make a mental note.
- Use a palette knife, an old credit card, or an ID card.
- To ensure that you get a nice and even coverage, go back and forth over the stencil when applying the embossing paste.
- Use an up and down or side to side motion to get a nice even coverage.
- Always work with a craft sheet or a crafting mat. You can also use an acrylic block.
- Add some color to your white embossing paste by mixing it with dye ink, mixed media ink, alcohol ink, liquid watercolor, etc.
- Make sure to clean it up before it dries up. It will be more challenging to clean up when it’s already dry.
- Always (and we mean ALWAYS) clean your stencils and palette knife after using them. Trying to remove hard, dried-up embossing paste with glitter on a stencil or a palette knife is a huge pain in the neck.
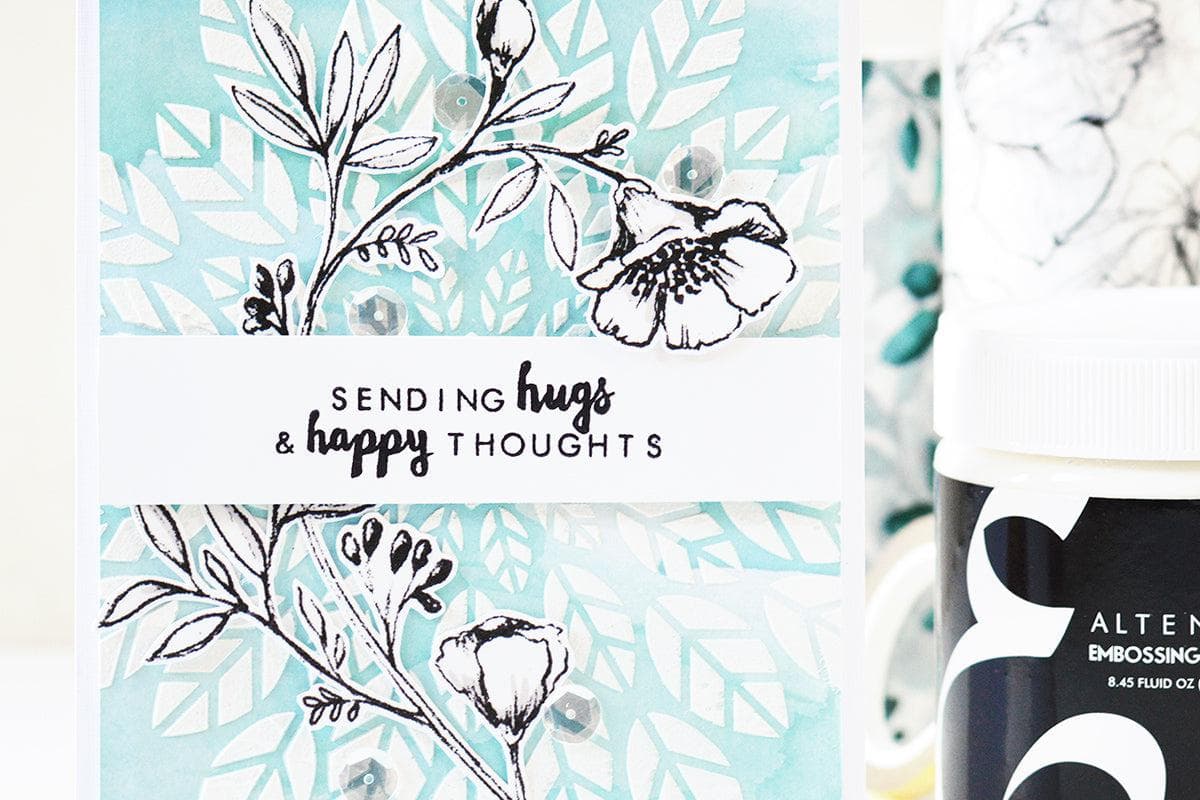
There is a wide range of stencils readily available in the market today - from simple designs like flower stencils and leaf stencils to more complex ones like kaleidoscopes and mandalas. Compared to other paper crafting supplies like stamps and dies, stencils are relatively cheaper too. That’s why it’s even more fun to try stencil craft ideas and create stunning handmade cards, scrapbook pages, and other DIY crafts with stencils. Are you ready to build your collection of stencils? CLICK HERE!


