A Touch of Whimsy Release Video Hop – Gradient Layered Stenciling Tutorial
by Lydia Evans April 16, 2021


Hello everyone and a very happy Friday. Lydia here. I'm so excited to be the start of the video hop. Today, we are continuing our celebrations for our Whimsical Wonder Release with our A Touch of Whimsy Video Hop over on our YouTube channel.
Add a touch of whimsy to your projects with this charming release! The stamp designs feature enchanting hand-drawn florals, a sweet tea set, an adorable sleepy cat, and unique stamps to help you create your own tie-dye patterns. These sets are accompanied by coordinating dies, mask stencils, and simple coloring stencils for your convenience. A layering stencil set, five 3D embossing folders, and two amazing paper packs are also included. You'll love showing off your crafting pride with our new decal set, and our washi tapes will be the perfect finishing touch for any project. To top it all off, we have a lovely Craft Your Life Tote Bag you can use to store all of your new goodies!

Check out our new stamps, dies, stencils, embossing folders, washi tapes, patterned paper, tote bag, and decals HERE!
Project
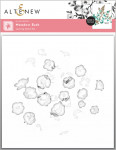
Today, I'll be sharing a beautiful gradient stenciling technique using Meadow Bush Simple Layering Stencil Set.
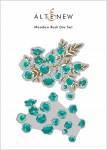
 I stated by stenciling through the leaf layer of the Meadow Bush Layering Stencil Set using Bamboo, Parrot, and Olive Crisp Dye Inks. For the first layer of the flowers, I used Baby Pink and Dew Drops, only going halfway over the stencil with each color. The second layer was colored using Fuchsia and Aqualicious Inks, again going halfway with each of the colors. Then, the last layer was done using Magenta and Teal Cave Crisp Dye Inks. I then stenciled the flower layers again using the same inks, but where I added the blues the first time, I added the pinks and vice versa. Once all the stenciling was done, I added a little extra detail to the leaves and stems using Shadow Creek Woodless Watercolor Pencil.

These images were then die cut using the coordinating dies. To add a little extra texture, I embossed a 4″ x 5 1/2″ piece of white cardstock using Diamond Stars 3D Embossing Folder and added this to the card base.
I then added the full stenciled image into place on the card base using foam tape. And adhered the other little die-cut flowers into place. The sentiment is from Circled Sentiments Stamp Set and was stamped using Obsidian Pigment Ink.

To see how this card came together please watch the video below. Or over on YouTube:
Thanks so much for stopping by!
Giveaway
$200 in total prizes! Altenew is giving away a $25 gift certificate to 8 lucky winners. Please leave a comment on the Altenew video and/or each designer’s YouTube video on the hop list by 4/21/2021 for a chance to win. Altenew will draw random 8 winners and announce them on the Altenew Winners Page on 04/23/2021.
Video Hop List
|