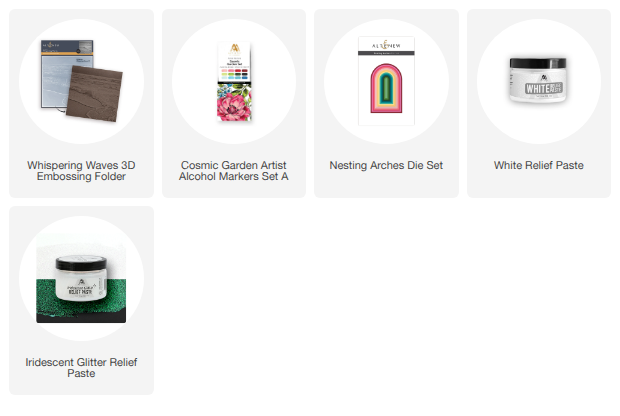
Easy Alcohol Marker Coloring for Scene Embossing Folders
Key Takeaways
Built-In Roadmap: 3D scene embossing folders eliminate the need for advanced coloring skills. The raised and recessed textures of the paper act as a physical guide for marker placement, naturally indicating where highlights and shadows belong.
Ideal Media Pair: Alcohol markers are highly effective for coloring textured cardstock. They lay down vibrant, smooth ink that saturates the embossed paper evenly without tearing or pilling the distressed fibers.
Texture-Enhancing Accents: Adding iridescent glitter paste to the raised ridges of an embossed image (like the crests of waves) amplifies the folder’s depth, mimicking realistic light reflections with minimal effort.
Strategic Ink Masking: Leaving unembossed space at the top of a panel allows you to use nesting dies as stencils. Masking creates clean, smooth background focal points—like a glowing sunset—to perfectly balance heavily textured elements.
Scene embossing folders can be some of the most beautiful, intricate products in our craft rooms. However, they can also feel a little intimidating at first glance. Once all of that gorgeous, detailed texture is embossed into your cardstock, it can be difficult to know exactly where to start with your coloring.
If you have ever stared at a deeply textured panel and wondered how to bring it to life, you are not alone! Today, I’m sharing an incredibly simple way to add vibrant color to the Whispering Waves 3D Embossing Folder using standard alcohol markers. This beginner-friendly technique doesn't require advanced blending or shading skills, yet it effortlessly creates a detailed, multi-dimensional ocean scene with plenty of visual interest.
To finish this handmade card, I added iridescent glitter paste for a touch of realistic ocean sparkle and created a breathtaking custom sunset sky using a clever masking technique with the Nesting Arches Die Set. The final result is a greeting card that looks meticulously detailed and layered, while keeping the actual coloring process approachable, stress-free, and fun.

How to Color Embossing Folders: Let Texture Do the Work
One of my absolute favorite things about using alcohol marker coloring for scene embossing folders is that the physical texture of the paper actually helps guide your hand. You don't need to be a master artist to get gorgeous results.
Pro-Tip: When working with 3D embossing folders, let the paper's natural highlights and shadows dictate your marker placement.
Instead of worrying about creating every single shadow, gradient, and highlight yourself from scratch, the raised and recessed areas of the embossing folder provide a built-in roadmap. This makes scene embossing folders a fantastic place to experiment with alcohol markers, even if you don't consider yourself an experienced colorist.
For this specific project, I leaned heavily into the beautiful, crisp details of the Whispering Waves 3D Embossing Folder. The deep ridges helped define the natural movement of the water, making it easy to see exactly where to deposit color to build a churning, realistic ocean scene.

Elevate Your Embossed Scene: Add Sparkle for Extra Dimension
What is an ocean scene without a little bit of sunlight dancing on the water? After the initial alcohol marker coloring was complete, I decided to step up the realism by adding iridescent glitter paste to select portions of the ocean waves.
This quick step adds another tactile layer of interest while beautifully highlighting the raised texture already created by the embossing folder. As the finished card catches the light, the strategic sparkle enhances the illusion of movement in the waves and truly brings the ocean scene to life. Small, thoughtful details like this can make a massive impact on your final design without adding a lot of extra work or drying time.

Crafting the Background: Create a Custom Sunset Sky
To complete the horizon line of our scene, I purposely left an open, unembossed space right above the ocean. I chose to fill this area with a glowing sunset by using the Nesting Arches Die Set as a custom mask.
Ink masking is one of my favorite ways to customize a card background because it allows you to create unique, crisp focal points without needing to buy additional specialty stamps or products. In this case, the elegant arched shape perfectly established the boundaries of a setting sun and provided a warm, beautiful backdrop for the cool ocean below. Combining this smooth sunset sky with the deeply textured, colored waves instantly transformed the embossed panel into a cohesive, complete landscape scene.
Why Alcohol Marker Coloring for Scene Embossing Folders Works So Well
If you’ve ever struggled to make your textured cards pop, try thinking of your embossing folder as the solid foundation for your media rather than just a background. When you break it down, a complex-looking card is really just a combination of simple steps:
The Texture Provides the Detail: The 3D folder does the hard work of creating depth.
The Alcohol Markers Add Color: Quick marker strokes bring vibrant life to the shapes.
The Glitter Paste Adds Sparkle: Glitter highlights mimic natural sunlight on water.
The Masking Creates a Focal Point: A masked sunset grounds the scene and adds a story.
Together, these accessible cardmaking techniques create a finished project that looks significantly more complex and time-consuming than the individual steps required to make it.
Video Tutorial: Whispering Waves Cardmaking Guide
Watch the video tutorial below to learn exactly how to combine alcohol markers and embossing folders for beautiful handmade cards!

In this full video walkthrough, I’ll take you step-by-step through the alcohol marker coloring process, show you my favorite trick for applying iridescent glitter paste cleanly to the waves, and demonstrate the simple masking technique I used to create the glowing sunset sky.
Final Thoughts
I absolutely love finding innovative ways to make highly detailed crafting products feel more approachable for cardmakers of all skill levels, and this project is a prime example of that. By letting your embossing folder do much of the heavy lifting, you can create a jaw-dropping ocean scene without needing advanced blending or illustration skills.
If you give this alcohol marker coloring for scene embossing folders technique a try, I would love to hear how it works out for you! Let me know your thoughts in the comments section below, and don't forget to watch the embedded video tutorial for all the fine details.
Happy Crafting! 🌊☀️✨
- Nicki

The Big Craft Haul Annual Sale
Save up to 50% off Tools & Adhesives and get a FREE Shimmer Relief Paste - Brass (worth $12.99) on orders over $59 within the collection. Shop here: Offer runs from June 24, 2026 at 12:01 AM EDT until June 25, 2026 at 11:59 PM EDT. (exclusions apply)
Shop here: https://altenew.com/collections/papercrafting-warehouse-sale
SUPPLY LIST