


Graphic Card Ideas: Two Bold Fall Layered Designs
Last Updated: November 26, 2025
Fall is the perfect time to play with rich colors, bold contrasts, and layered elements in cardmaking. For today’s post, I’m sharing two cards that showcase strong visual impact and vibrant focal points — both are what I like to call graphic cards. Each one highlights different techniques, from layered die cuts to embossed backgrounds, giving your projects a striking, eye-catching look.
Creating a Graphic Card with a Layered Fall Tree
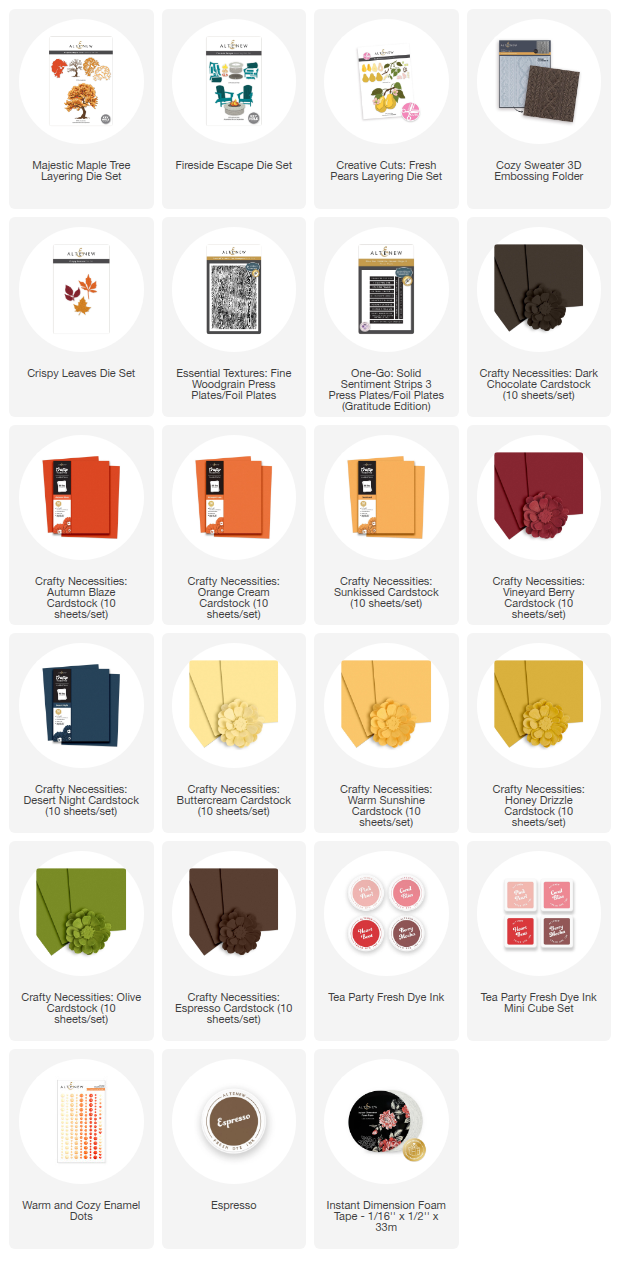
My first card features the beautiful Majestic Marble Tree Layering Die Set, a versatile set that allows you to build a large tree for any season simply by changing the foliage colors. Since I wanted to create a bold fall-themed design, I went with warm, rich autumn hues. This approach helps create a truly graphic card with strong visual contrast.

Die-Cutting the Fall Elements
I die cut all the tree layers using cardstock from the Crafty Necessities line. For the trunk, I used Dark Chocolate cardstock, and for the foliage layers I chose Sunkissed, Orange Cream, and Autumn Blaze cardstock. Once all the pieces were cut, I assembled and adhered them with liquid glue to create the dimensional layered tree.
To bring a cozy scene to life, I reached for the Fireside Escape Die Set and die-cut a pair of Adirondack armchairs from Vineyard Berry cardstock. Their deep red shade complements the warm fall tree perfectly and adds another pop of color to the graphic card design.

Building the Background and Adding Dimension
For the background, I embossed Desert Night cardstock — a deep, elegant blue — using the Cozy Sweater 3D Embossing Folder. I love how this textured navy panel contrasts with the bright foliage and the bold red chairs.

I mounted it onto a white card base, then popped up the tree and chairs using black adhesive foam squares. Since all the elements on this card are darker in color, black foam was crucial; white foam would have been visible from the side.

For the sentiment, I used the One-Go: Solid Sentiment Strip 3 Press Plates, pressing the strips with Berry Mocha Fresh Dye Ink from the Tea Party bundle. I popped the sentiment onto the tree using thin black foam squares, just enough to lift it without adding extra bulk to this already dimensional graphic card.
As a finishing touch, I added several enamel dots from the Warm & Cozy Enamel Dots set. The combination of rich layers, bright focal points, and textured background makes this card a perfect example of a striking, graphic card for fall.
Autumn Inspiration: Graphic Card with Layered Pears
For my second card, I used the adorable layered pears from the Creative Cuts: Fresh Pears Die Set as the main focal point. I wanted this card to feel warm and cozy, so I chose a soft monochromatic palette built around gentle yellows and natural neutrals.

Assembling the Layered Pears
The die-cut layers make it really easy to create pears with depth and personality, and the subtle color variations add a nice realistic touch. I die cut the pear layers from Crafty Necessities: Honey Drizzle, Warm Sunshine, and Buttercream cardstock — these warm yellows blend beautifully and create a soft, dimensional look. For the stems, I used Espresso cardstock, and for the leaves I used Olive cardstock.
To bring in more fall foliage, I also die cut several full leaves using the Crispy Leaves Die Set, this time in Vineyard Berry, Sunkissed, and Orange Cream cardstock.
With all the elements ready, I assembled the pears with liquid adhesive and set them aside while working on the background.
Creating the Woodgrain Background
For the background panel, I used the Essential Textures: Fine Woodgrain Press Plate, impressing the pattern into Espresso cardstock with Espresso Fresh Dye Ink. This gave the panel a rich, natural texture that pairs so well with the autumn theme.
I then popped the panel onto a white card base using Instant Dimension Foam Tape, creating a subtle texture that helps this card qualify as a graphic card, even if the focal elements are cleaner and simpler.

Next, I arranged the pears and leaves into an autumn cluster, tucking the leaves slightly behind the fruit. One pear is adhered flat, and the other is popped up using thin black foam squares to give a bit of lift and shadow, enhancing the visual impact.
For the sentiment, I used the One-Go: Solid Sentiment Strip 3 Press Plates, pressing onto Buttercream cardstock with Berry Mocha Fresh Dye Ink.

I intentionally skipped ink-blending and additional embellishments to maintain a clean, crisp look. Even with minimal layering, the graphic card effect is achieved through bold color choices and strong background contrast.
Final Thoughts on Creating Graphic Cards
Both of these projects show that a graphic card doesn’t have to be complicated to make a strong impression. The Majestic Marble Tree card demonstrates how layering and dimensional elements can make a card pop, while the layered pears card proves that bold color choices and a striking background can achieve a similar effect even with cleaner designs.
If you’re looking to make cards that really stand out, consider experimenting with graphic cards using bright focal points, bold backgrounds, and thoughtful layering techniques. These simple principles can help you create projects that feel modern, vibrant, and visually impactful — perfect for any season or occasion.

Need a bit of extra inspo for your next cardmaking project? Get these FREE & Printable Card Layouts to help you conceptualize and construct your next creation. Use it as a template or simply as inspiration to get those creative juices flowing. Download them HERE!
SUPPLY LIST


In This Article


More Crafty Reads & Inspirations
-
Starting 2026 With a Clean Slate and Using Up Leftovers
-

January 2026 Inspiration Challenge
-

Simple Tips To Bring Your Die Cut Florals To Life - A Touch of Sparkle With Carissa Wiley
-
3 Secrets for No-Outline Watercoloring: The Art of the Disappearing Line | Perfect Pairings with Jaycee
-
Card Ideas that Symbolize New Beginnings


