Fun Inky Tips for Adding Color to Embossed Designs
Last Updated: August 29, 2025
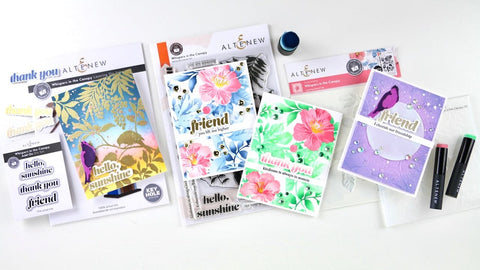
Embossing is a classic and elegant technique that adds dimension and texture to your paper crafts. Whether you're creating stunning handmade cards, scrapbook layouts, or art journal pages, embossed designs have an undeniable charm. But have you ever thought about adding a splash of color to those beautifully raised patterns? If you're ready to take your embossed designs to the next level, we have some fun inky tips to help you achieve stunning and colorful results.

Layered Dahlia Stencil Set (A & B)
Embossing 101
Embossing in cardmaking creates raised or textured designs on paper or cardstock. It adds depth and dimension to your handmade cards, making them more visually appealing and exciting. There are two main types of embossing used in cardmaking:
Dry Embossing
This involves using a stencil or embossing folder to press a design into the paper or cardstock. The embossing folder has a raised pattern on one side and a recessed pattern on the other. You place your paper or cardstock inside the embossing folder, run it through a manual or electric embossing machine, and the pressure from the machine presses the pattern onto the paper, creating a raised design. Dry embossing can be done with or without ink or other coloring mediums.
Heat Embossing
Heat embossing involves using heat to melt embossing powder onto the paper or cardstock, creating a raised, glossy, and textured effect. The process consists in stamping an image or design onto the paper using embossing ink (a slow-drying, sticky ink), sprinkling embossing powder over the stamped image, tapping off the excess powder, and then using a heat tool to melt the powder. As the powder dissolves, it fuses to form a smooth, raised design. Heat embossing is often used with rubber stamps and is famous for adding metallic or colored accents to card designs.
Both embossing types can be combined with other cardmaking techniques like stamping, coloring, die-cutting, and layering to create intricate and visually appealing designs.
Inking Tips to Elevate Your Embossed Designs
Embossing adds a tactile element to your cards, making them stand out and have a professional look. Take it to the next level with these fun inky tips!
White Pigment Ink: The Base for Brilliance

One of the most magical ways to introduce color to embossed designs is by starting with a white pigment ink base. White pigment ink acts as a blank canvas, allowing the colors you layer on top to pop and shine genuinely. Apply the white pigment ink over your embossed design using a brayer, blending tool, or even a sponge dauber. This creates a soft and muted backdrop for your colors to dance upon.
Vibrant Enhancements with Fresh Dye Inks
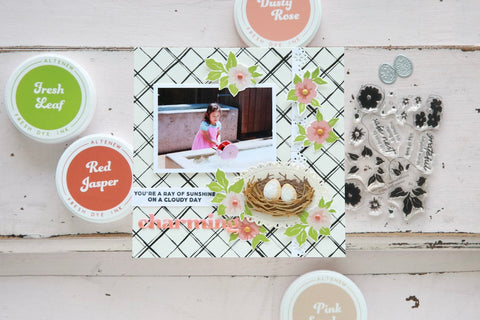
Fresh dye inks come in a wide range of vibrant colors. Different shades can add depth and dimension to your embossed designs, making them visually appealing.
The contrast between the embossed pattern and the inked surface can make the design stand out. Choosing complementary or contrasting ink colors can emphasize the raised embossed areas, creating an eye-catching effect.

Fresh dye inks allow for creativity and personalization. You can experiment with different color combinations, layering techniques, and ink application methods to achieve unique effects that enhance your embossed designs.
Watercolor Wonders: Controlled Chaos

Banana Leaves 3D Embossing Folder
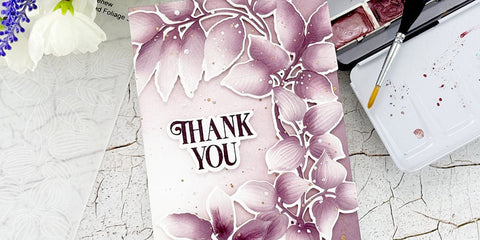
Watercolors are perfect for achieving a more organic and fluid look on embossed designs. Load your brush with a hint of watercolor and gently touch the tip of the brush to the raised areas. Watch as the color spreads and flows, adding an artistic and whimsical touch to your design. You can layer different watercolor hues for a stunning gradient effect or keep it simple with a single shade.
Markers and Pencils: Precision and Detail
If you want to add intricate details and precise pops of color, markers and colored pencils are your go-to tools. Choose fine-tipped markers or pencils to color specific sections of your embossed design carefully. This technique allows you to create stunning focal points and highlight intricate patterns with precision and control.

Craft Your Life Project Kit: Florescence
Metallic Magic: Shimmer and Shine
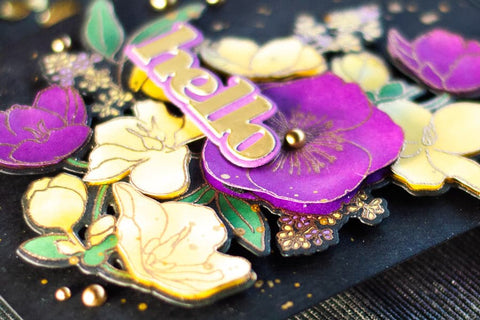
Consider using metallic inks or paints on your embossed designs for an extra touch of glamor and elegance. Metallic gold, silver, and copper add a luxurious shimmer that elevates your project to a new level. Apply the metallic ink or paint to the raised areas, allowing the light to catch the gleaming accents.

Crystal Clear Crisp Embossing Powder
Monochromatic Masterpiece: Shades of a Single Color
Monochromatic color schemes can create a sophisticated and harmonious look. Choose a single color and apply shades and tones to your embossed design. This creates a cohesive and visually pleasing effect that showcases the intricate details of the embossing while adding a subtle yet captivating touch of color.

Checkered Squares 3D Embossing Folder
Experiment and Explore: Unleash Your Creativity
Remember, there's no right or wrong way to add color to embossed designs. The key is experimenting and exploring different techniques to find what resonates with your artistic vision. Combine techniques, play with various color palettes, and allow your creativity to run wild. With each experiment, you'll uncover new and exciting ways to bring life and vibrancy to your embossed creations.
Incorporating color into embossed designs opens up a world of creative possibilities. From the soft elegance of white pigment ink to the bold vibrancy of watercolors and metallics, these inky tips will help you create eye-catching and breathtaking works of art. So grab your embossing powders, heat gun, and favorite inks, and get ready to embark on a colorful journey of creativity!
Do you want more ideas and inspiration for your next project? Visit the Altenew Blog today!


