3D Embossing Folder Magic! One Folder, One Diecut Set, Three Ways!
Hi Altenew fans and friends! I hope you are ready for some absolute MAGIC using the beautiful Blooming Doily Charm 3D embossing folder. I am on a bit of a mission to stretch those creative muscles and one way of doing that is using the same product, but different ways, on more than one card. Today's session started out with a test run of the Blooming Doily Charm 3D embossing folder, and it quite quickly (probably to nobody's surprise) escalated to three cards being the end result.
It's your texture, layers and dimension loving gal Erica back on the Altenew blog and YouTube channel, and as mentioned, we are going to add some luscious texture using a 3D embossing folder. If you don't have this one, or don't fancy this one, you can use whichever embossing folder you have in your stash. One of the reasons for this mission I have is to make sure we actually use what's in our stash, a ‘shop your stash' mission, if you like.
First things first, make sure to check the instructions for how to use a 3D embossing folder with your die-cutting machine. I have a Platinum 6 from Spellbinders, and it very helpfully has the instructions on the platform's plates. You only need the base platform, the embossing folder with the cardstock of your choice and the D adaptor plate. It is so easy, and the best part is that it is not a hardcore workout to run it through the machine either! It will probably make you question how something that goes through that easily will actually come out textured, but it does.

In my last blog post and video, I also used a 3D embossing folder, and I don't think I can overstate how amazing they are for adding effortless texture and interest. For how easy they are to use, 3D embossing folders really do pack a punch! Another plus is that they don't take up much space, and they are quite affordable too. Win-win-win!
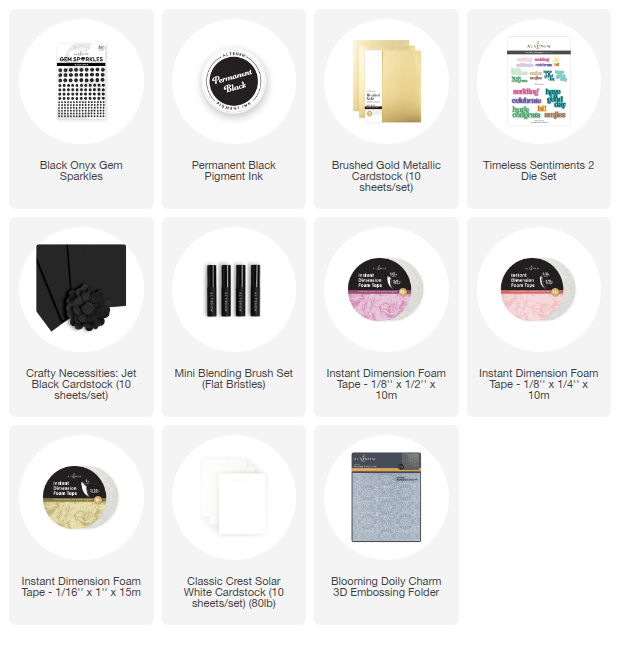
For these cards, I have used both white card stock and Crafty Necessities Jet Black Colored Card Stock, and I can't even decide which one looks best un-dressed like this. That texture is divine! There are so many ways to take these to the next level. You can use the Enchanted Gold Pigment Ink pad and lightly sweep it over the texture. If you prefer Shimmer Relief Paste dab a little on your fingertip or a spatula and gently drag it across the card stock and watch the magic happen.
The Jet Black card stock panel I left as it was, because I had another sparkly plan for it, but one of the white card stock panels got a soft pastel look to it by ink blending (mostly leftover) ink from my ink blending tools over it. The pattern from the embossing folder really picks up the color and makes it stand out even more, than the flat bits.

This technique will work so great with any embossing folder you have, so go to town and have some fun with it! For a light, pastel look, go gently with the blending tools and if you want a bright pop of color, layer it up!
At this point I had three backgrounds, because I am a lunatic, and I can't control myself. I did use the same Blooming Doily Charm 3D embossing folder though, so the mission to use the same products was still on track. I have also used the same word die-cut for all three cards. This is one of my favorites, it says, ‘have a good day' and it's from the Timeless Sentiments 2 set. It's a must have, in my humble opinion.

The Jet Black card stock and Brushed Gold Metallic Card Stock look is so classy. It looks just as good reversed, and also with a rainbow ink blended shadow part. Options are important. That's my stance and I'm not budging, LOL.

Obviously, the texture and dimension of the backgrounds were not enough, we need more height! Instant Dimension Foam Tape to the rescue, and I have used a couple of different sizes to get the pieces evenly propped up. It's sad when you have a lovely sentiment drooping on a card, isn't it?

I have probably over-used this sentiment, but it works for so many things, so why not? I'm also acutely aware of the fact that not everyone is as lucky as I am to get new and wonderful things to play with every month as part of the design team gig, which is another reason I tend to go back and re-use my favorites.
With all of this amazing, or should I say TREMENDOUS texture thanks to that embossing folder, it was easy peasy to then pop the sentiments on their respective backgrounds and call it a day. Except, of course, as mayor of Bling Town I had to add some sparkle. It would almost be a creative crime not to.

I know I keep teasing about these Stellar Sequin mixes, but I PROMISE the wait will be worth it. The Champagne ones are an absolute must if you like a touch of gold. On this card I kept it very sparse, with just three clusters of different sized sequins, attached with the hotly anticipated Altenew glue!

On the white background card, I used the pattern of the embossing folder to add the sequins, again Champagne ones, and while quite a few made it onto this card, I think it works! Because of that lovely doily pattern, it just works.

On the third and final card I added some Black Onyx Gem Sparkles, and I'm quite frankly amazed that I managed to keep it to as few as I did. This might not be ‘a few' to you, but I'm telling you I wanted to follow the pattern from the embossing folder again and add lots more of the smallest gems. I had a quick calculation, and I wouldn't have had enough to do what I really wanted so I'm off to add more of these Black Onyx Gem Sparkles to my cart, lol.

Well, with that, I am done for today, but I hope you get a chance to check out the YouTube video too. It is filled with my usual jibber-jabber but also a few tips and tricks which will hopefully come in handy for you.

Thank you so much for stopping by, I will see you soon again but until then I hope you are exercising those creative muscles and having some fun.
Lots of love, sparkle and creativity,
from your gal, Erica.