Hear From Happy Altenew Fans!
We are honored to have loyal fans and talented crafters around the world using Altenew products. Here is what they have to say about their Altenew experiences. Every crafter’s opinion is valuable to us, and we love hearing from you. Every personal Altenew testimonial you share helps us work towards improving our products and serving our customers better.
Write A Review and Earn Reward Points!
 |
Did you know that sharing a testimonial on any of the products on our website can serve a double purpose? You can help us improve our products while earning your own rewards points! Write a review and get 20 reward points - it's that simple! You can earn up to 140 points daily by leaving 7 product reviews. When we know what you love about Altenew and what you would like improved, we have a better idea of how to serve you better. We would love to have a closer look into your mind and heart so we know how to make your crafting life better. Share your testimonial with us, and help us help you! |
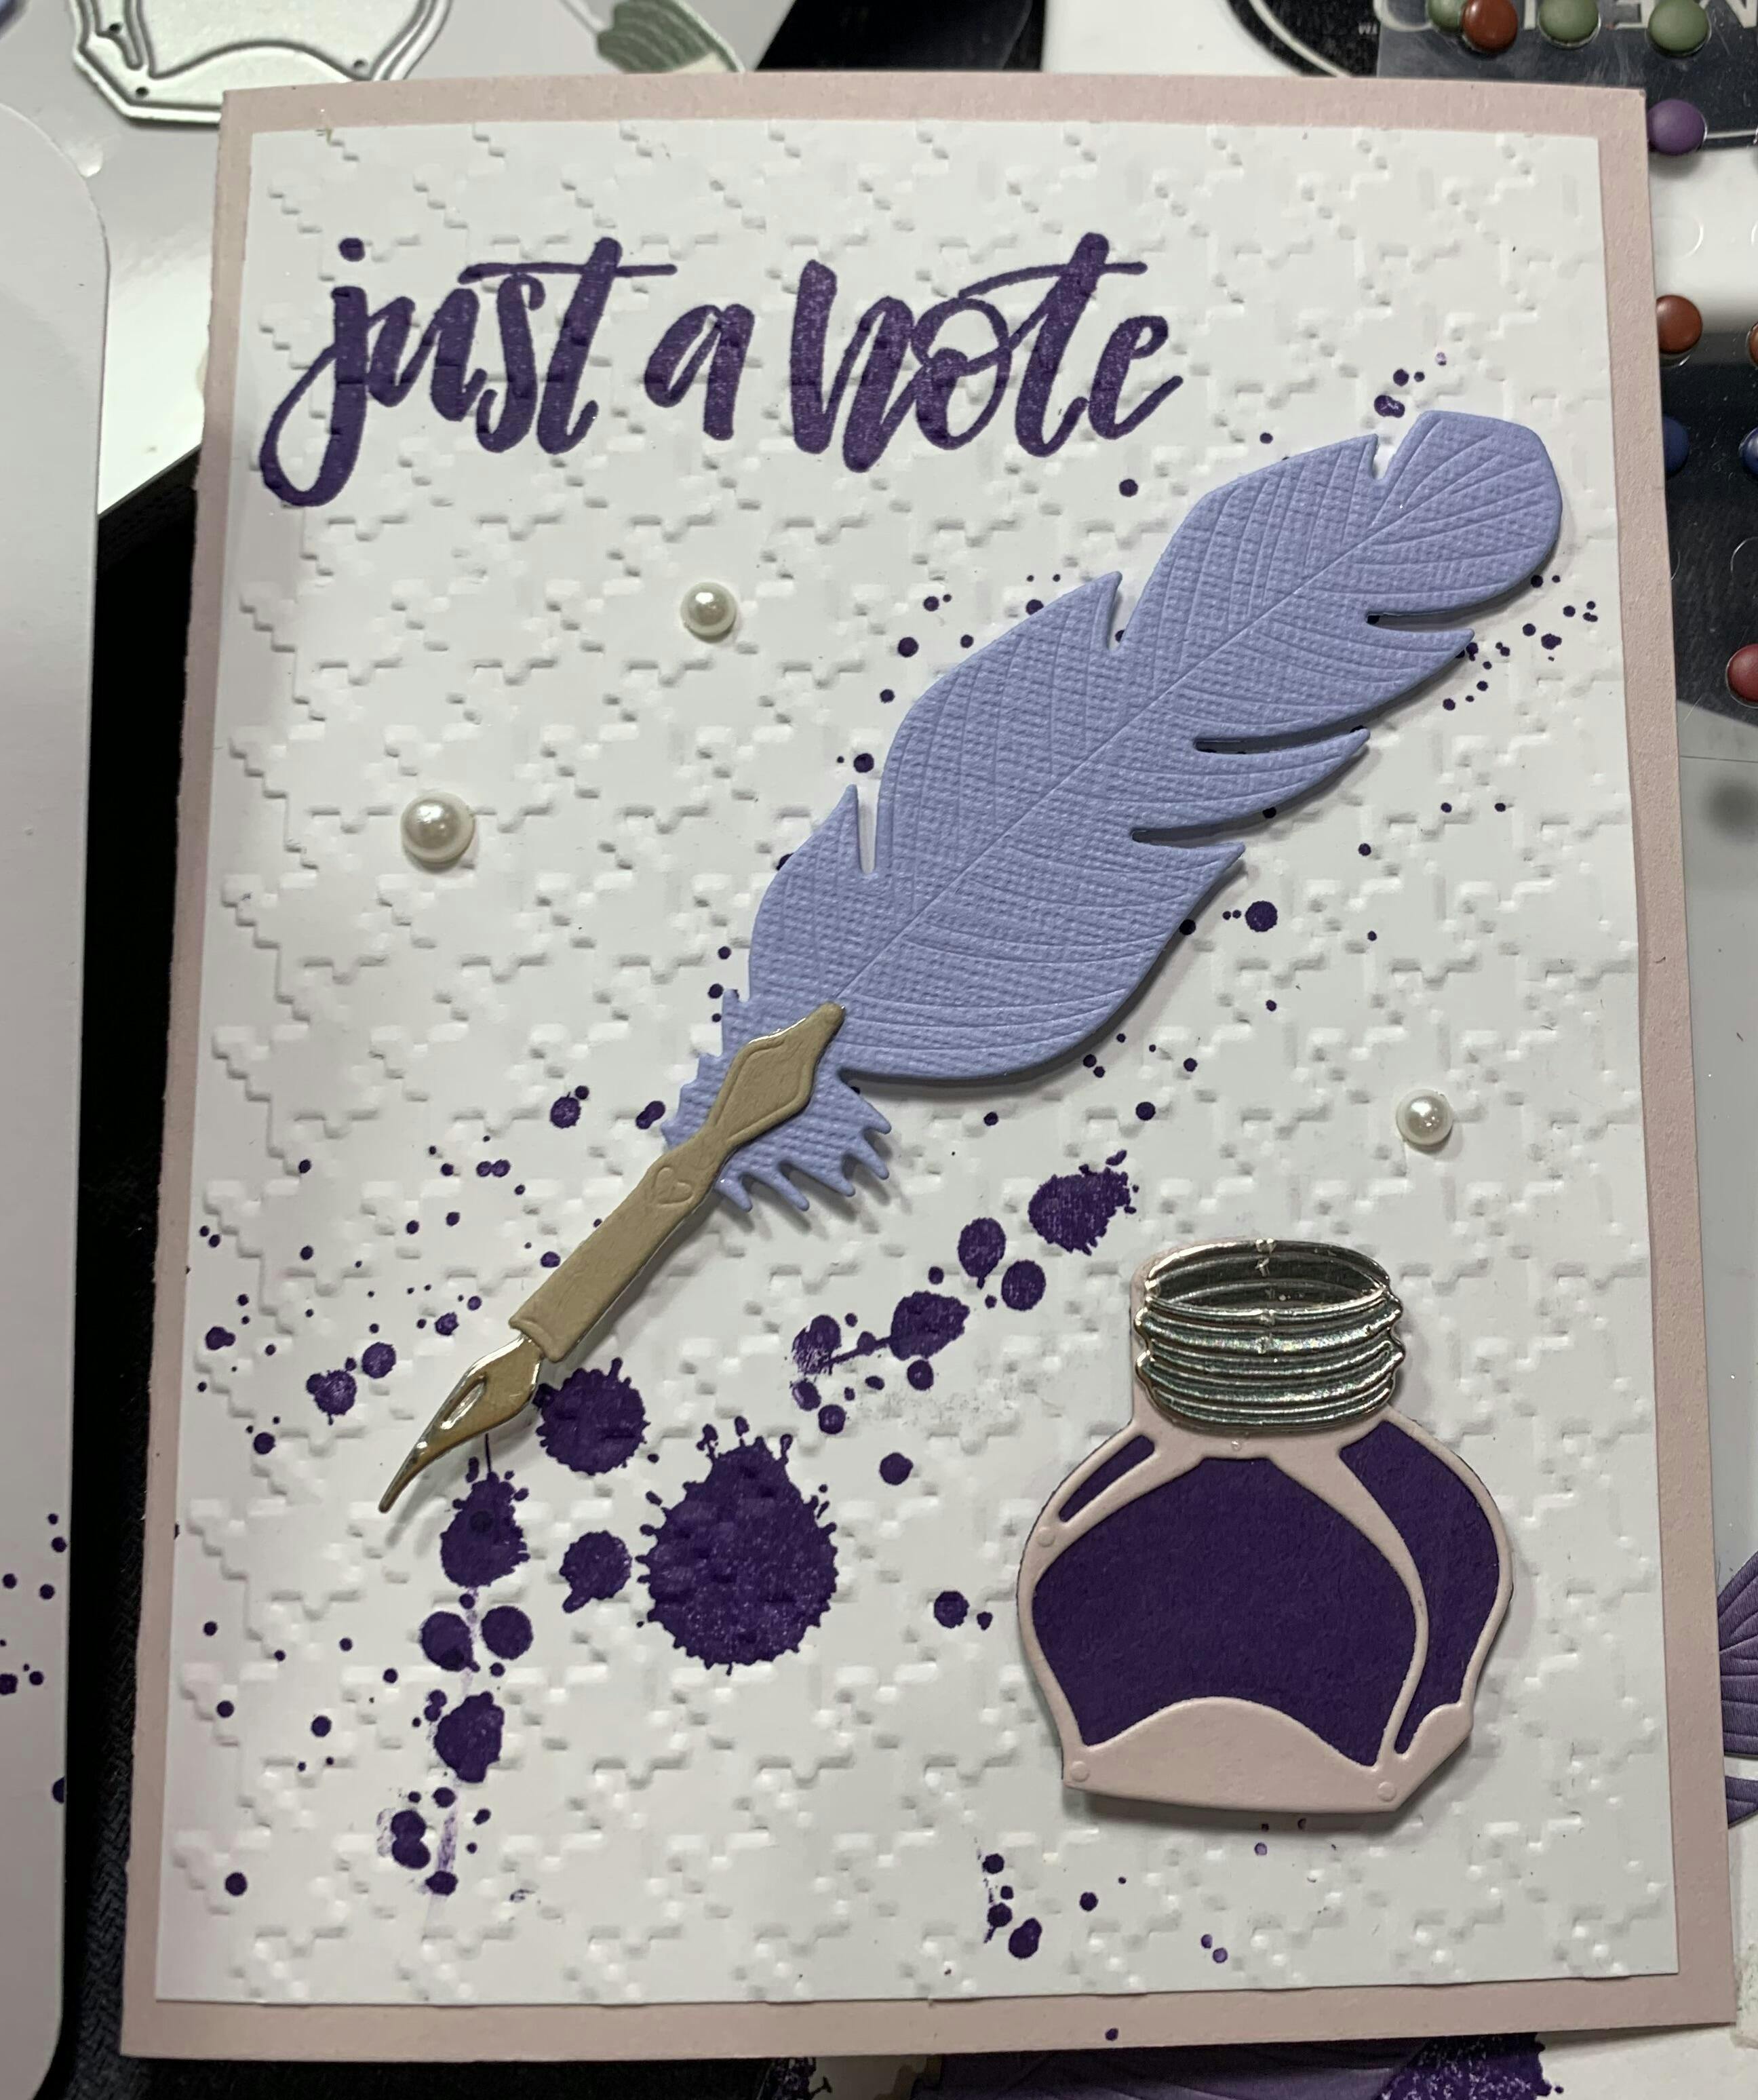
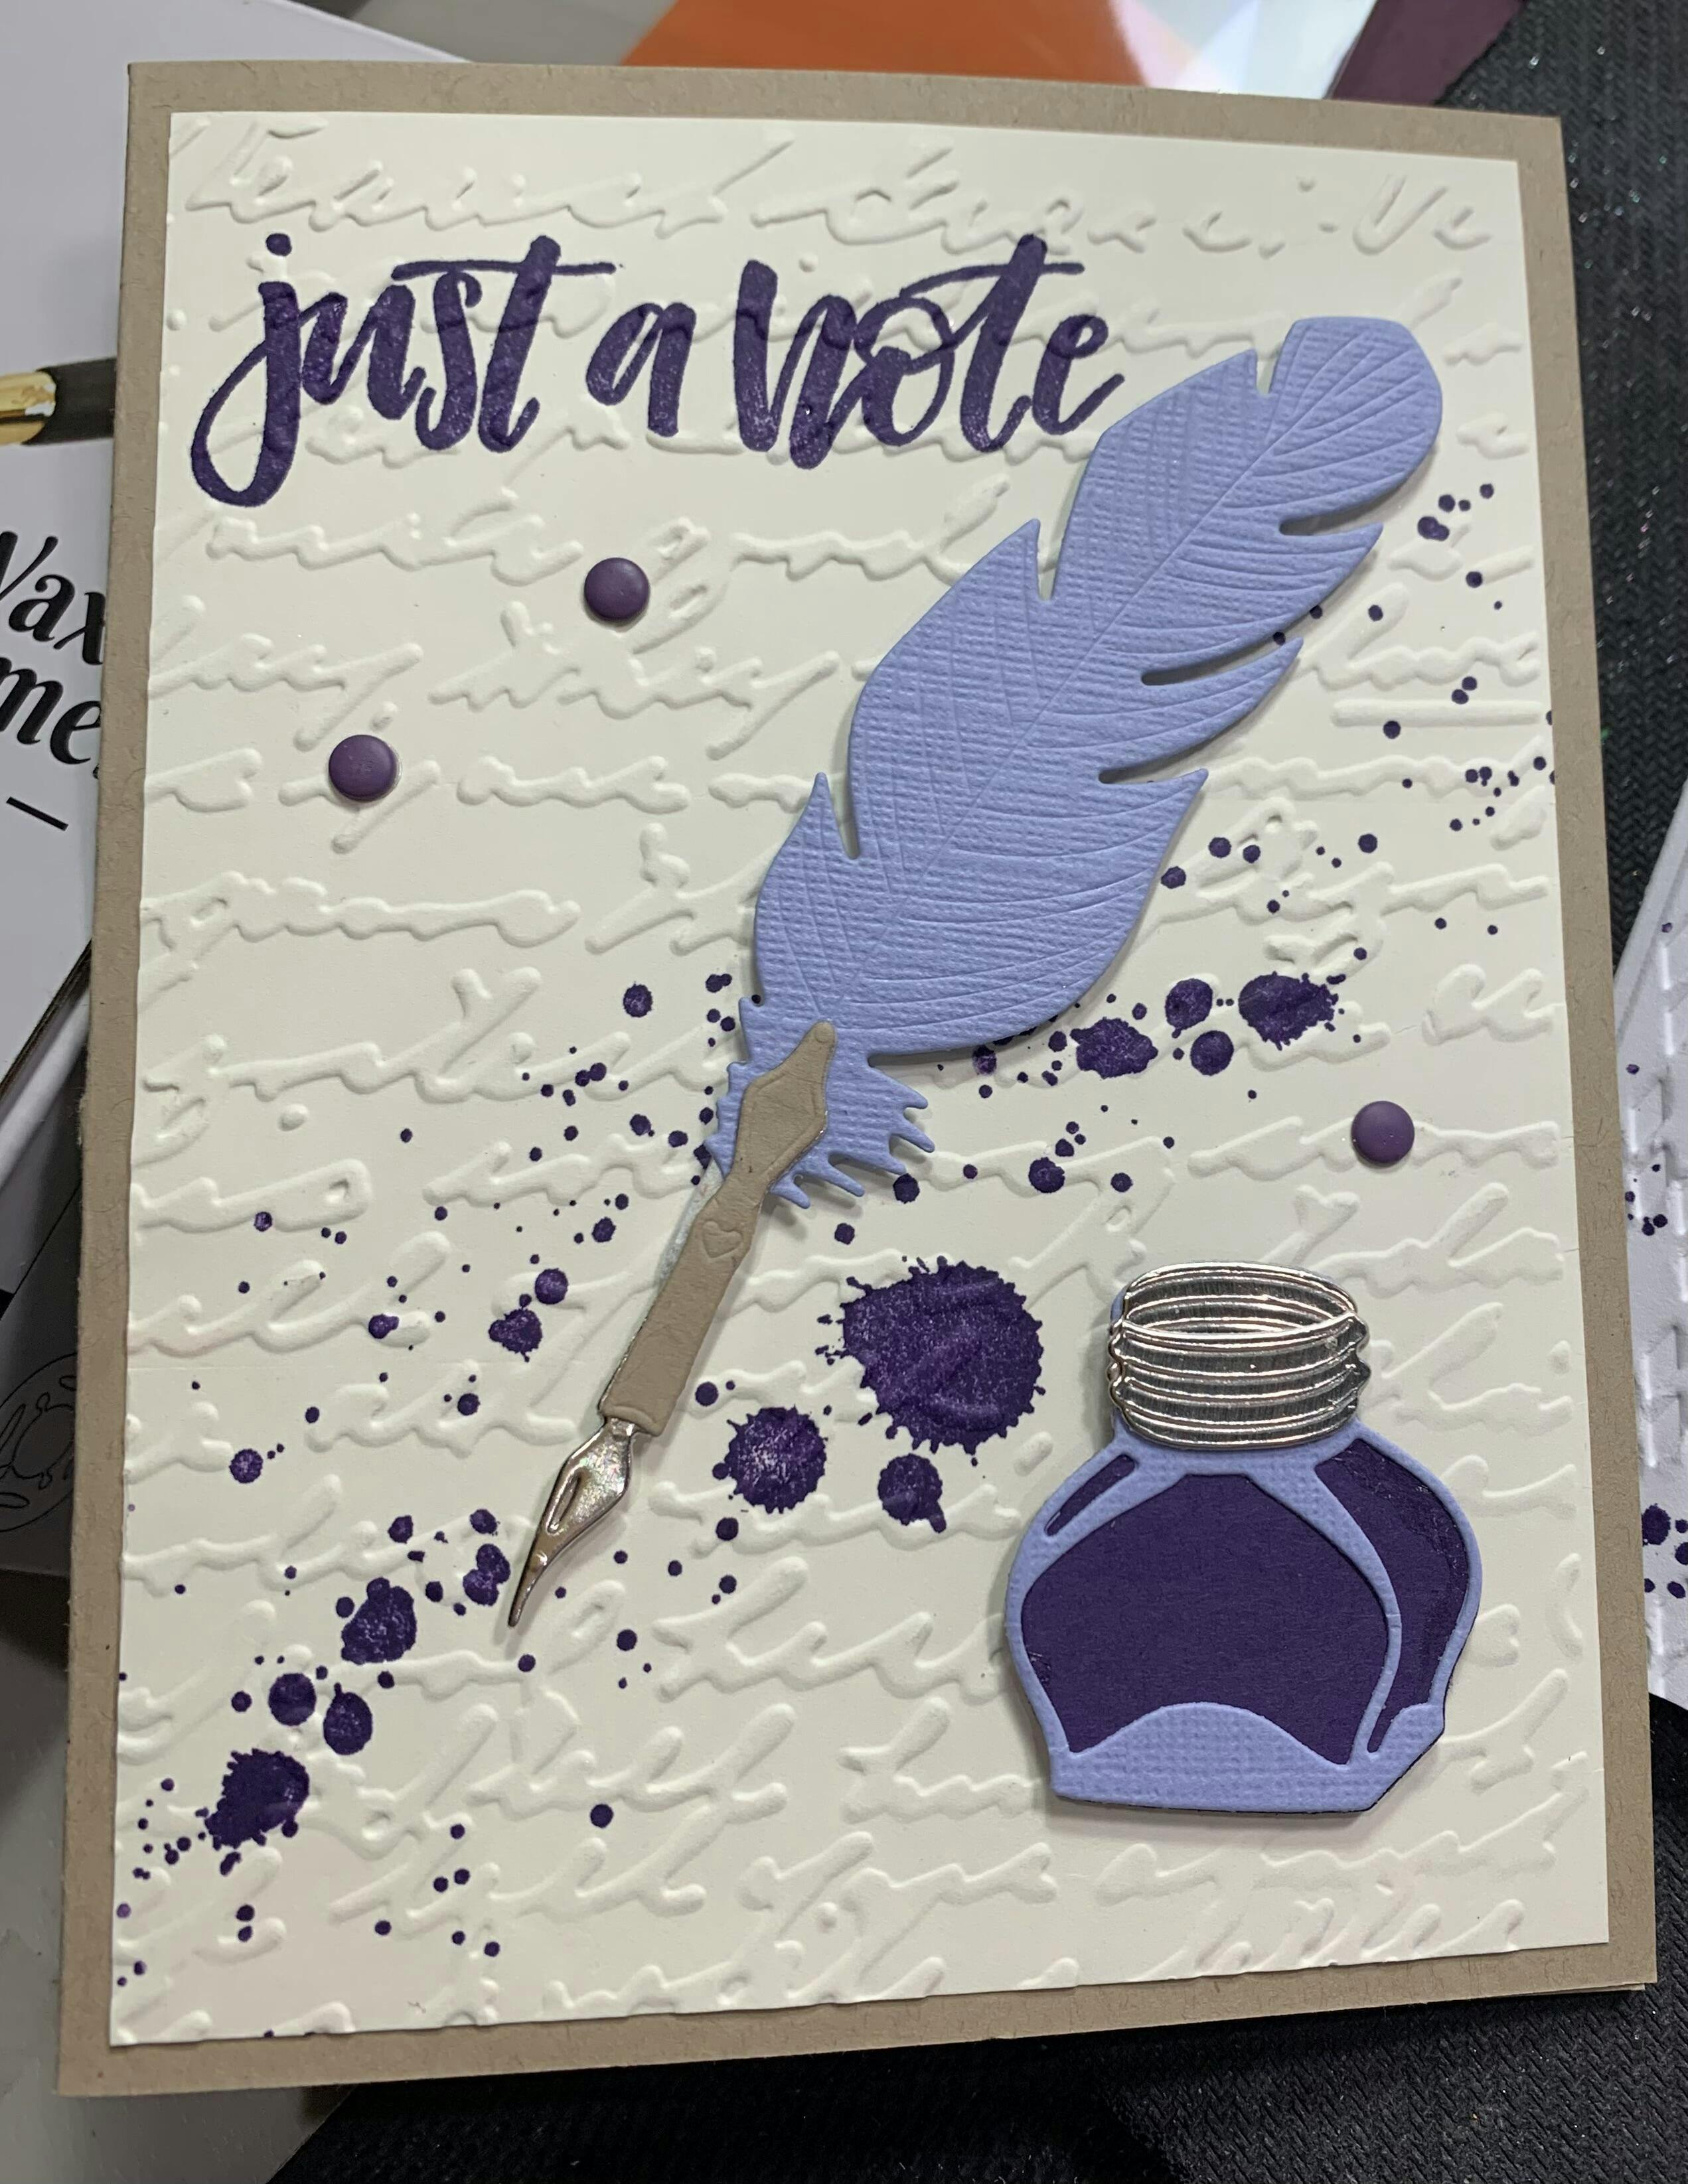
I love that this beautiful little lantern includes so many details and even has a die for the candle and flame! It's easy to assemble with the keyhole system, too!

This is my absolute favorite blue. Actually, out of my whole stash of Fresh Dye Ink Bundles, this is definitely the one I love the most.
I am really loving this neutral color. I always thought that I don't really need a neutral in my stash. but i was completely WRONG!. Neutrals are must have!
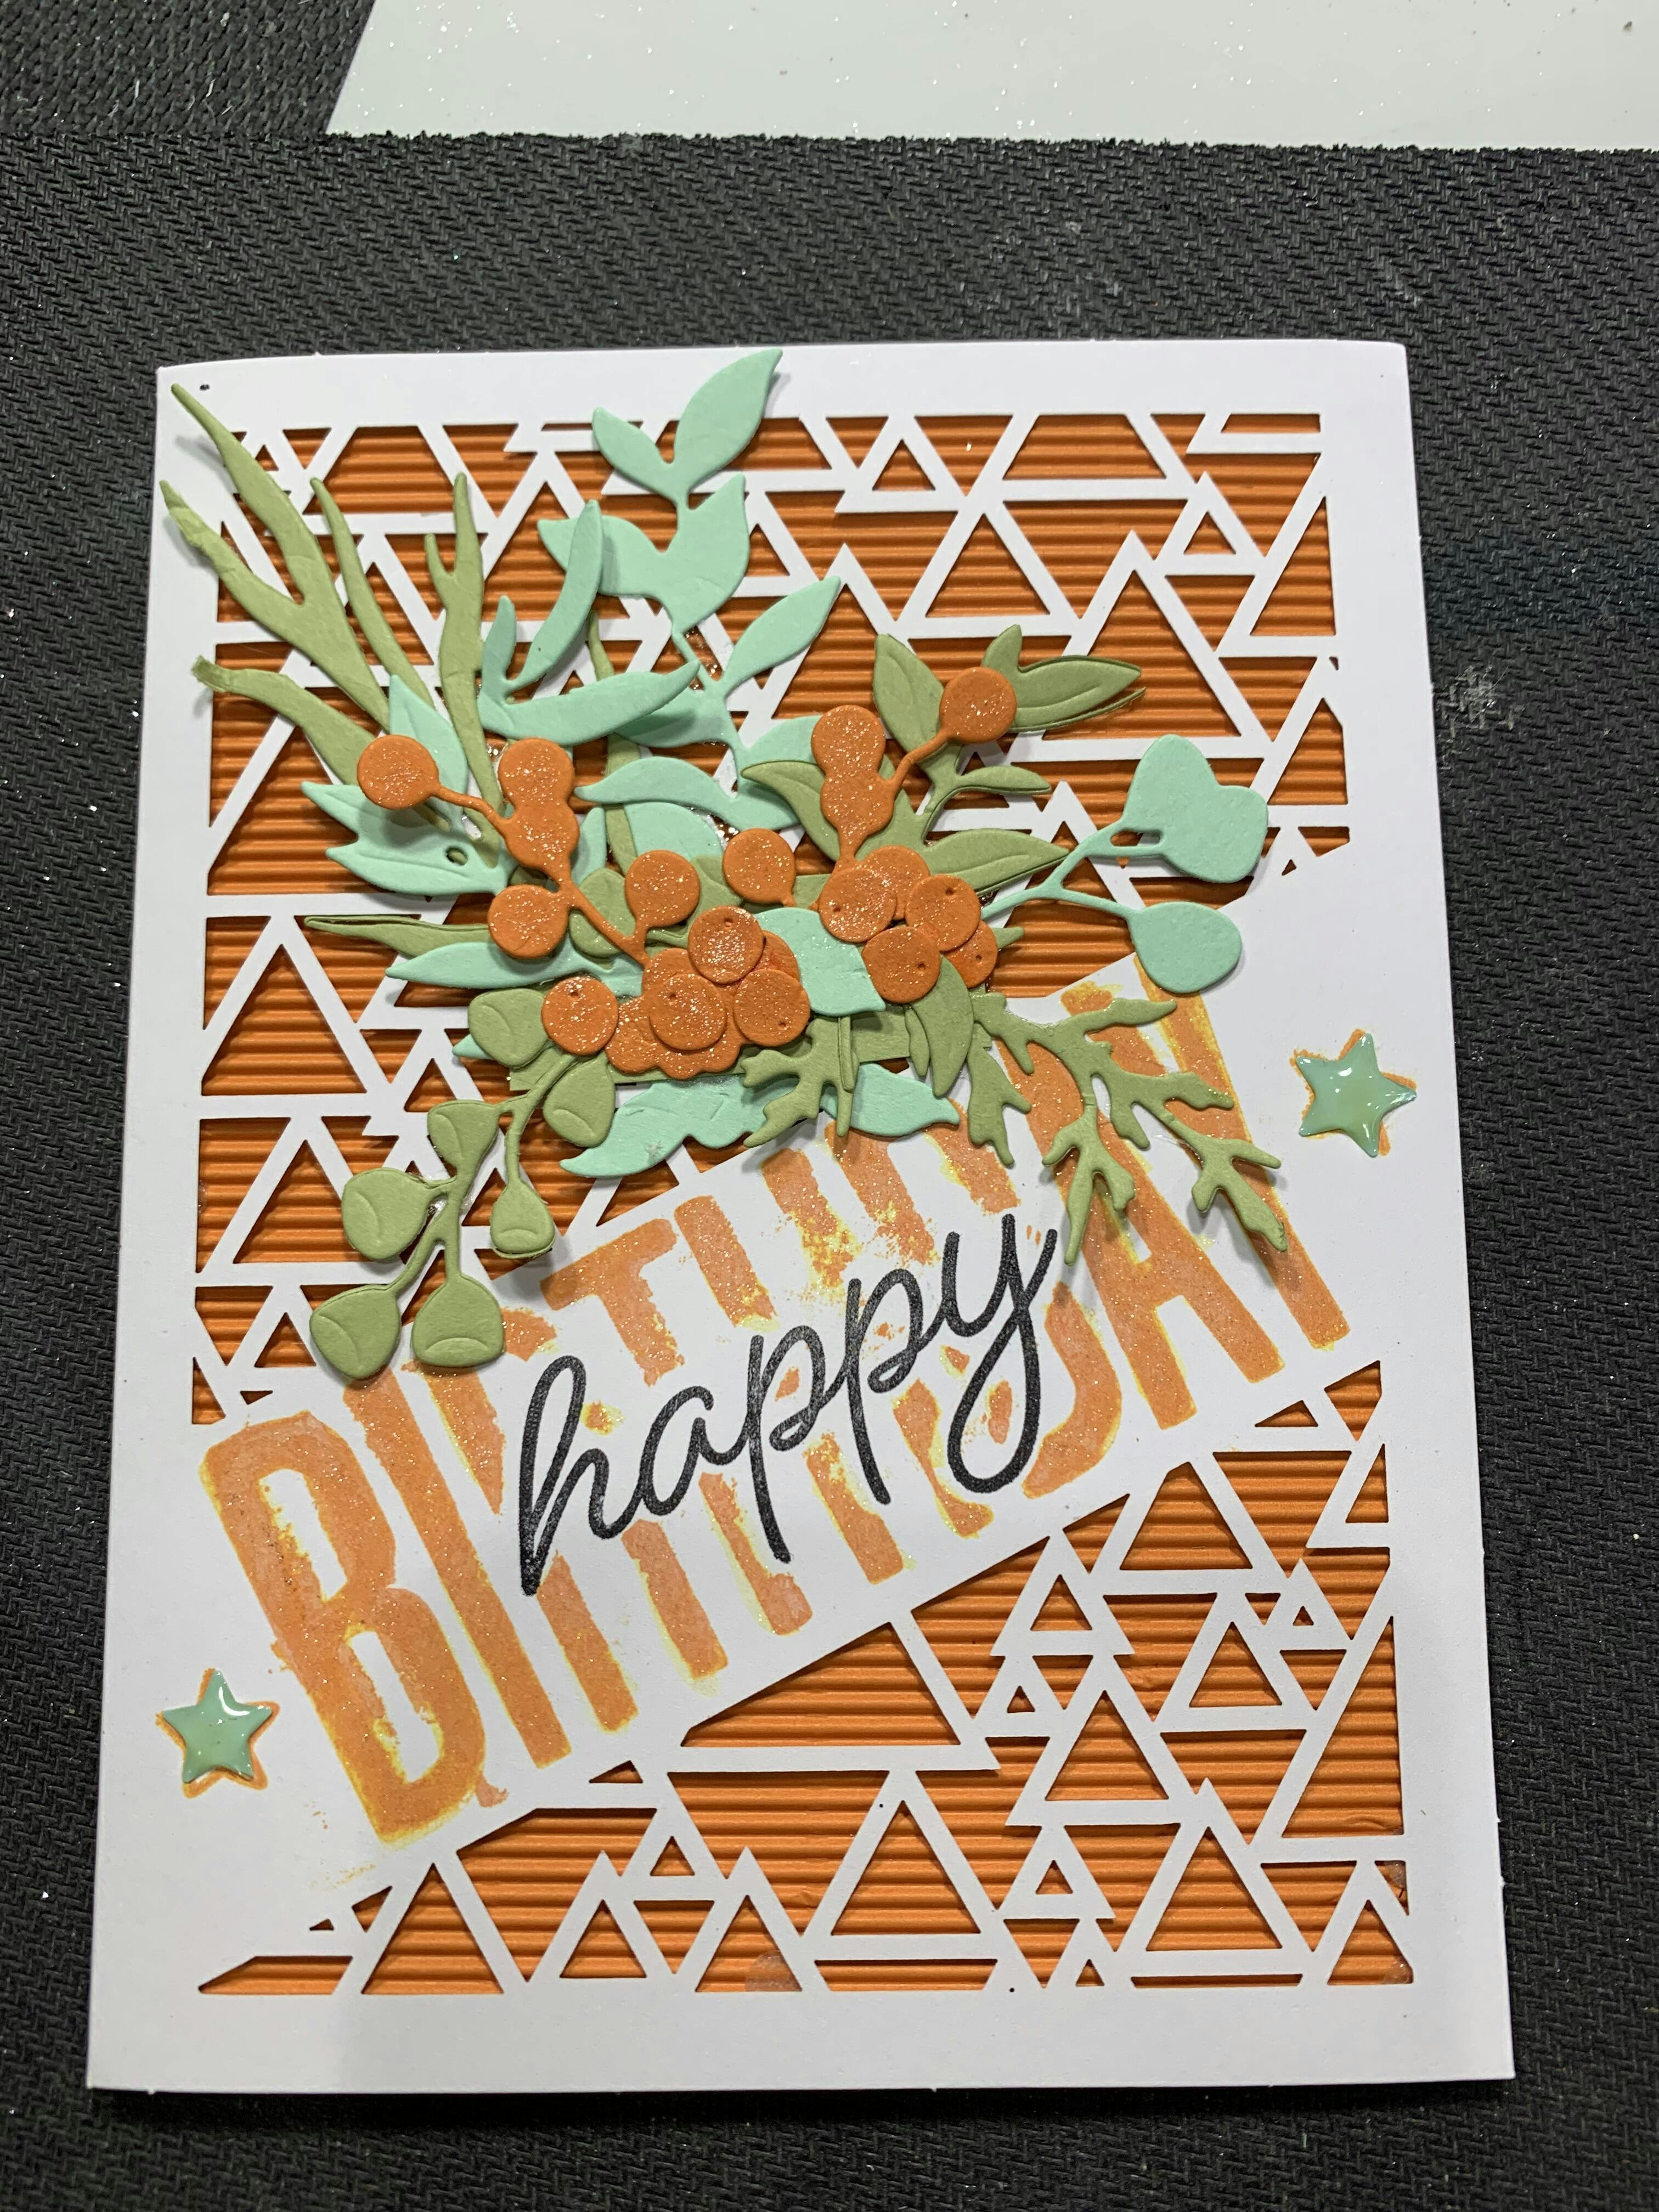
Didn't realize this had two designs til I got finished with the first one lol used oxide inks with large blending brushes. Pretty easy to use, though you may want to mask off the edge of the stencils in some places and part of the floral image in the smaller design. Larger design is pretty large but still usable for A2 sized cards - just have to choose how you want to crop it. Smaller design could make a large element or focal point on a card without cropping.

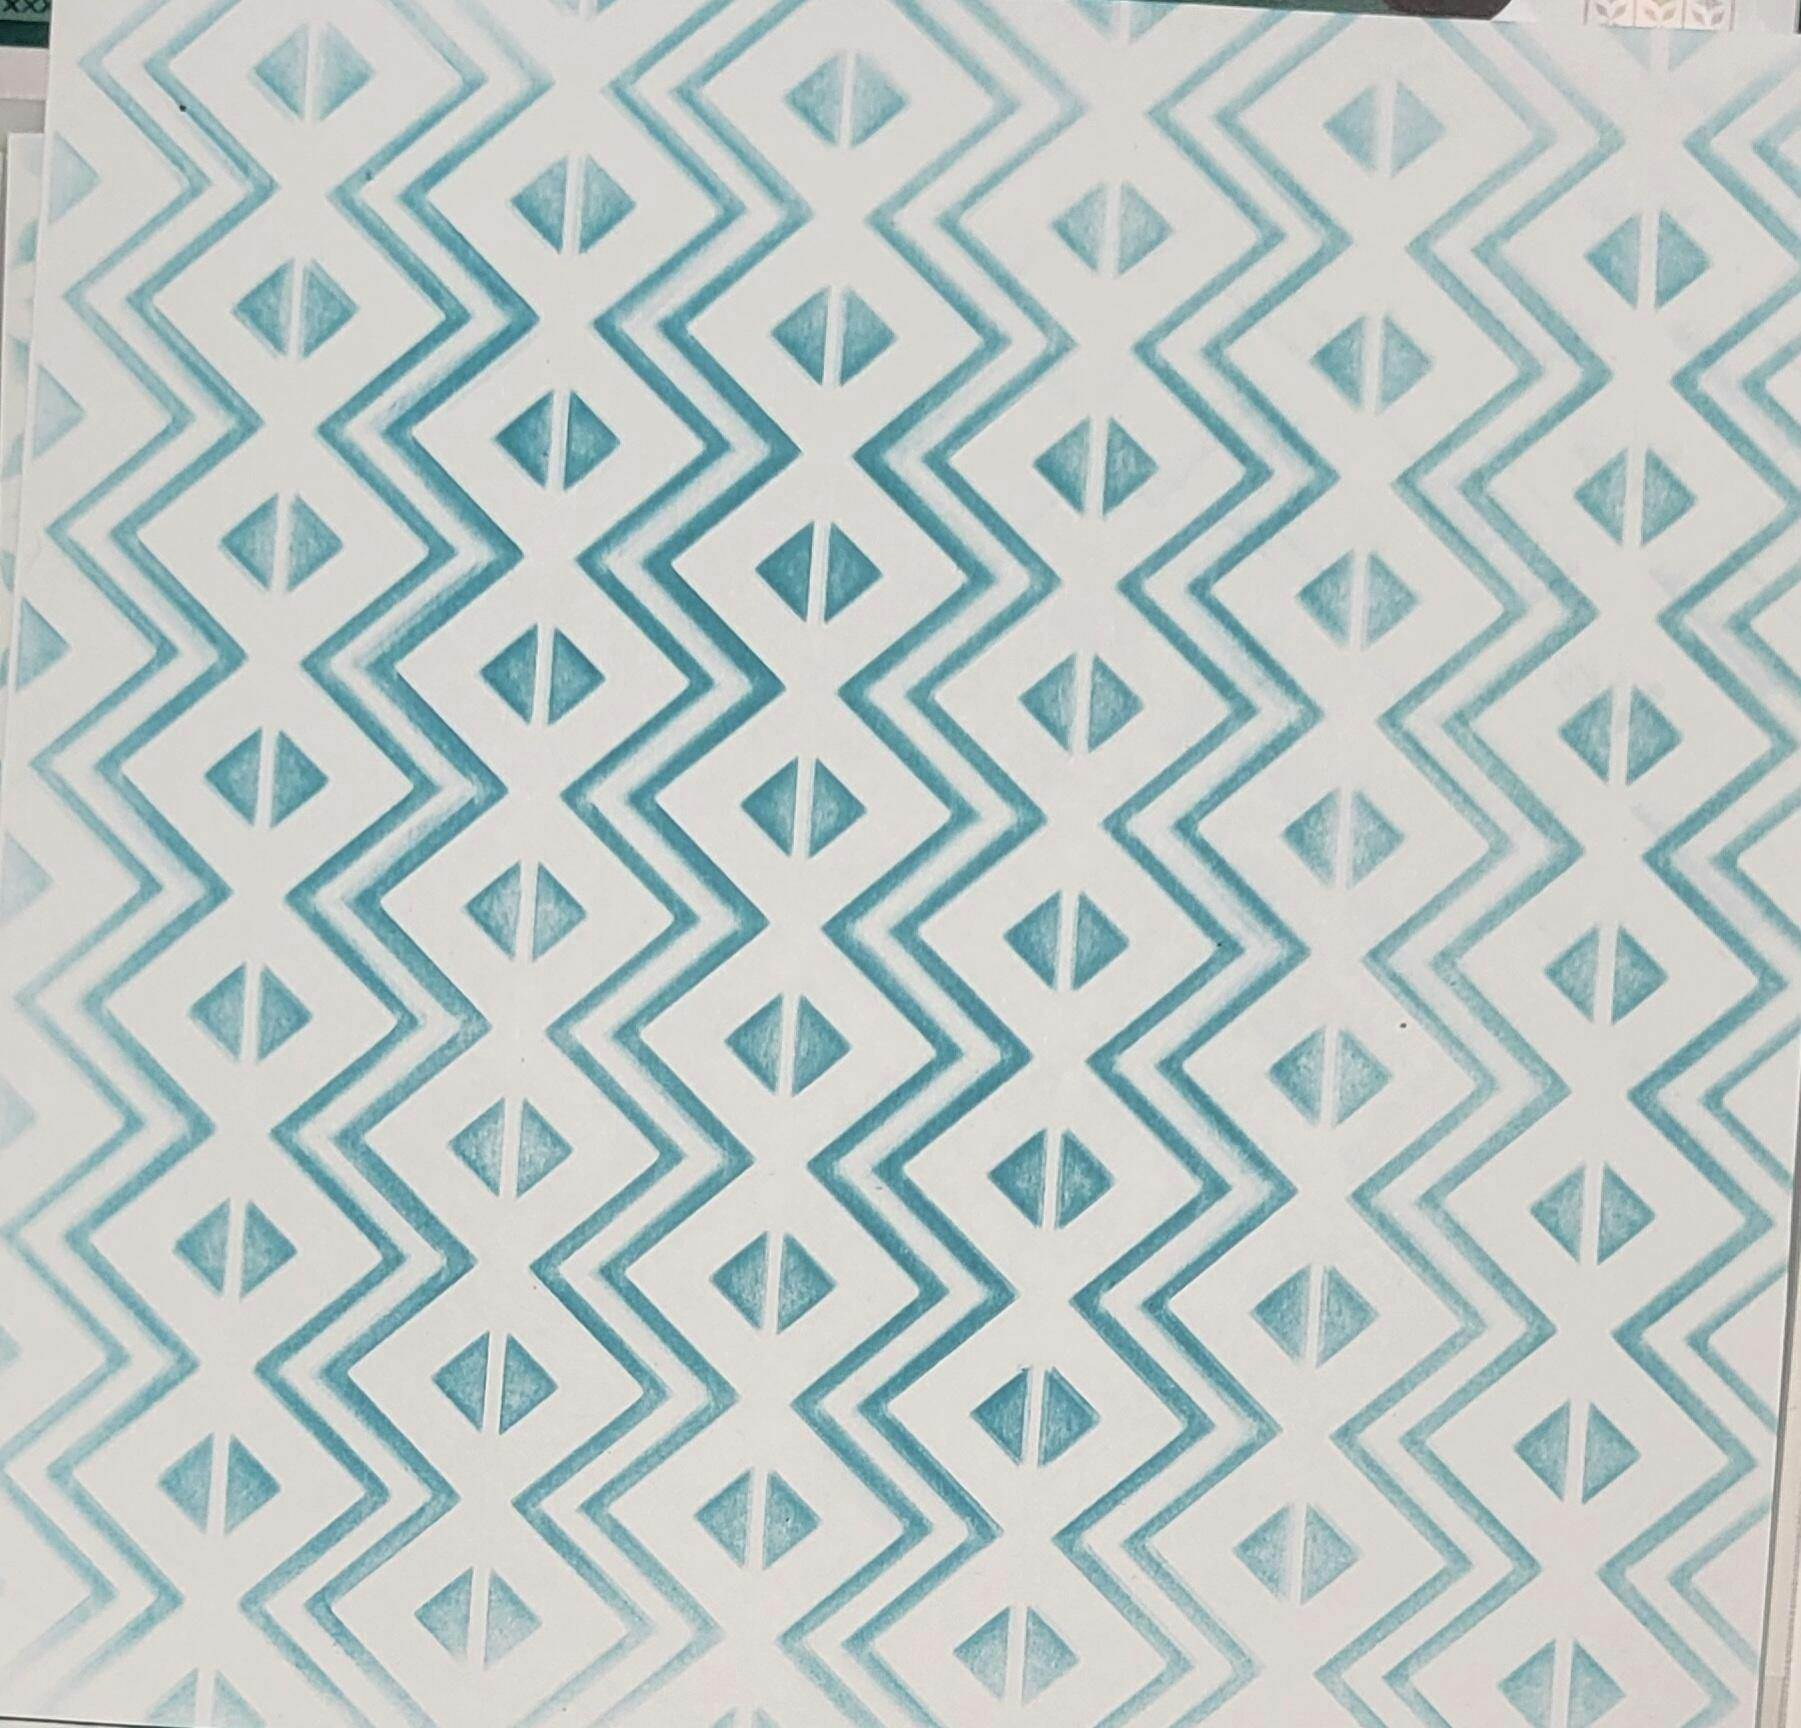
Love the design, but its very fiddley due to the striped nature of the cutouts... have to be careful of blending brush direction. May have worked better as a layered stencil. A stencil adhesive spray would make this much easier to ink blend. I think I would use this with ink sprays instead of ink blending. Don't regret getting it though. Could see doing different parts of it in different colored markers too.
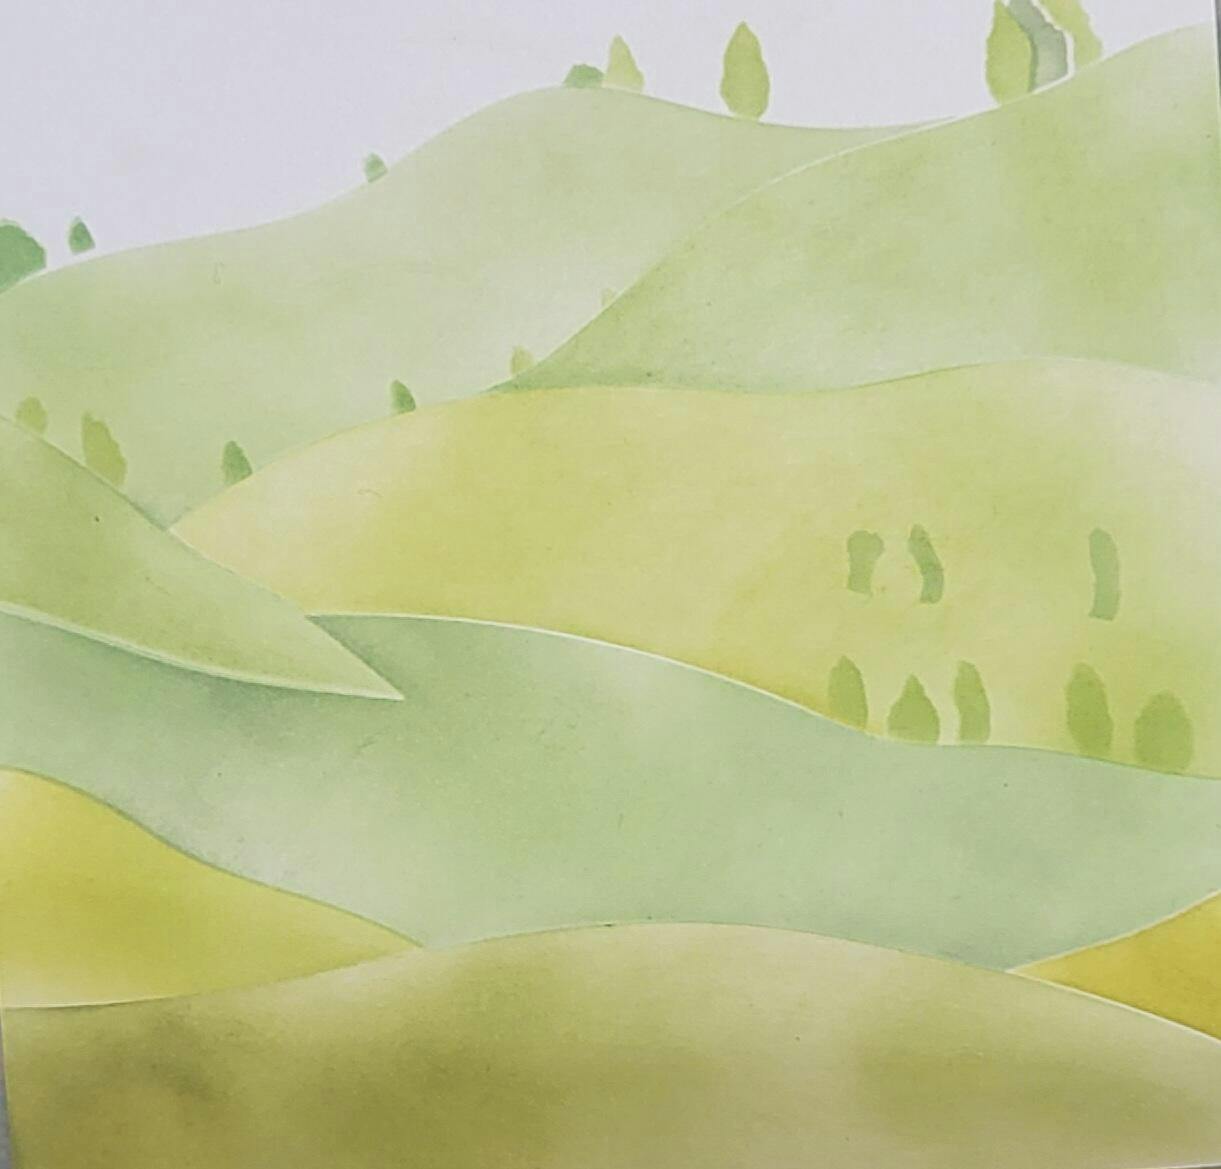
Super easy to use with big blending brushes. Used oxide inks. Image is of my first use, and clearly iI didnt pay close attention lol. The 'floating trees' on the right actually nestle between the trees below them so some shifting of the stencil is necessary. Can see only inking some of the hills and using it as a backdrop for hot air balloons or for cards celebrating a journey. Also could tape over the trees and use it for snow drifts.
Very easy to use though a little fiddley. Used oxide inks. Could see blending from yellow to an orange yellow. The image is of my first use and will go in my stencil package for reference. Only down side is there isn't a mask for the tree and ground to color the sky. Still looks great though, however the image over fills an A2 card size (ie you have to cut quite a bit off) so you may want to consider that.

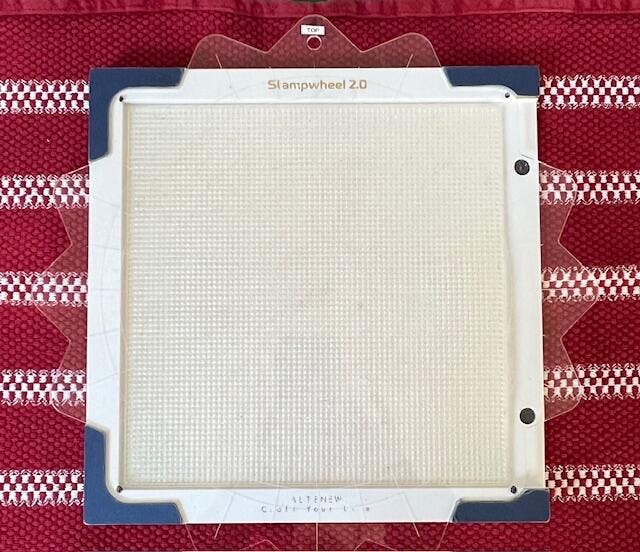
For the past eight months I have given my Stampwheel 2.0 a thorough work out! While I have all my stash inventoried on OneNote on my computer I was still finding it hard to get an idea of what I had and how it would stamp out. So I decided to stamp every single stamp set I had onto sheets by "category" so I could see what each stamp looked like in size and shape and find them all much easier! (I also made binders with pictures of each of my embossing folders / dies / cover plates / stencils etc copied out so I can flip through them easily for ideas....) This turned out to be a monumental task but it was sooooo worth it! So now when I need a sentiment for a wedding card I am working on I just have to go to that "category" and see all the possible choices I have and what will work. Whew! I am finally back to making cards - and it is so much more enjoyable now. HOWEVER, long story short, what I really came here to say is that my Stampwheel 2.0 got such a work out that I wore the gold on all the corners of the unit right off so I ended up putting some heavy cardstock on the corners where the gold had been to "spruce" it up a bit, lol. This, of course, in no way affects the operation of the unit and I am absolutely in love with it! I would highly recommend this product to anyone and everyone!
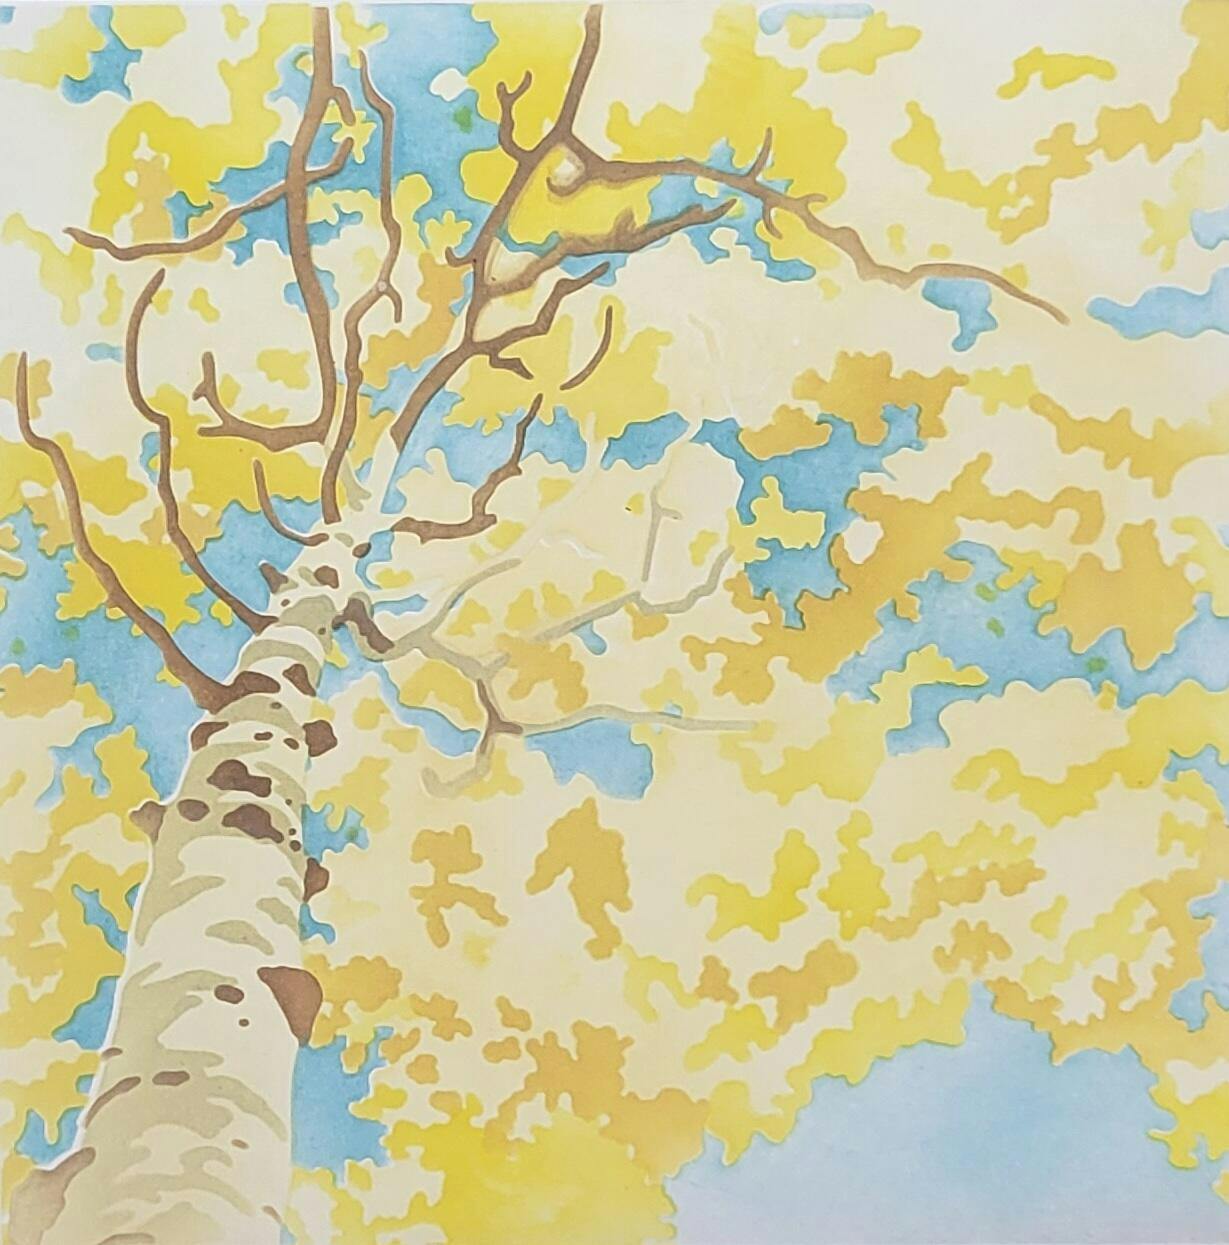
Pretty easy to use though the first layer is very fiddley. The rest of it went smoothly though. Used oxide inks. Image is of my first use to get an idea of colors and for reference sheet. (Clearly warm colors for the trunk and branches doesnt work as well with the yellow leaves lol)
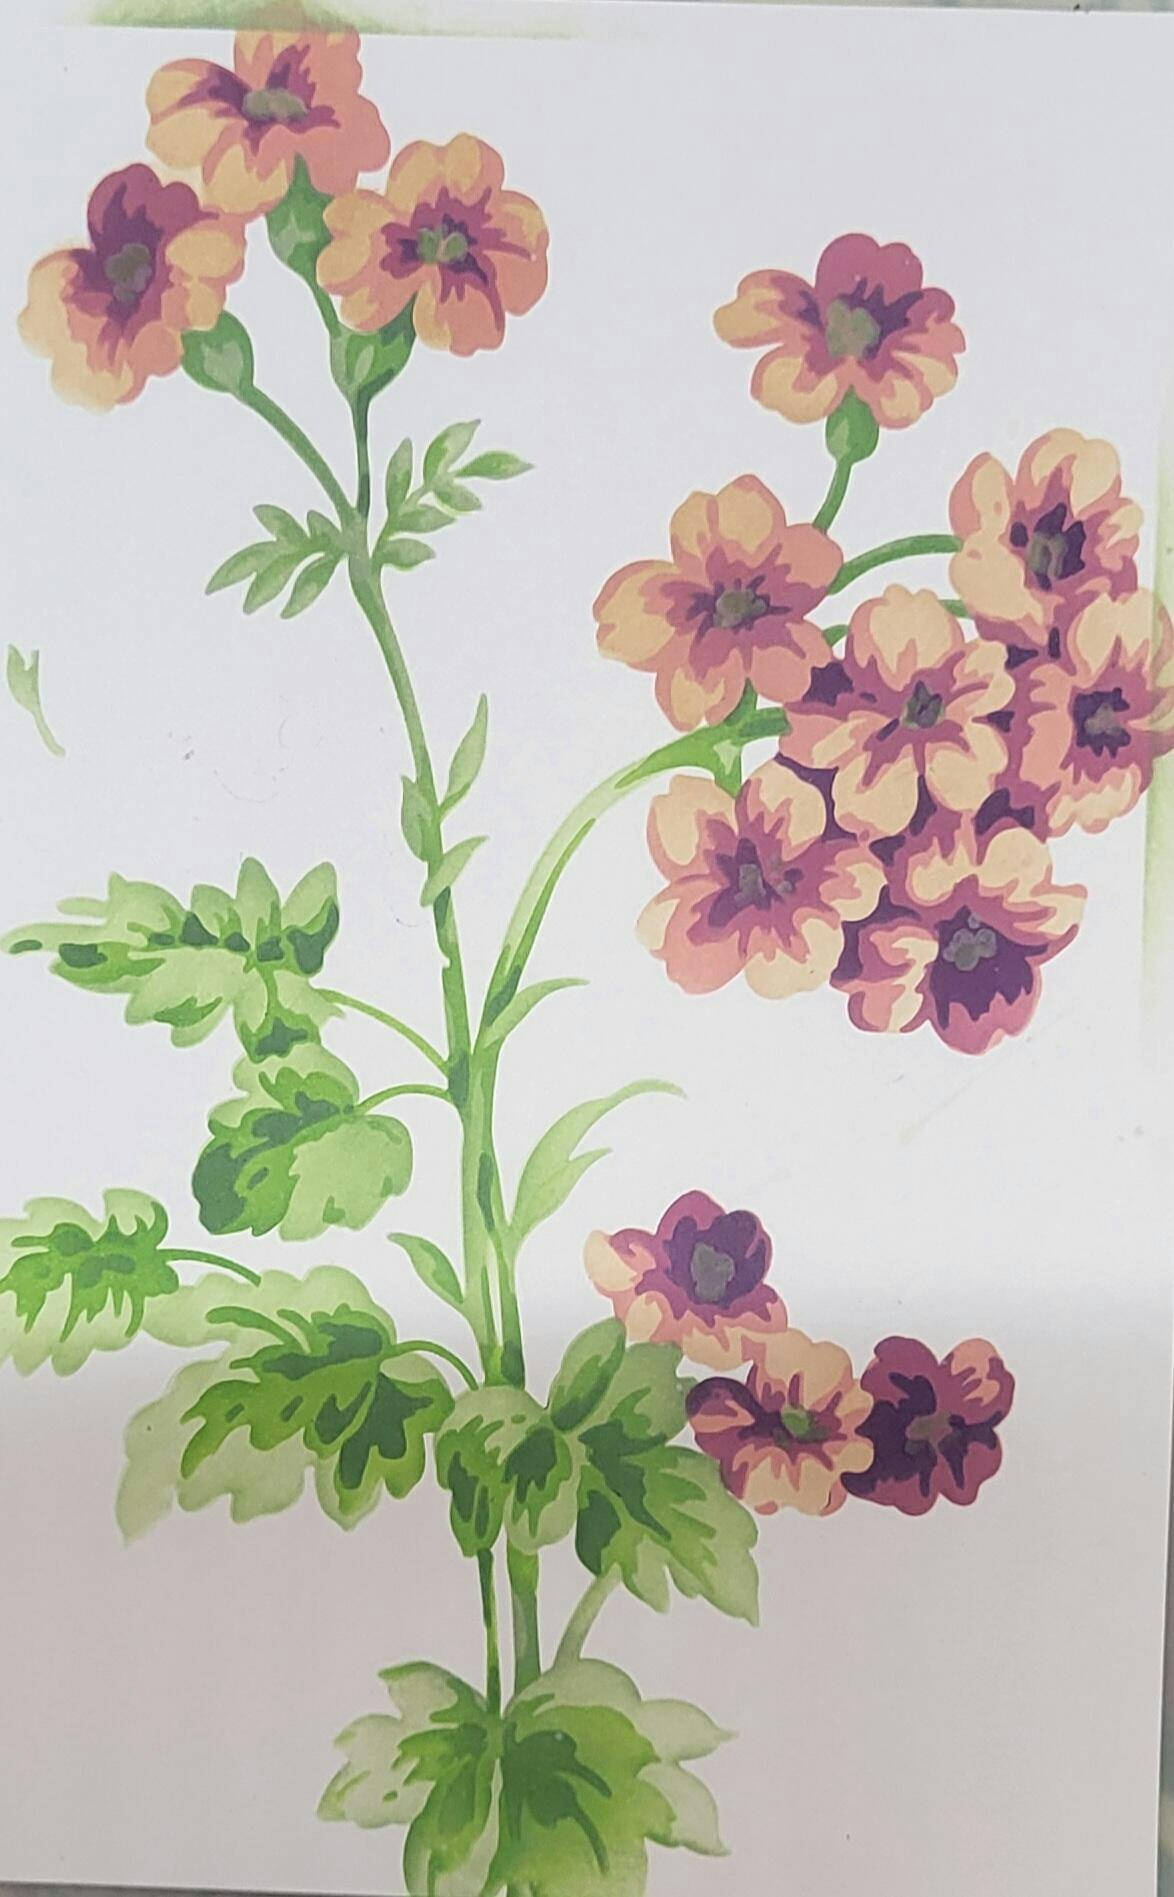
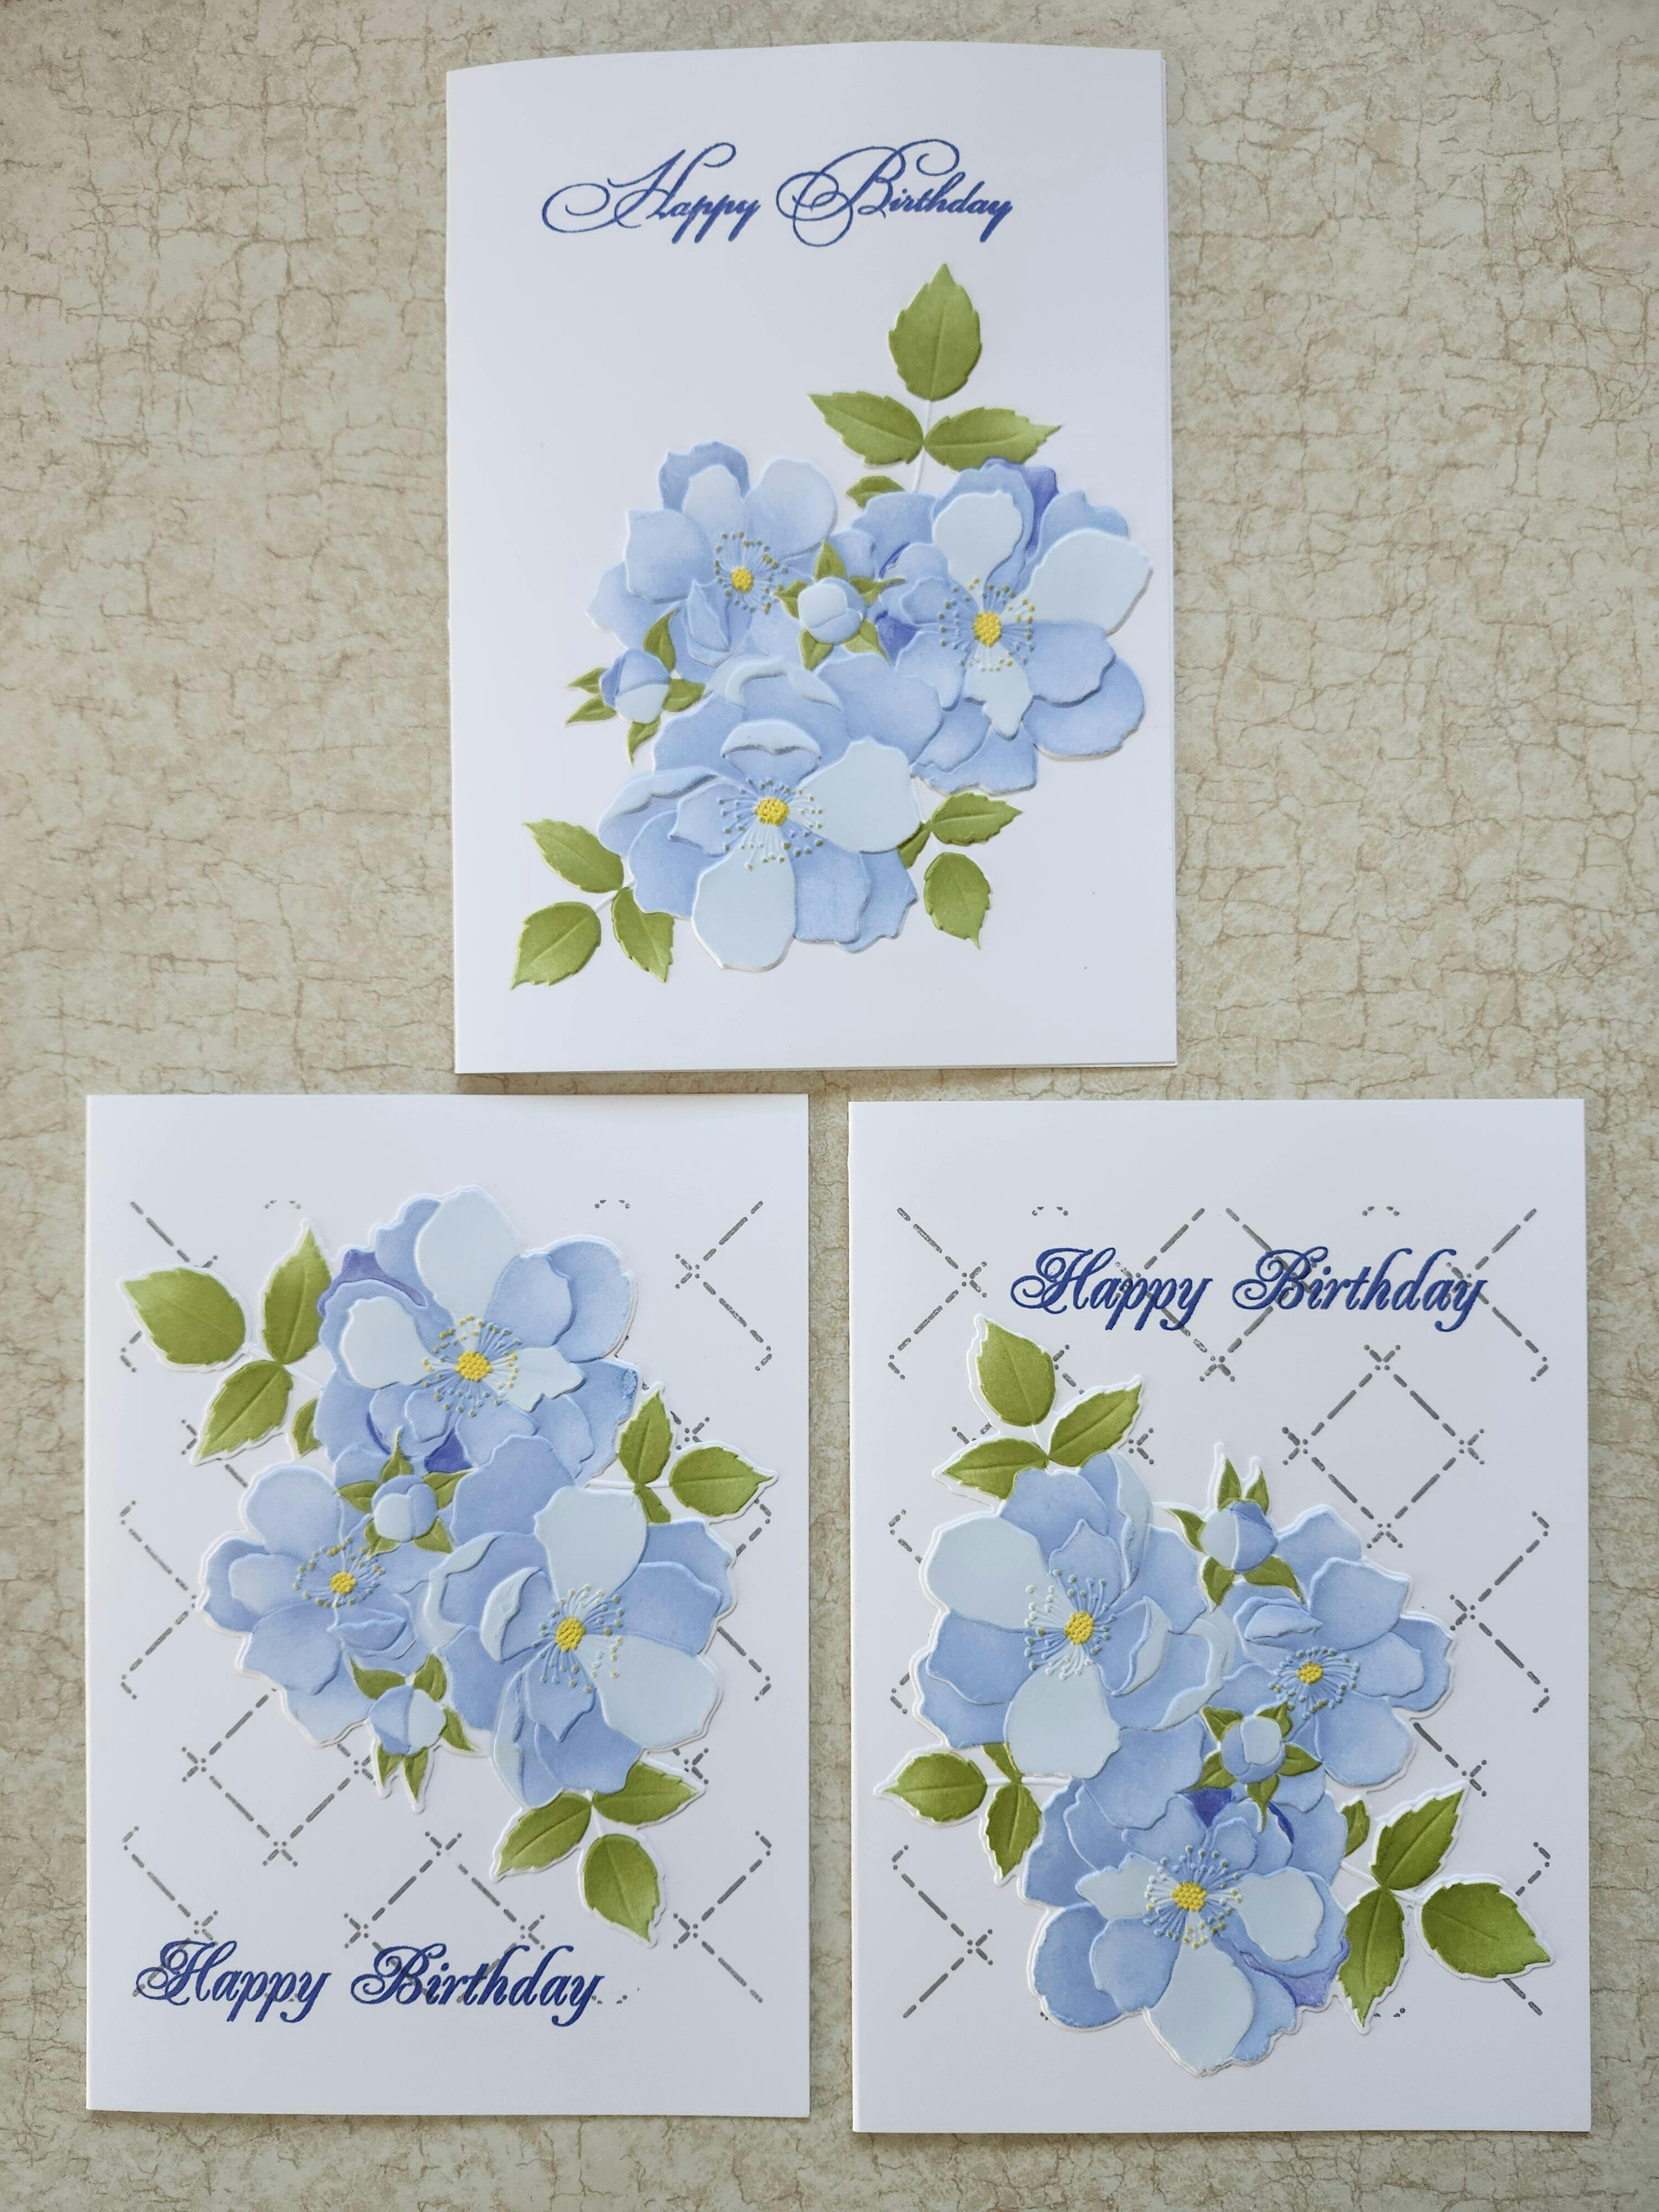
Over all this was easy to use with large blending brushes. Image is of first use and clearly I didnt pay a lot of attention lol. My first use goes in w the stencil for reference so I can see what I need to pay attention to so i dont repeat mistakes. Used oxide ink so center of flowers may not be as clear w dye ink. You can't line the stencils with edge of paper as the stems and flower parts sit different in the stencils space which is why I recomend doing the leaves first. (Hence why the green stripes on the right and top). All these issues just require a bit of attention so I consider that a user issue.
Beautiful set and so versatile! All products coordinate so well. Stamps create perfect images. Stencils and die work perfectly for both stamps and embossing folder. The 3D embossing folder is amazing! Details are like commercial cards. I waited several years before purchasing this set; wish I'd bought it sooner. Upon receiving the package, I immediately created three cards. The only drawback is you need to download the layering guides. Newer sets include the guides in the package.
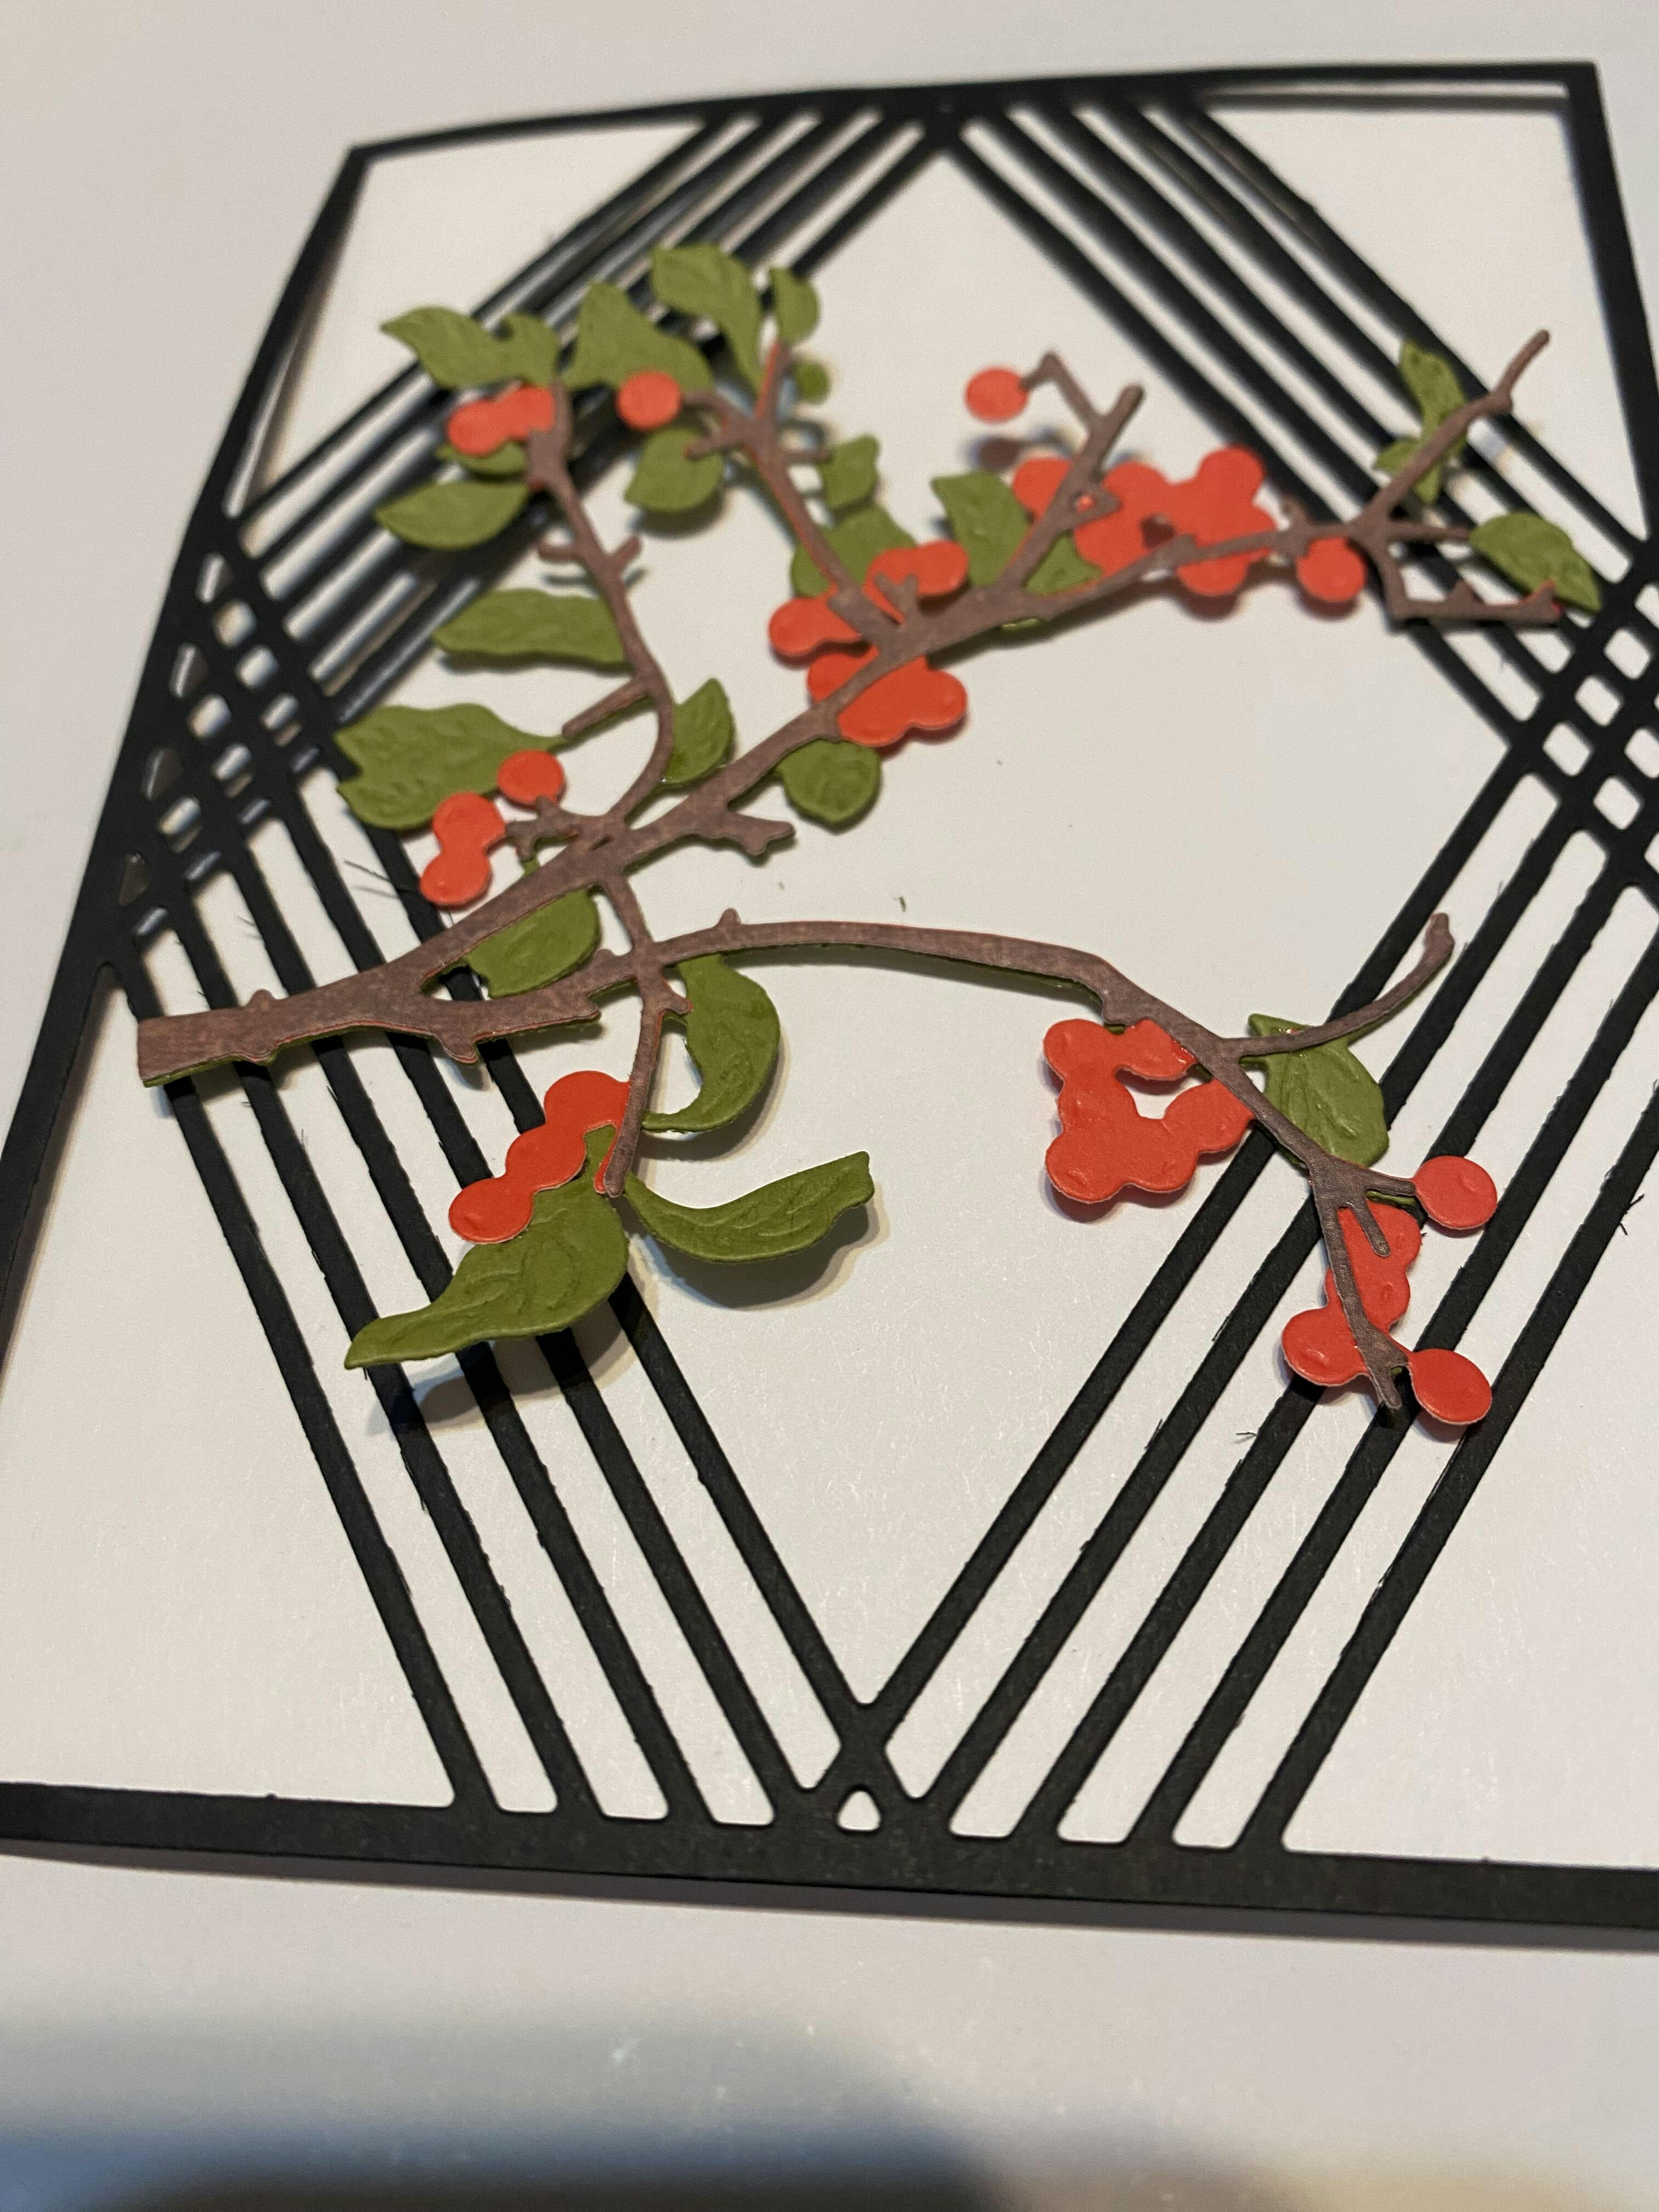
I do like this dye plate, but I wish all the berries would be at one end so I could use two colors of card stock when cutting I wouldn’t normally use green berries or red or orange leaves so for me I think I will have some waste but it’s Still a pretty set
Hi Diane,
Thank you so much for sharing your thoughtful feedback on the die plate. We truly appreciate you taking the time to explain how you use your supplies and the challenges you encountered with color placement.
Your suggestion about grouping the berries to one end for easier use with multiple cardstock colors is very helpful, and I will be sure to pass this along to our design team for consideration in future designs. Customer insights like yours are incredibly valuable to us as we continue to improve our products.
We’re glad to hear you still find the set beautiful, and we appreciate your honesty and support.
I really like this girl dies, even though it took me quite a bit of time to figure out how to put them together. It is a little tricky. This one will take practice, but I’m gonna have fun learning all the ways I can use it even if I didn’t do some of them, right

First time using wax seals on my cards and I must say I just love it. I’m so glad I chose four colors instead of just one. I also chose two different stamping heads and I have to tell you I’m having a blast playing with them. Look forward to choosing more colors.

I love these! So easy to layer and just a 'treat' to play with. The only Baking I am loving to do, is making these Sweet treats. I made them for Christmas and Valentines too :D

Appreciate the directions for placement of the stencils and the suggestion for colors. The die work well I’m still getting used to ink blending with brushes. A good and fairly simple start

I have only had my order for one day but loved playing with it.
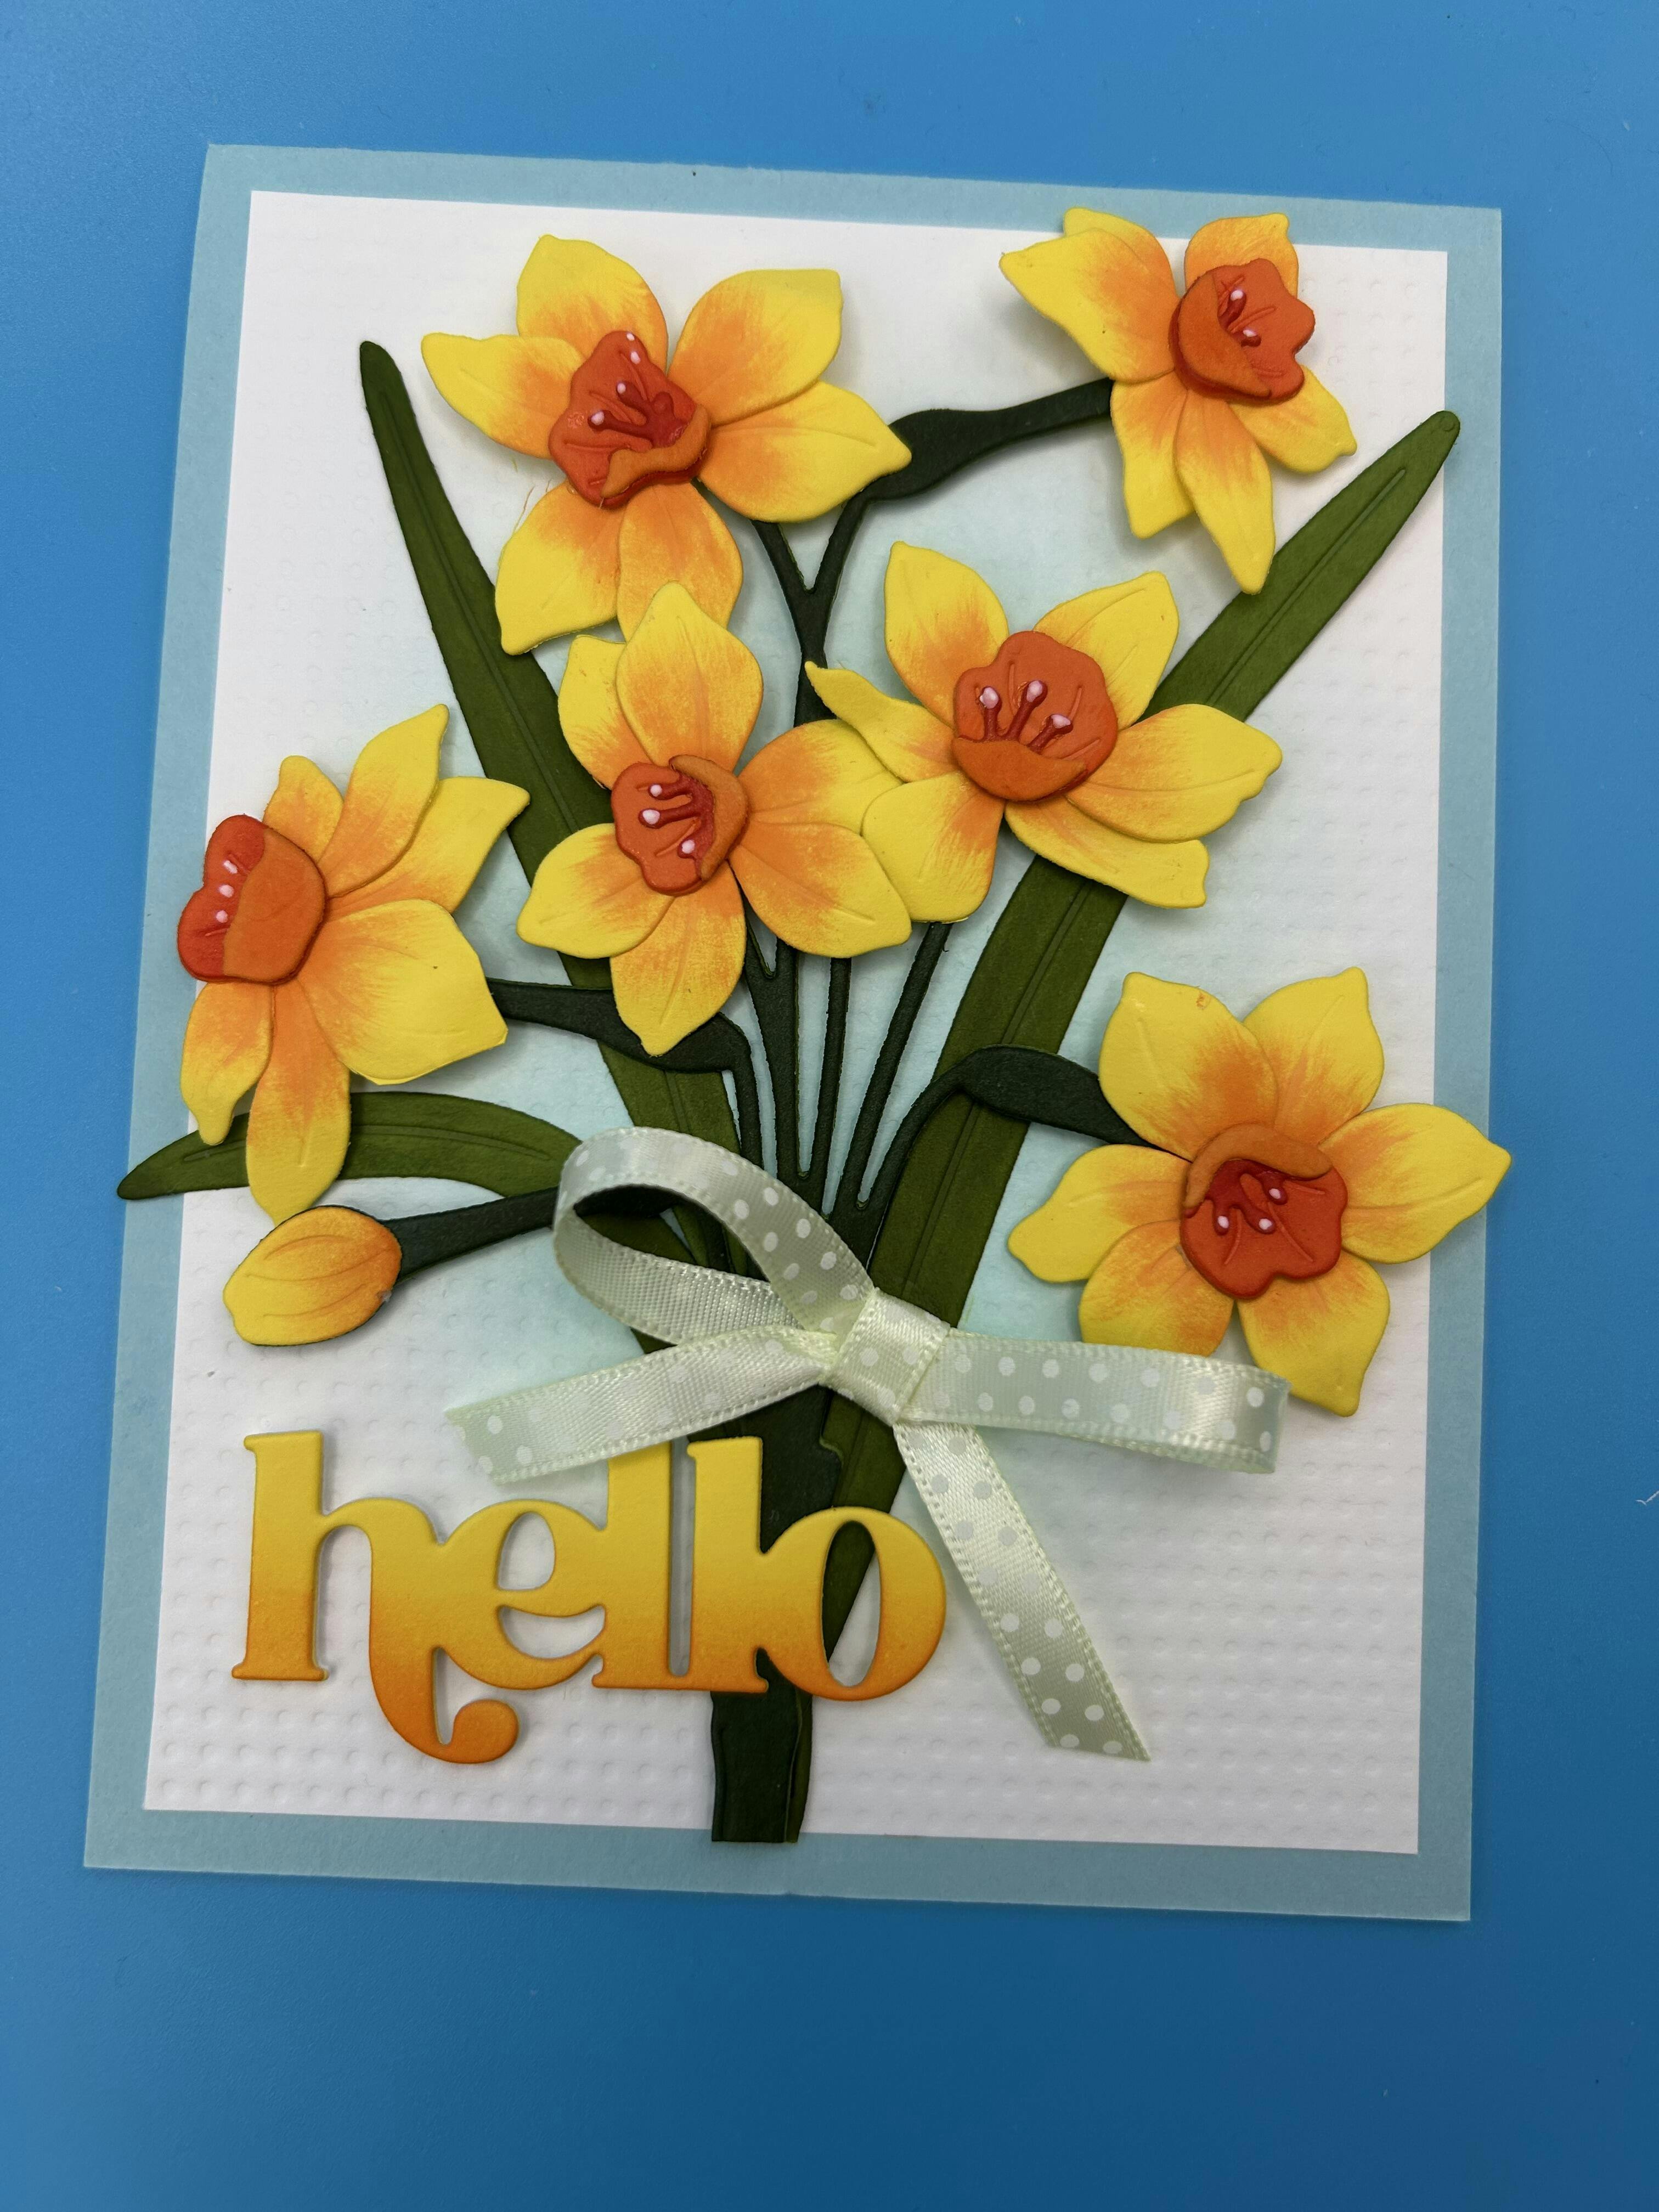
I love all spring flowers but this Narcissus Layering Die Set is the best! I created a Daffodil bouquet using the color palette suggested on the guide. I placed it on a panel that is blended with a touch of Seaglass ink and debossed with the Delightfully Dotty press plate. The sentiment is from Timeless Sentiments. I also added a bow with ribbon from my stash. I love how easy the Keyhole System makes putting the flowers together!
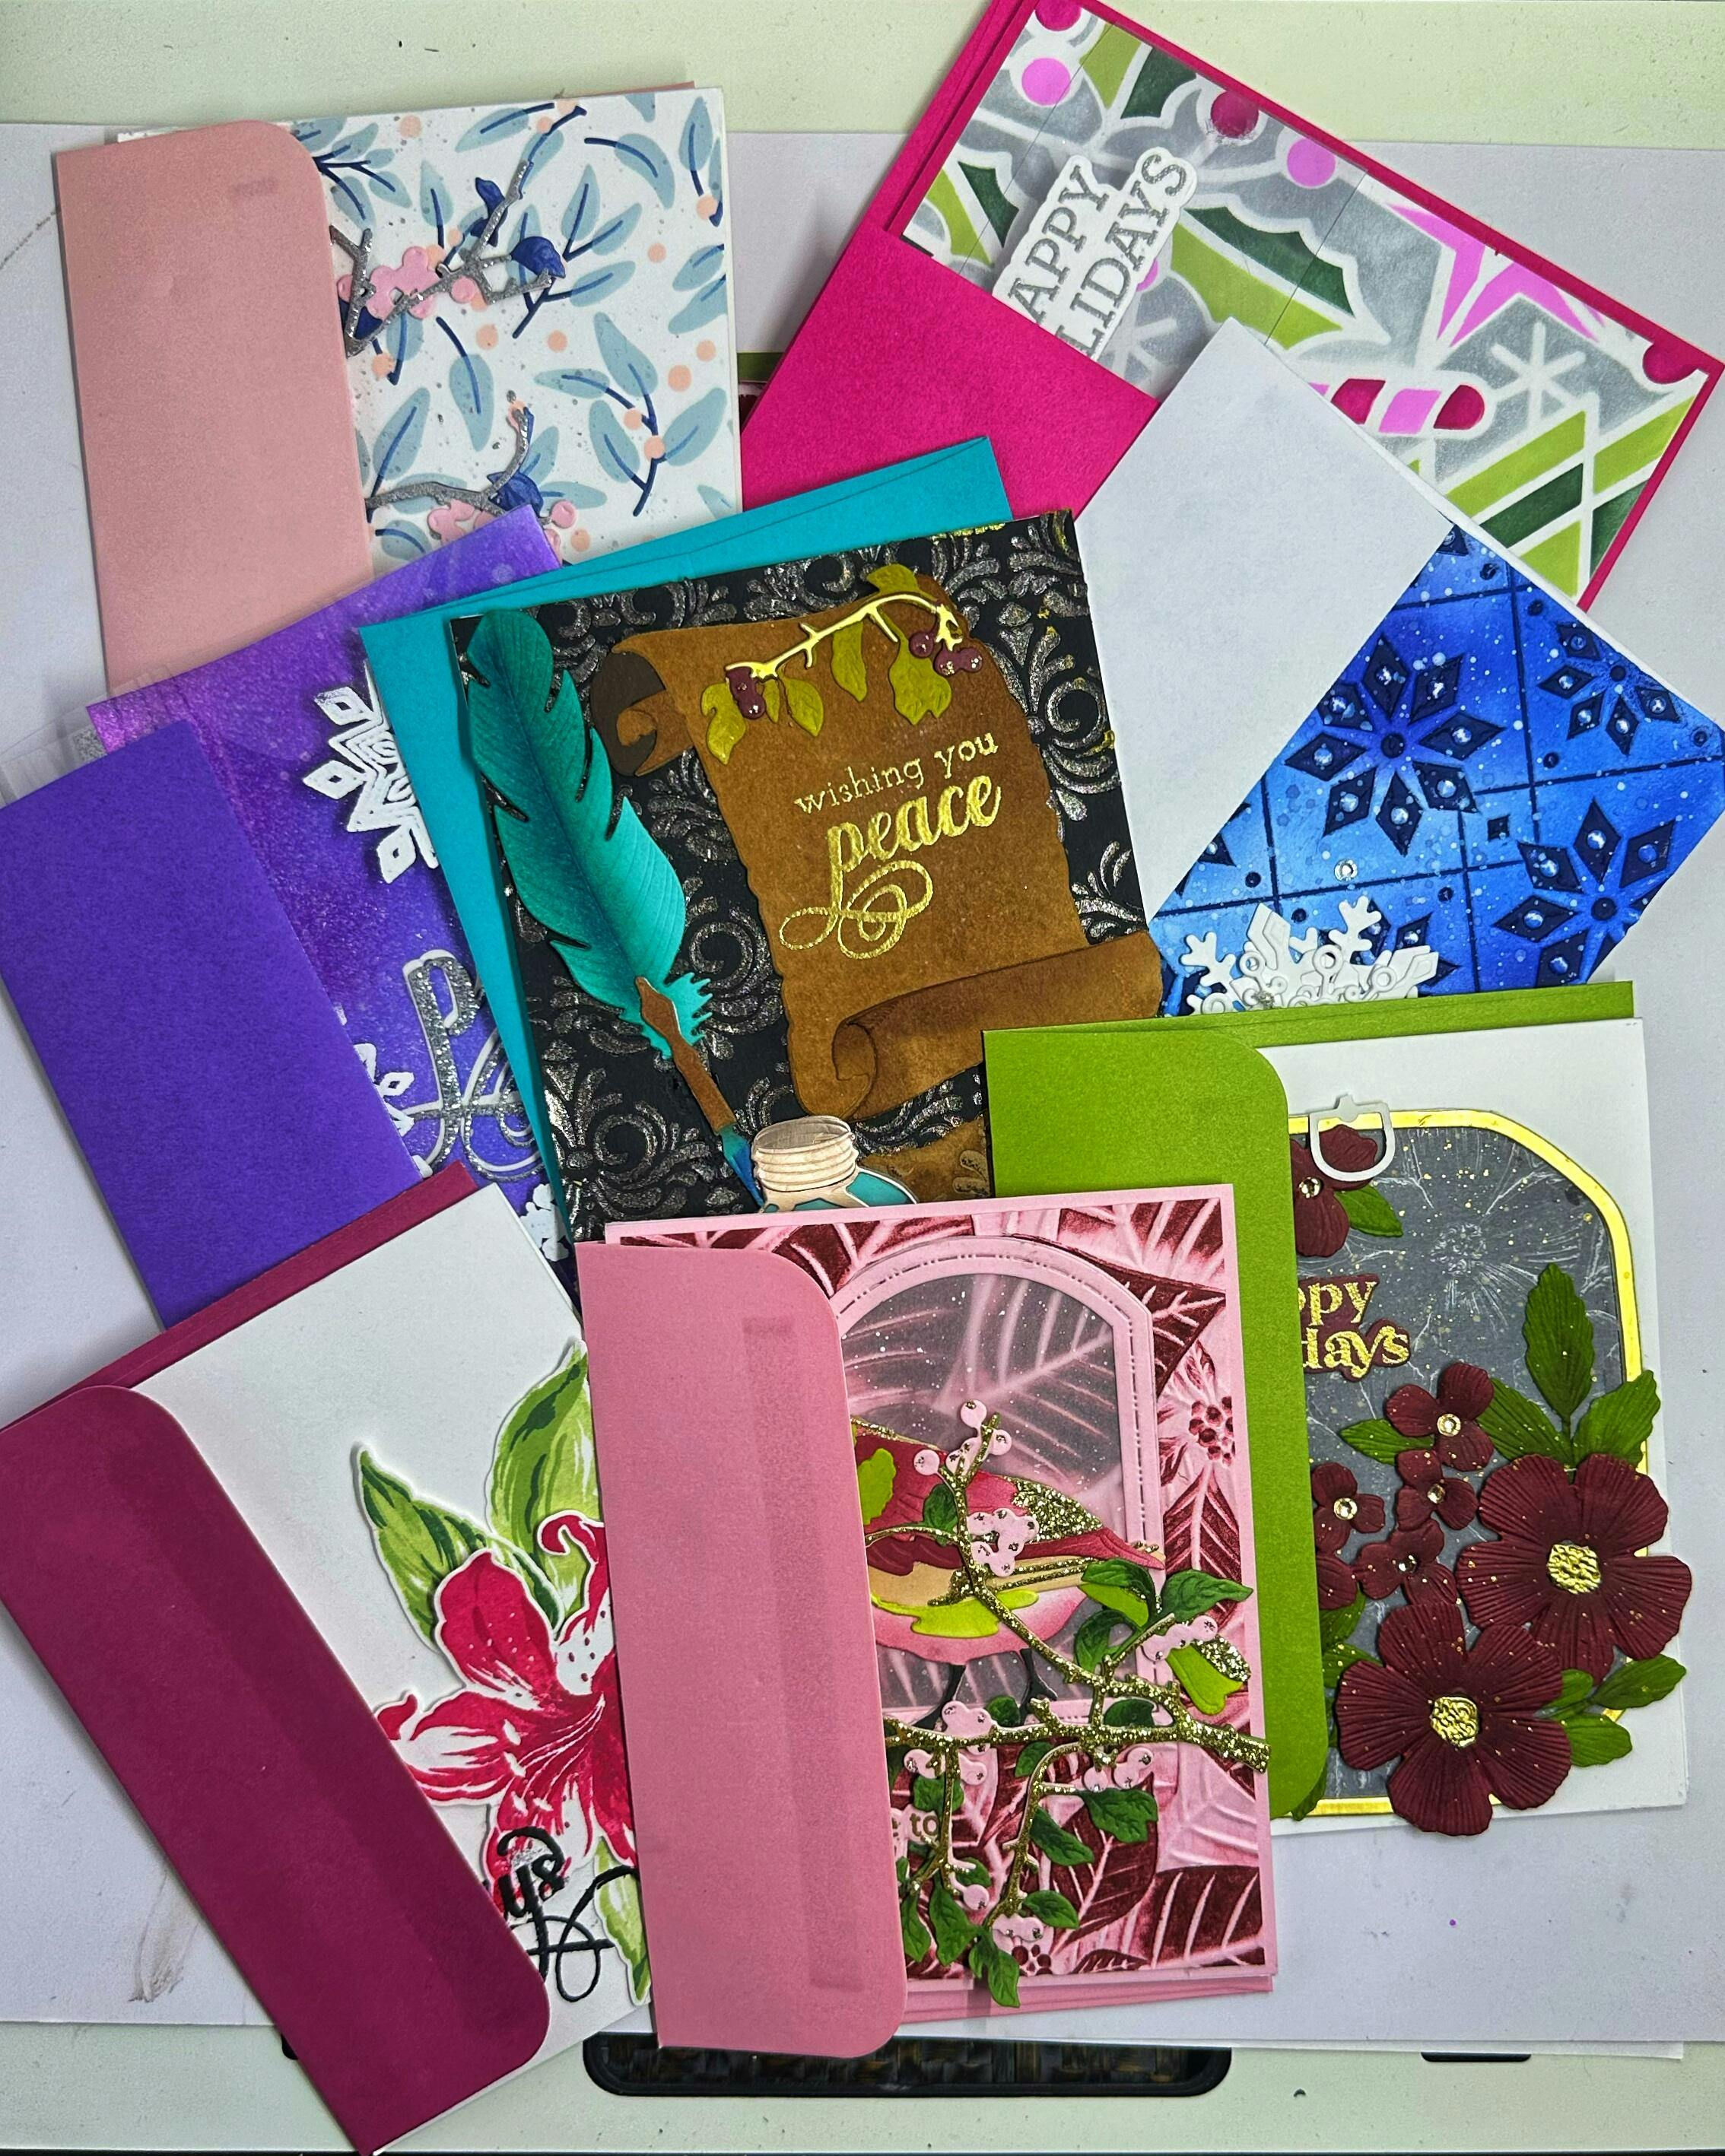
These are high quality envelopes that match the colors in your Altenew cards. I love them
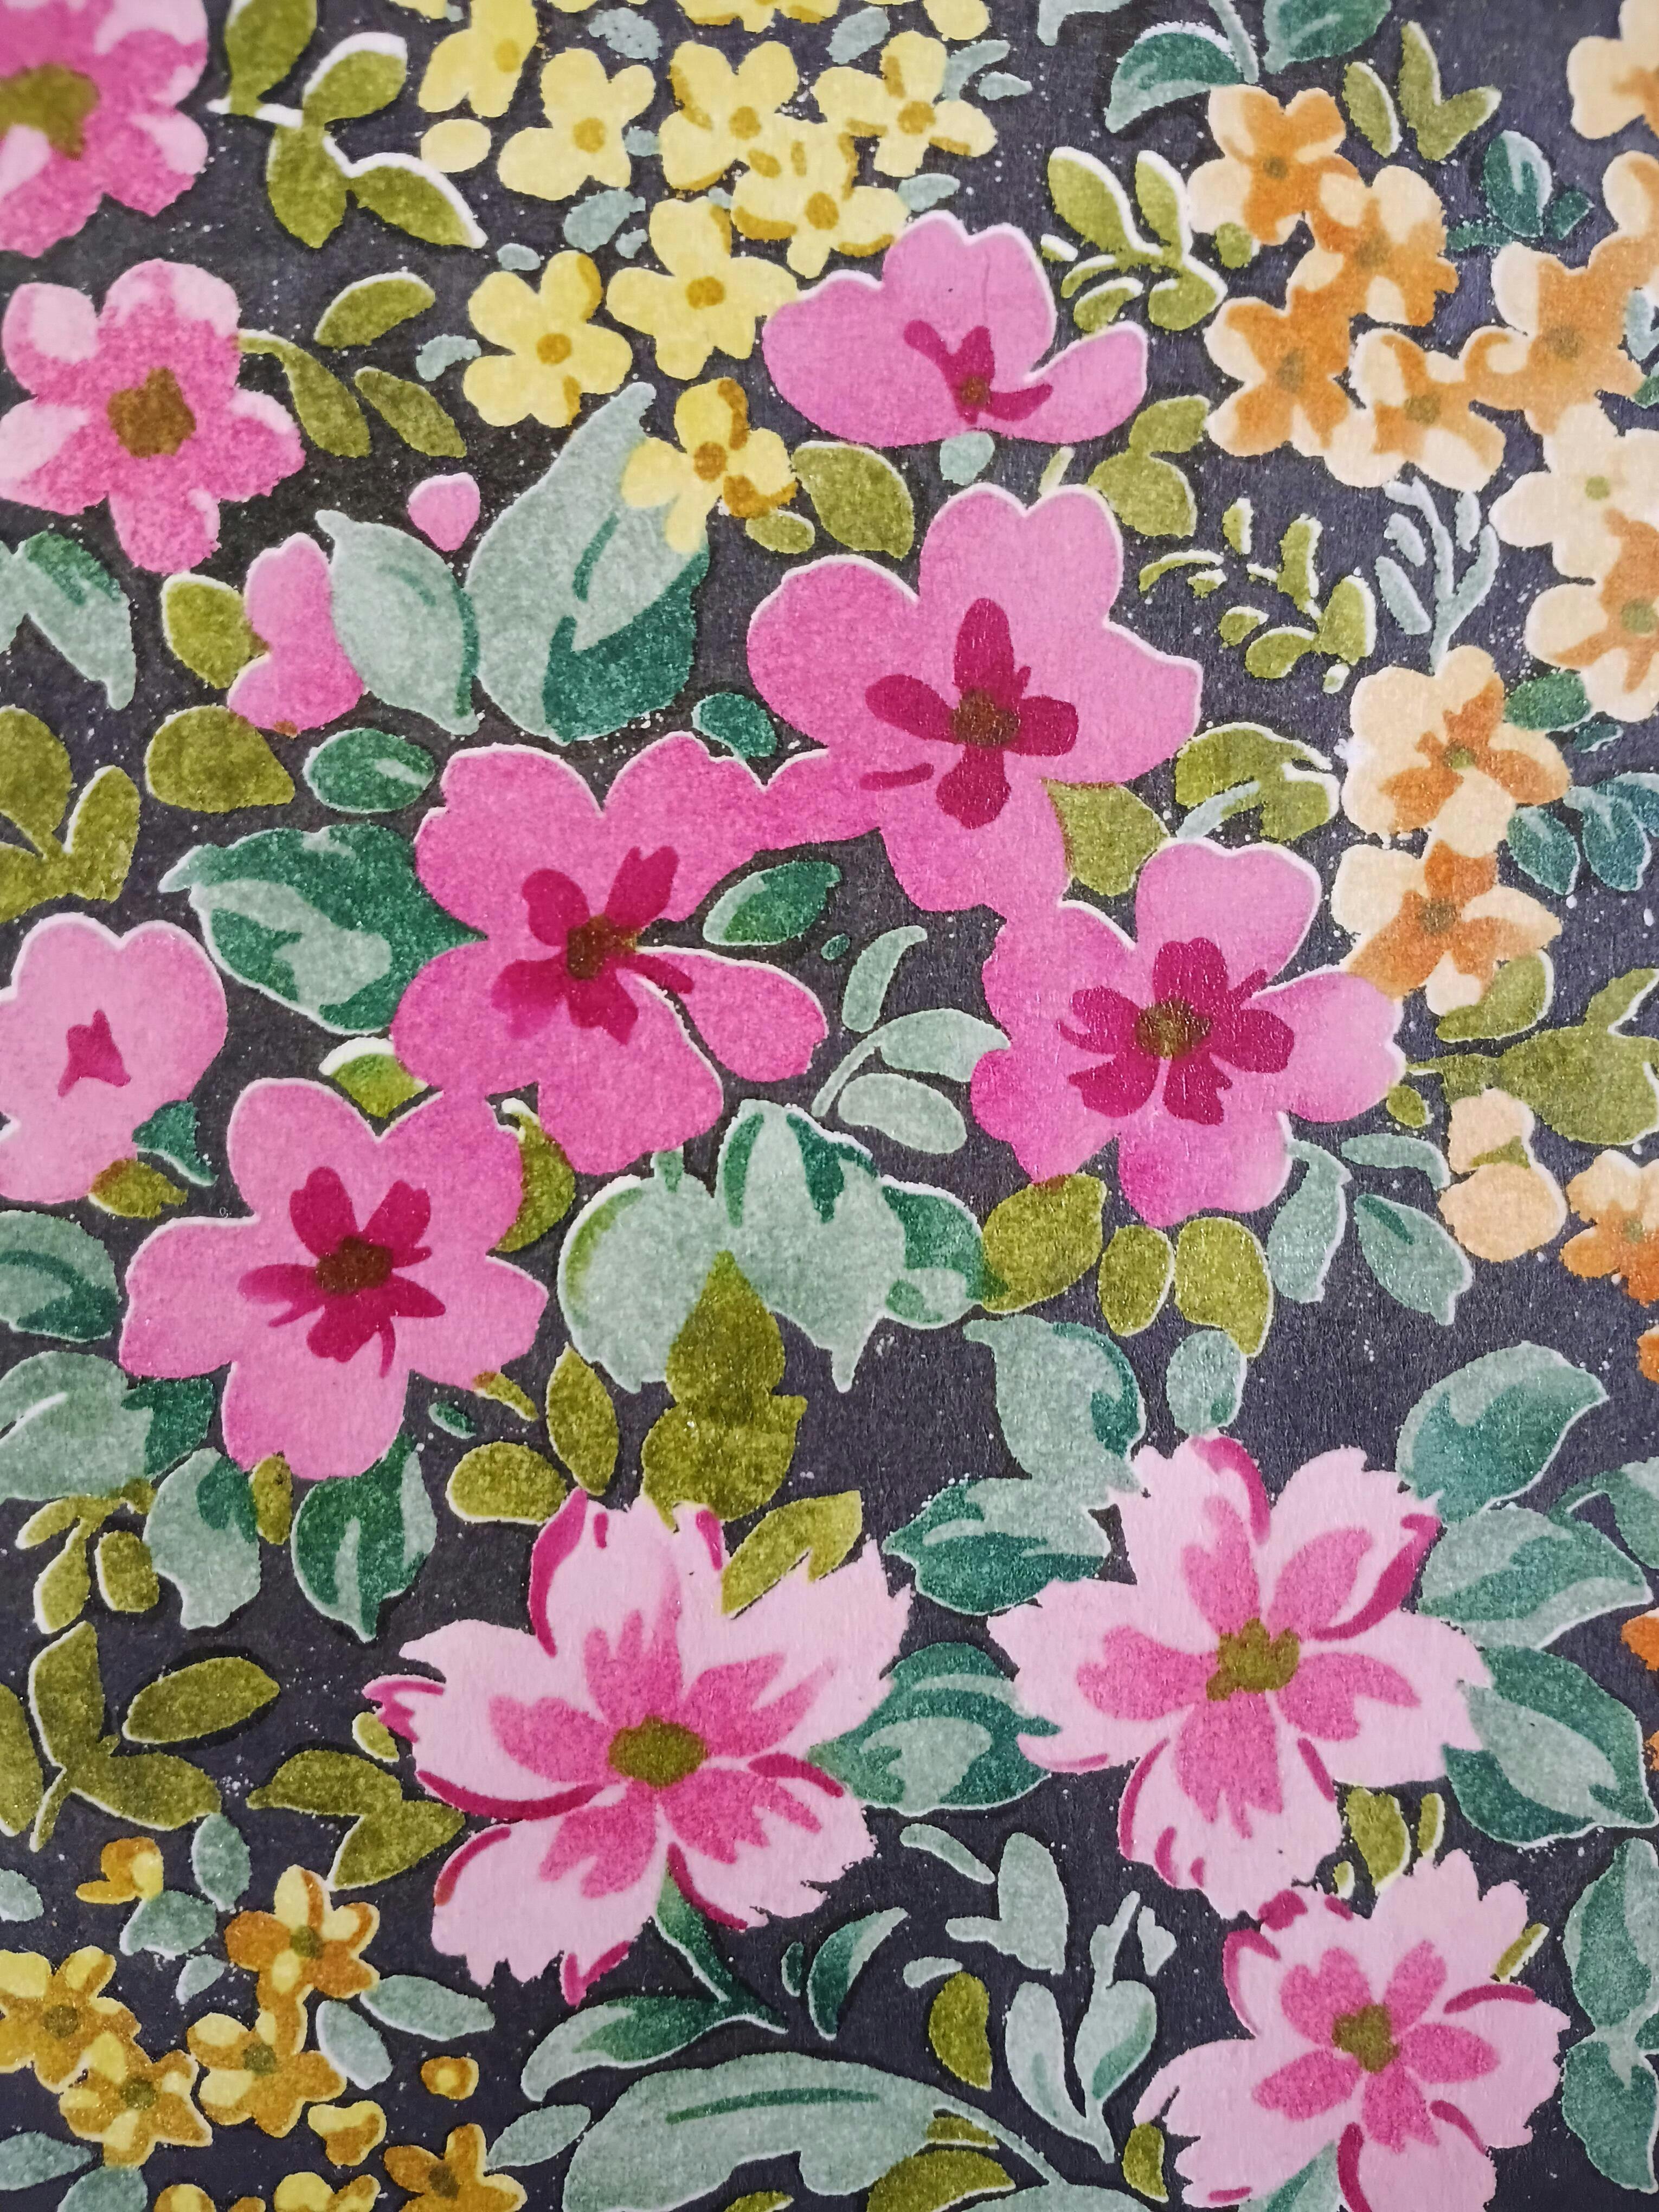
I am having fun stenciling this wallpaper. My husband already ordered me a bookmark tooo.
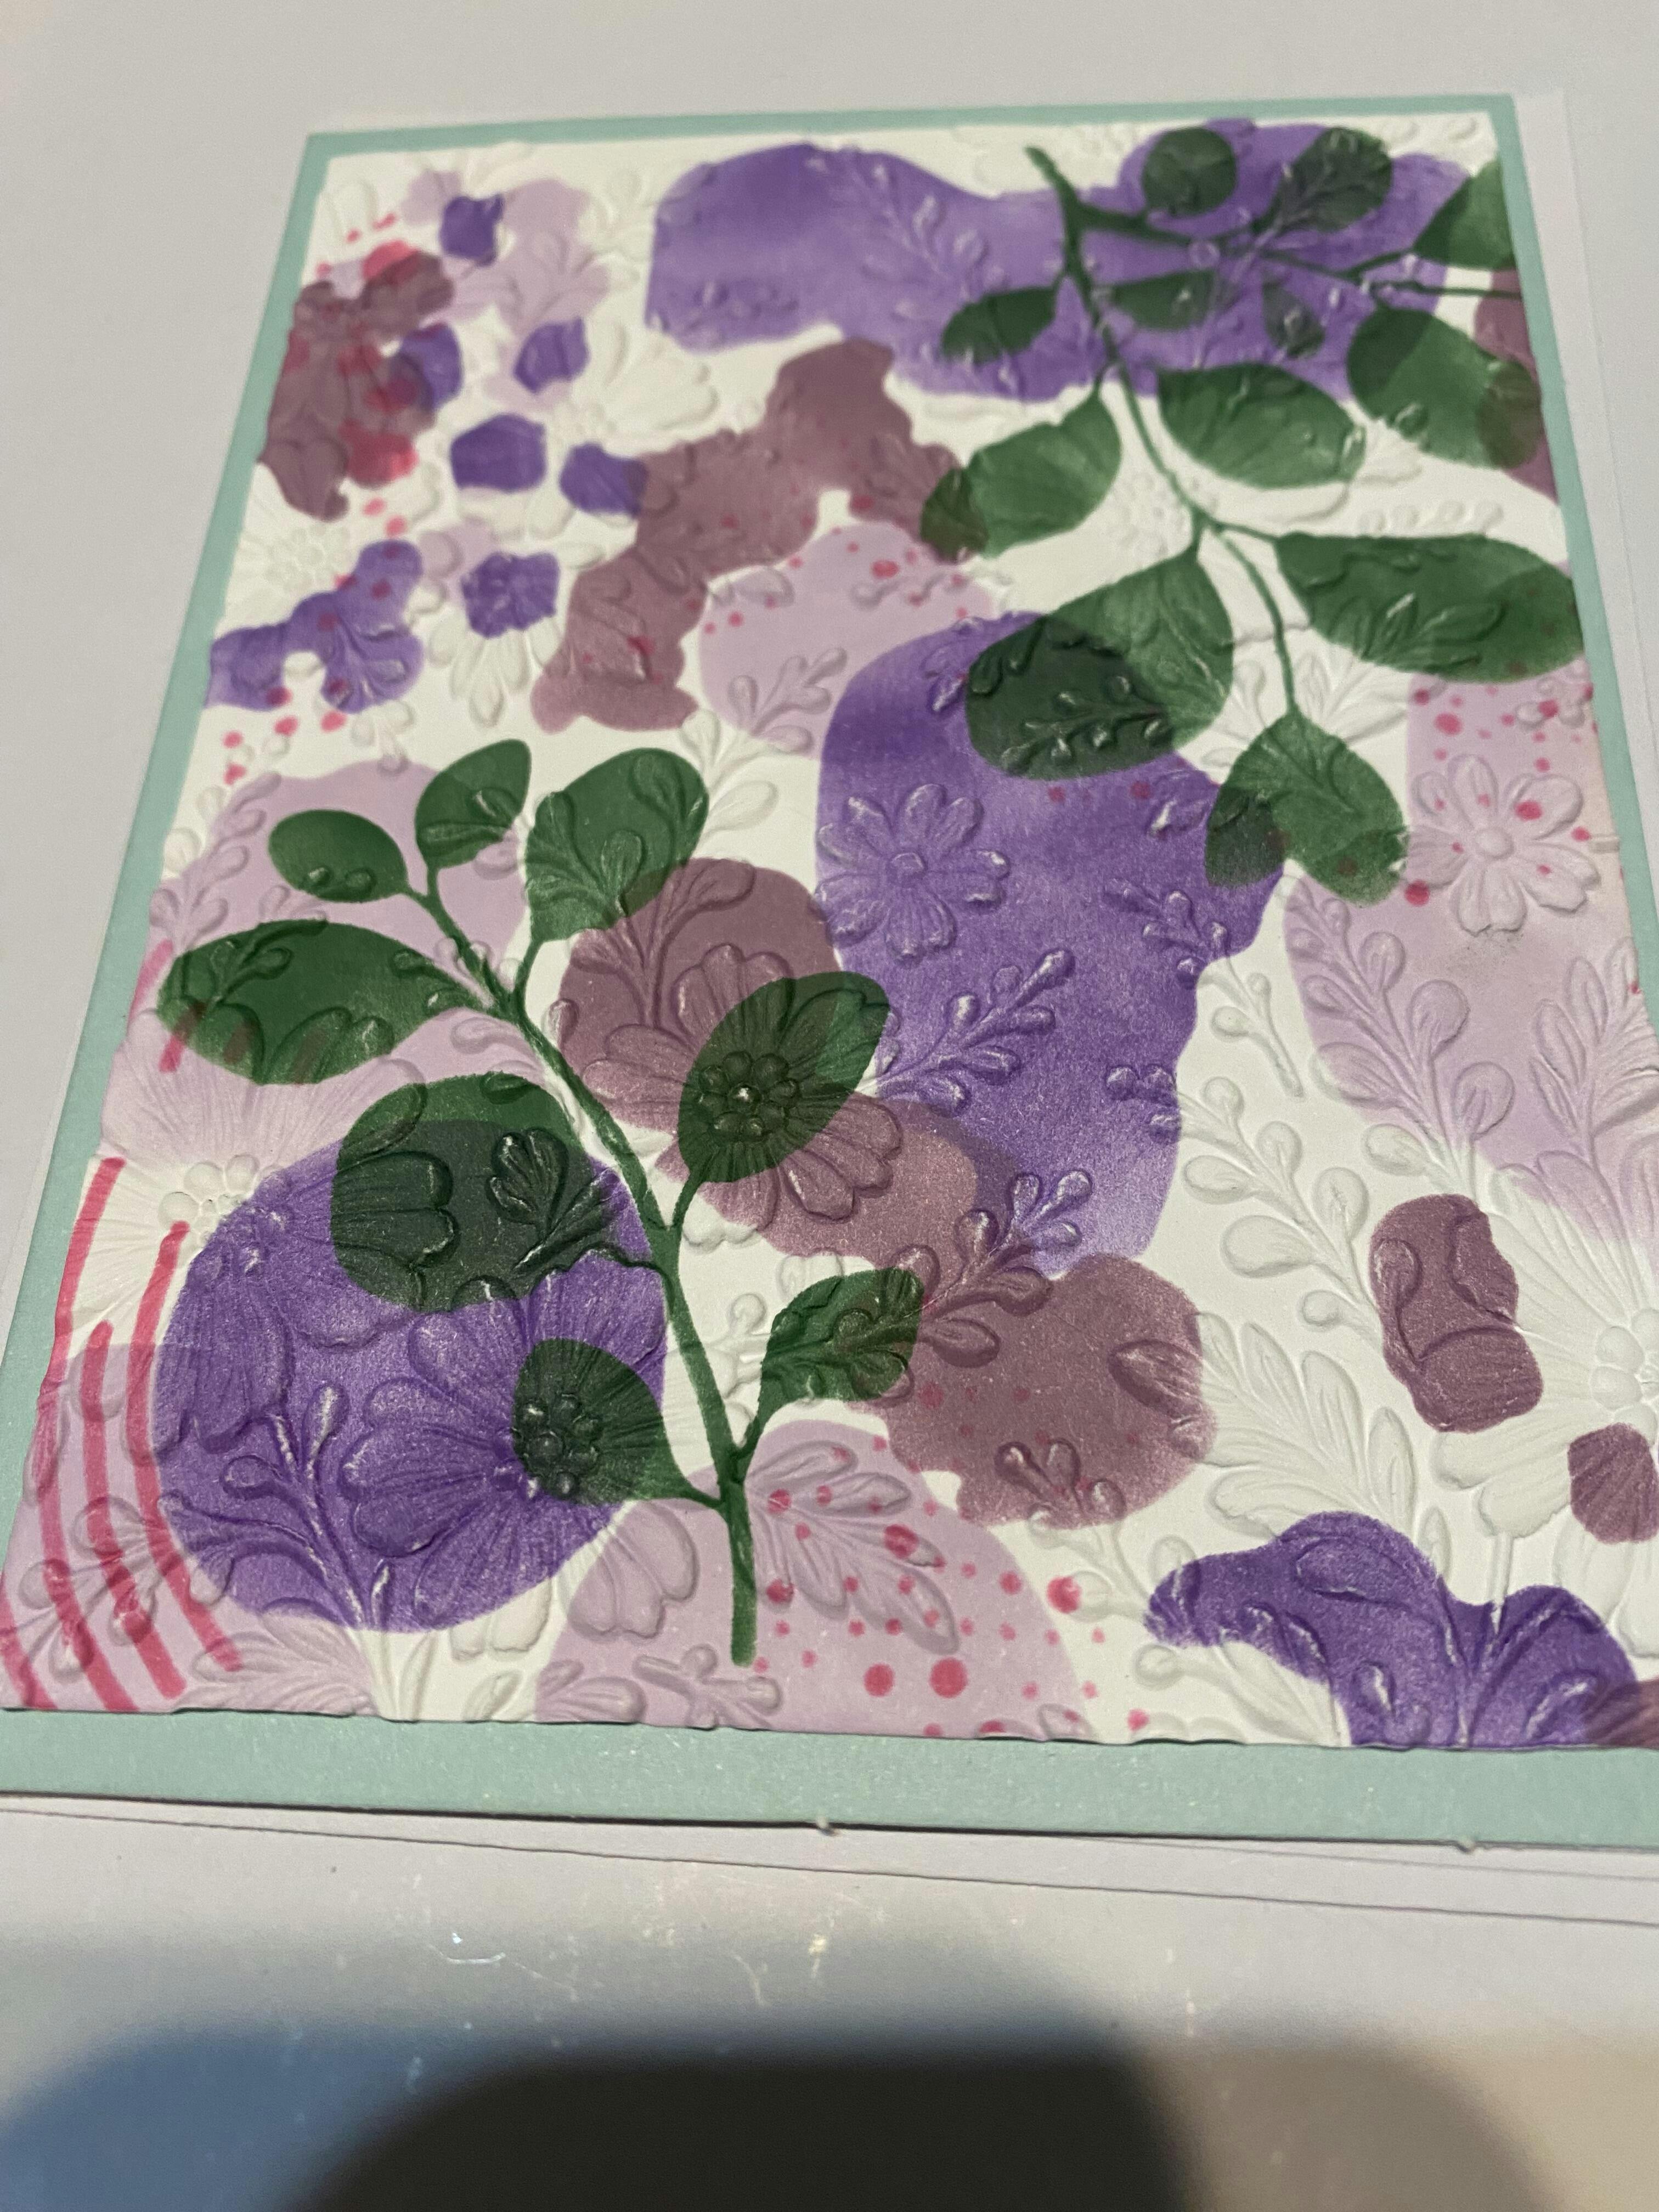
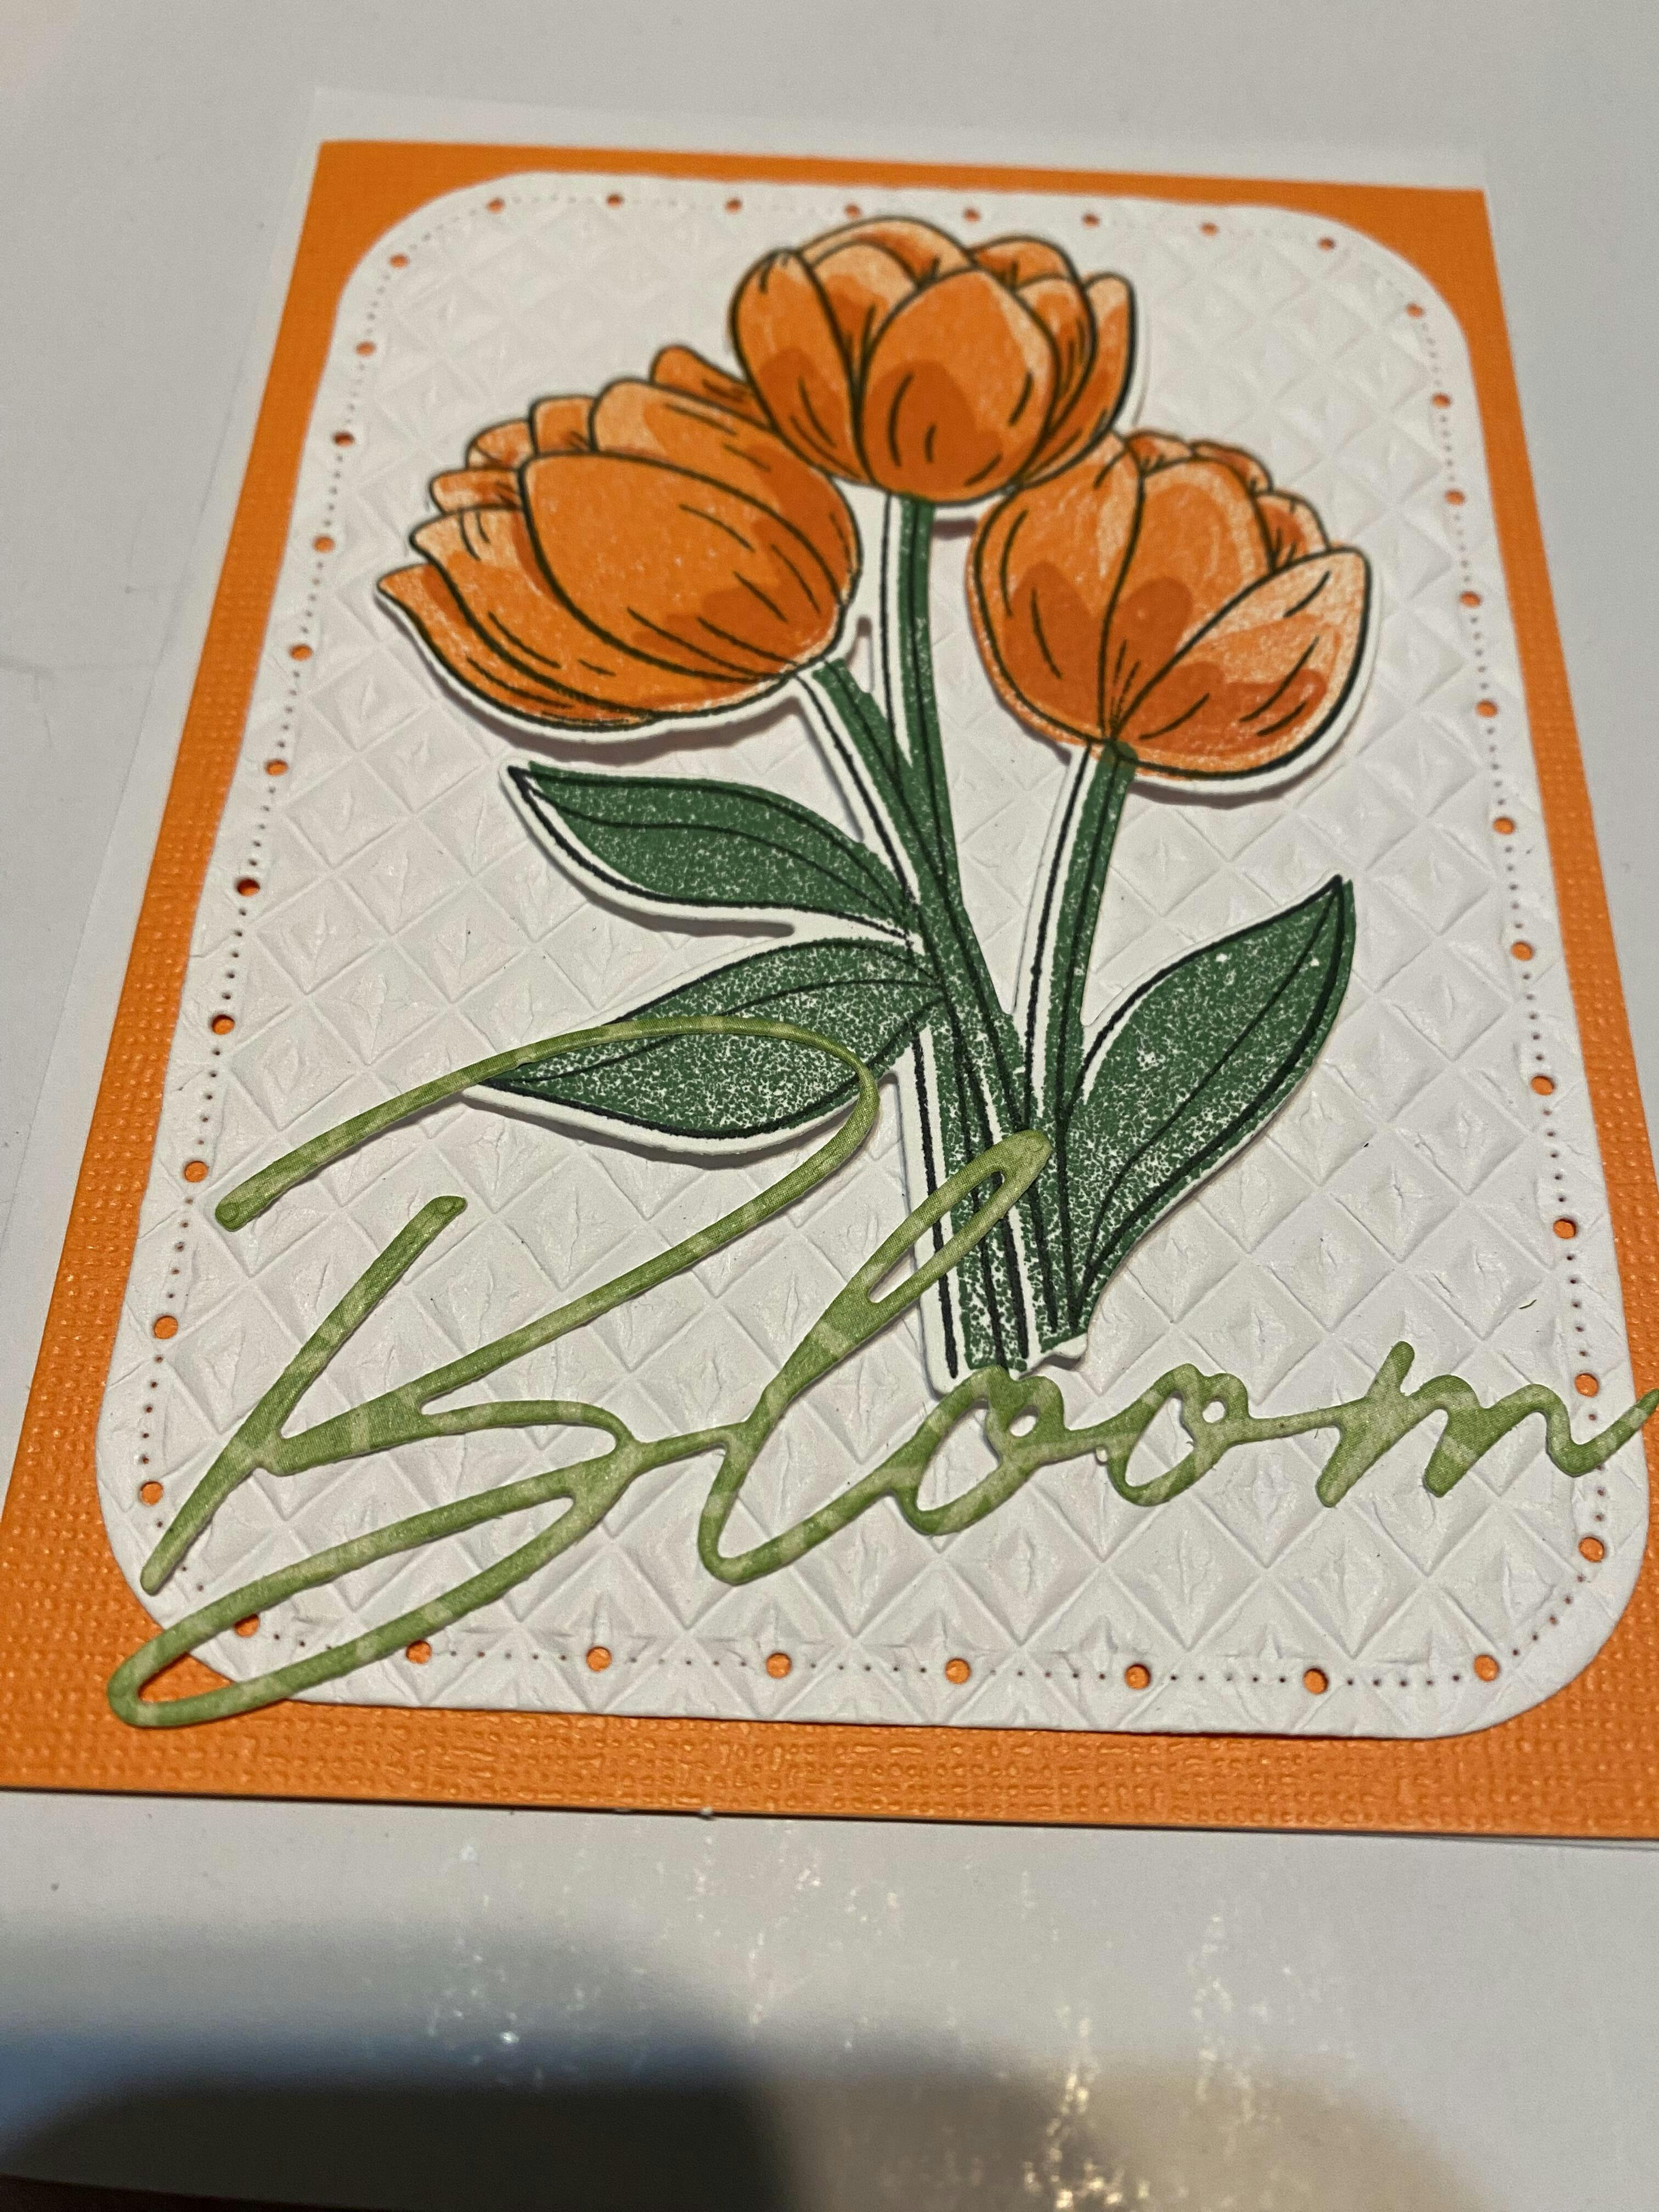
I love Altenew stencils and decided to use this new embossing folder to create a new delicate look for the colorful splashes of color with the floral texture.
Still a work in progress but lots of options depending on the colors you use.
Easy to stamp the colors of choice for a Spring time look and die cut as you wish for a stunning card.
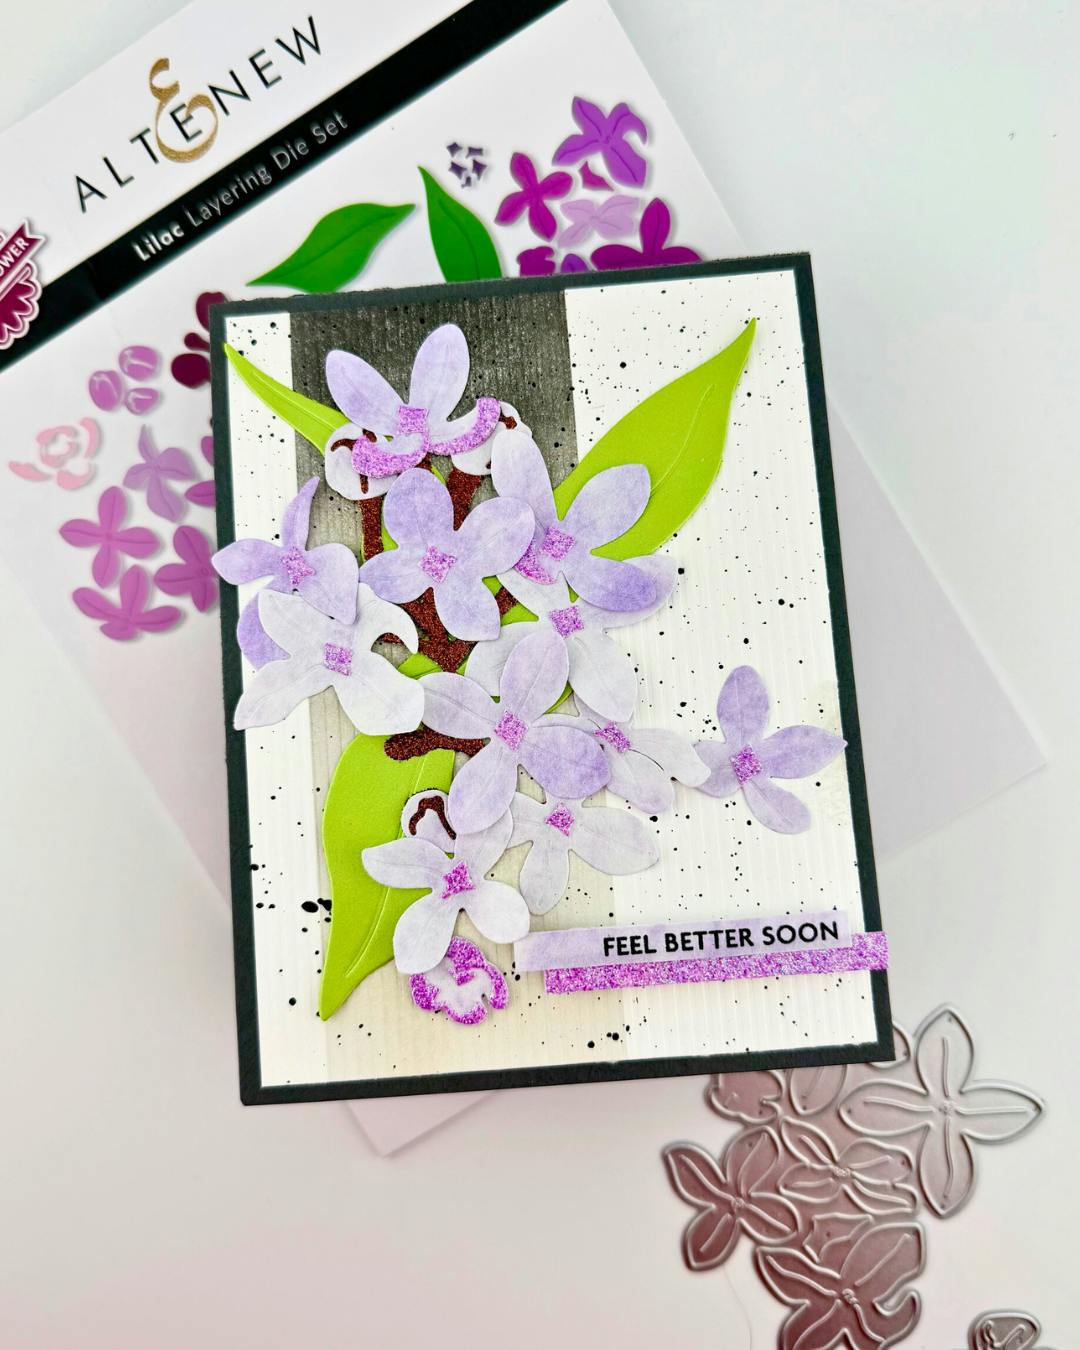
These lilacs are so much easier to put together than I thought they would be! And they are so beautiful! Another great CAF set!
I love these small brushes. Fit in your hands & fingers very nicely. I have them stored w/each ink pad & re-inker on my wall.