Quick and Easy Holiday cards | Clean, simple, and shimmery

The Holidays Are Coming Up Fast!
Hi and welcome back to the Altenew blog and YouTube channel! It's Erica again. I know, I know. So soon, but there is hardly a moment to spare before the holidays are upon us and I know about you, but this time of the year just sneaks right up on me. Every year. I don't know if it's because I'm in slight denial about how fast the holidays are coming, or that the year is almost over, or what it is but here we are. I'm scrambling for every minute to get those holiday cards made, signed and posted off. There is no time to waste, so I'm going to cut down on the jibber-jabber and get to it.

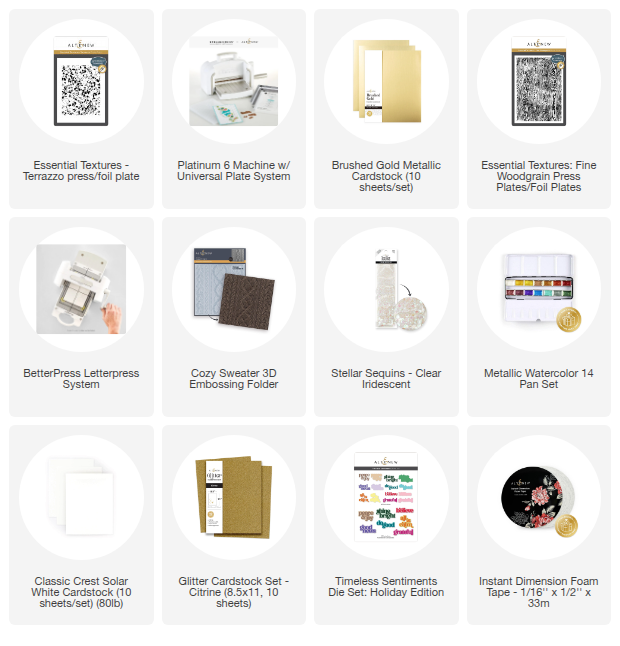
You will need some basic supplies like white cardstock, some metallic card stock, embellishments and either stamps or diecuts. My favourite is the Brushed Gold Metallic Cardstock, I absolutely LOVE it. It's so great, and it works for everything: celebrations, holidays, birthdays, you name it. Plus, white and gold is such a classic elegant combination. If you like a little bit of texture on your metallic cardstock, try one of the fabulous Glitter Card Stock. I did use a little bit of Citrine, because it adds such an elegant touch, plus it goes great with this gold and white holiday theme I have got going on.
When time is of the essence, I do find it quicker to prep all my bits and pieces for the cards in advance. It makes assembling them a breeze, plus you can rope in some help if you have kids that are willing to help or friends who might want to join in on the crafting action. So that's what we are going to do today. Prep. Assemble. Write. Seal. Send.
Preparation is Key for Mass Producing.
-First of all, count out your card bases, and if you need more, trim, fold and score enough to make sure you have one for each person you are sending a holiday card to.
-Decide on your design. When mass-producing cards, whether it is birthday, holiday, thank you's etc, having a pre-determined design will save you a lot of headaches.
-Stamp what needs to be stamped, and then die cut them out, if need be. If you are doing die cuts, like we are doing today for these holiday cards, get rolling. Get it? A die cutting pun, I couldn't help myself! If they need to be glued, it's better to cut them all out first and then glue one after the other until they are all done.
-Background wise it's time to either get your stencils, sprays, embossing folders or press plates out. Get cranking and get it done, one by one.
-Settle on embellishments and make sure you have enough for each card.

For these holiday cards I wanted to go quite simple, yet elegant, which is why I settled on white and gold. The white is to symbolize the snow, and cold, and the gold... I don't really need a reason why I'm using this gorgeous gold; it speaks for itself, I think. I also love, love, love how word die cuts look with gold cardstock!
I wanted some texture and fun feel to the cards, because I just don't like a holiday card that is muted and boring. The holidays are supposed to be all about joy, love and togetherness so I wanted the cards to convey that.
As I like texture on my cards and I'm not super great with white space, I decided to use some Press Plates to create some luscious patterns. This is a great work-around if, like me, you struggle with leaving white space blank. I really admire people who can do that, but for me, it's so hard for some reason UNLESS I add shimmer, texture or bling. And all of those things are pretty much encouraged for holiday cards, am I right or what?
If you do not have a BetterPress, you could always try one of the many beautiful 3D Embossing Folders. Like the Cozy Sweater! It's perfect for winter and the holidays!
I also tried bunching up some card stock and then flattening it out a little again. I wanted a bit of a snowy hill look, if that makes sense. Kind of perfect for the winter holidays, if you are from a country that gets snow, or if you just like the idea of it.
For this to work, don't use really heavy cardstock. It doesn't bunch up easily, just ask me how I know, LOL.
It's All in the Details
While I'm not great with plain white space, a little bit of it was needed in order to adhere my holiday sentiments without them looking wonky or not stay on properly. So, to integrate this I cut a textured panel into half, at an angle and then used both pieces for separate cards. So, one background equals TWO holiday cards! Ha, smart or what? If you are mailing your holiday cards, you might want to skip the Instant Dimension Foam Tape, but if you are hand-delivering some, add it and don't be shy!
For the sentiments I have used the Timeless Sentiments 3 die set Holiday Edition. I talked some nonsense in the video about there being a Holiday Edition set in this range, not realizing I am actually holding it in my hands. I know. That happened. In fairness to me, on the packaging of my set it doesn't actually say Holiday Edition.
I cut out some of the sentiments out of the Brushed Gold Metallic Cardstock as well as Glitter Card Stock in Citrine, as well as the shadow parts in white card stock. These are all layered up, using liquid glue and set these aside.

Assembly
I had a few backgrounds made but decided to not go crazy here but rather show you how to get a two-for-one. When time is of the essence, every little shortcut helps.
The one I liked the most was made using the Essential Textures Terrazzo Press Plate, but rather than using it to letterpress or hot foil, I used it as an embossing plate. The sandwich needed for this is a bit different than a die cutting sandwich so make sure you check the instructions on your die cutting machine before attempting to do this.
The panel came out so beautifully textured and I added a little bit of gold splatters on this for that shimmer and shine. This was then cut in half, but at angle.
Card Number 1
For the first card, I have gone quite simple and as flat as possible. If you are mailing your holiday cards, this is the best option, no matter how fun it is with layers.

The textured half was simply glued down to a card base, and then one of the die cut sentiments was added and voila: our first holiday card done! So simple, yet elegant and this could easily work for all sorts of different religious winter holidays.

Card Number 2
For the second card, I've gone for the LAYERS! Oh yes. That Instant Dimension Foam Tape came out, and I used it for every bit. This holiday card will definitely have to be hand-delivered, but oh well.

A top tip I'm sharing in the video, on how to get your bits and pieces down straight, is to add some liquid glue to your foam tape pieces. It gives you a few extra seconds to make sure things end up where you want on your cards.

No matter who you sent/give this card to, it will fit every type of holiday as it's focusing on peace and joy, rather than a specific holiday.
Card Number 3, Our Rouge One!
Remember how I mentioned about scrunching up paper to make it look like a snowy hill? Well, this might not be everyone's cup of tea, but it doesn't require anything other than some white, thin paper and your hands. Consider it a bit of a holiday crafty workout, LOL. All you do is scrunch up the paper over and over to create texture on it, then we flatten it out, trim it down and simply adhere to the card base. That's it.

On this one I added another little piece of cardstock to make it easier to adhere the sentiment. It also got a very healthy smattering of Clear Iridescent Stellar Sequins to give the illusion of falling snowflakes.
Like I said, it's not going to be everyone's cup of tea, but it was fun to make and that counts for something, doesn't it?

Now, that's it from me for today but I really hope I have given you some inspiration to get those last few holiday cards made and sent!
With love and light, sparkle and snowflakes from your gal, Erica.
LAST CHANCE ALERT: Cyber Monday Special Offer!
Speaking of getting those cards done efficiently, don't miss out on essential crafting supplies! Our Cyber Monday Special Offer on Tools and Adhesives is still running, but it ends tomorrow, December 3rd. Since preparation is key for mass-production, this is the perfect time to stock up and get Up to 40% OFF everything you need to prep and assemble.
Leave a Reply