May 2026 Guest Designer of the Month | Layered Cardmaking Techniques

Get to Know Our Guest Designer - Bonnie
Hello crafty friends! I’m Bonnie Crane from BONNIECAROLLEE.com, and I’m thrilled to be joining you as a guest designer for Altenew. I discovered cardmaking a few years ago after retiring from teaching, and what started as a simple way to pass the time quickly grew into a true passion.
Like many, I began by learning through imitation, but as my skills developed, so did my confidence—and before long, I was creating my own designs. Describing my style isn’t easy because I genuinely love it all. I enjoy experimenting with a wide range of techniques and looks, and that variety shows up in my cards. For this project, I wanted to focus on intricate layered cardmaking techniques that bring paper to life.

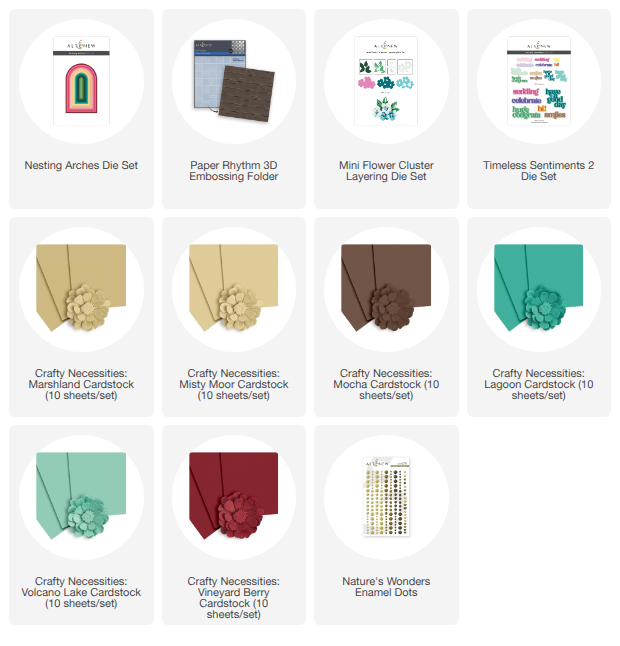
For this card, I thought it would be fun to incorporate a few of my favorite Altenew products:
- Paper Rhythm Embossing Folder (background texture)
- Mini Flower Cluster Layering Die Set (floral elements)
- Nesting Arches Die Set (structure)
- Timeless Sentiments 2 Die Set (sentiment)
Crafty Necessities Cardstock colors:
Finishing touches:
Mastering the Textured Background
The background was created using Lagoon cardstock embossed with the Paper Rhythm Embossing Folder. Because the design features a repeating pattern of squares, I began with a larger panel so I could trim it down to 4 1/4” x 5 1/2” and ensure the pattern was nicely centered both horizontally and vertically. I chose to use the side of the embossing where the solid squares are raised. I accented them by masking off one square at a time using Post-it Note tape, then inked the alternating squares with Teal Cave Ink followed by a splatter of gold using metallic gold watercolour paint. The deeper inked squares combined with the flecks of gold really emphasize the texture and structure of the background. The finished panel was then adhered to an A2 card base.

Adding Interest with Layered Cardmaking Techniques
For additional interest, I incorporated three arches using one of the smaller dies from the Nesting Arches Die Set. I cut layers from black foam, brushed gold foil cardstock, and Vineyard Berry cardstock. The gold layer was adhered to the foam for dimension, and the Vineyard Berry layer was slightly offset to reveal a subtle gold trim along one side of each arch.
The bold sentiment from the Timeless Sentiments 2 Die Set was constructed with the same foam and cardstock layers and adhered along the bottom of the card before adding the arches.

Assembling the Layered Floral Elements
The florals were created using the Mini Flower Cluster Layering Die Set. I cut two sets of flowers and leaves, with each flower built from five layers: brushed gold foil, Marshland, Misty Moor, Marshland again, and Mocha for the flower center detail. The leaves begin with a base of brushed gold foil layered with Lagoon, and the curled leaf accents were cut from Volcano Lake cardstock.

Final Assembly and Finishing Touches
Once all the elements were prepared, I arranged and adhered the flowers over the arches, tucking the leaves in around them to create a full, dimensional cluster. These layered cardmaking techniques really help the project stand out. The card was finished with embellishments from the Nature’s Wonders Enamel Dots.
Thank you so much for joining me today—happy crafting!
Supplies