3 Creative Ways to Use Your Stencils in Paper Crafting
Last Updated: October 24, 2025
If you're a crafter, then you know that stencils are a must-have tool in your craft room. They're perfect for creating quick and easy designs and can add great interest, texture, and dimension to your cards, scrapbook pages, and journaling projects. In this blog post, we will explore the different ways you can use your stencils in your paper crafting projects.
If you're also feeling a bit stuck on ideas for using your stencils, don't worry - we've got you covered! We will also share some creative stencil project ideas to inspire you. So let's get started!
What Are Stencils and How Are They Used in Paper Crafting?
Stencils are templates with cut-outs or holes that you can use to create repeated and intricate patterns on paper and other materials. Most stencils are typically made from thin sheets of plastic or metal, and they come in various cut-outs that correspond to the designs you want to create.
To use a stencil, simply position it on your paper material and trace it around the edges with a pen or pencil. You can also choose to fill in the tracing with color, pattern, or texture with ink or acrylic paint. In using stencils for cardmaking, some crafters decide to work with inks as it is easier to blend and dab with an ink-blending tool or brush.

All You Need To Know About Stencils
Stencils are a great way to add interest and can be used for all sorts of paper crafting projects, including card making and scrapbooking. From coloring stamps and embossing to creating professional-looking texts, stenciling provides versatility in completing designs!
Did you know that one of the most beloved crafting products on Altenew includes our famous layering stencils with floral designs? Crafters love them because they are easy to line up and use for all sorts of gorgeous designs. Try a set today!
If you're looking for a new technique and tool to try, why not give stencils a go? You might be surprised at how much fun it is!
3 Crafty Ideas for Using Stencils in Your Crafting Projects
1. Combine Stencil Backgrounds with Stand-Alone Dies
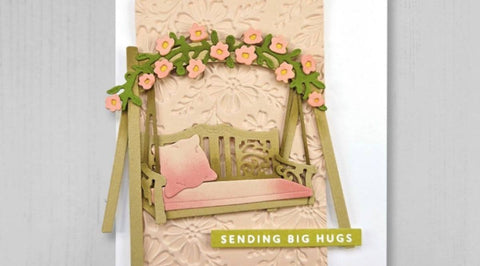
A crafty and unique way to get more use out of your stencils is to combine stencil backgrounds with standalone dies. This technique is perfect for using stencils and stand-alone dies to echo the stencil image as a focal point on your project.

Meadow Burst 5-in-1 Layering Stencil
You can do this by placing the stencil on your cardstock or paper and using a blending tool or dauber to apply ink or paint over the top.
For this method, Norine used complementary light and dark colors from the Sparkle & Shine Crisp Dye Ink Mini Cube Release Bundle.
You can decide on whatever color scheme you want, but remember to use bold and vibrant colors for your stencil background that would contrast the color of the die.

Bitterroot Flower 3-in-1 Layering Stencil
Once you have colored the stencil, you can cut the dies from plain or colored cardstock and assemble them on top of the stencil background. You can use a die slightly different from the stencil as long as it has a relevant design and is positioned to complement or echo its shape.
After stamping a coordinating sentiment, the result of this technique will be a stunning and elegant card!
2. Experiment with Stencils Using Different Media
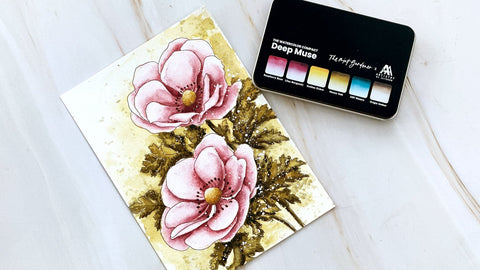
Another great way to get creative with stencils is by mixing them with different media. You can use this technique in various ways - embossing paste, glitter gel, washi tapes, watercolors, stickers, and more! The creative possibilities are endless.

Playful Patterns Stencil Set (4 in 1)
For layering stencils, you can use different media to emphasize specific layers instead of just coloring them with ink. For this technique, you can use embossing paste or glitter gel, as shown in this lovely tutorial by Therese:
You can also maximize using stencils in your projects by working with washi tapes! Norine achieved this unique look by using the Painted Orchids Washi Tape as her card's focal point, with a Wonderful Wreath Stencil background that she painted with watercolor.
The design of the washi tape coordinated perfectly with the watercolor stencil, bringing all elements together beautifully in one cohesive piece.

2 Ways to Combine Washi Tape, Stencils, and Background Dies
You can also do this technique by layering stamps and stencils on top of each other with ink, resulting in a wild but beautiful design, much like the one below by Norine:

Layers Upon Layers; Stencils, Stamps and Ink
3. Try Your Hand at Heat Embossing Layered Stencils
Did you know that you can emboss your paper with stencils too? You can use stencils to emboss textures onto paper instead of using embossing folders - just run them through your die cutting machine and achieve almost the same results! But another great technique to truly maximize the versatility of stencils is heat embossing with layered stencils.
You can follow this stencil technique with Therese's detailed tutorial below:
To do this technique:
- Use embossing ink on the stencil instead of your standard dye or pigment inks.
- Add embossing powder and dry with a heat gun.
- Do the same for all layers - using embossing ink and powder all the way, alternate the colors of the embossing powder per layer.
- Top the look off with a lovely sentiment die!
Simply put, the key to this technique is to layer different-colored embossing powder instead of ink on the image. After embossing and drying all layers with a heat gun, the final product is a one-of-a-kind piece that you can't find anywhere else! The dimensions are raised and deep, making for an incredible design.

Add Flair to Your Projects with These Stencil Techniques!
Have we inspired you to give stencils a try? They really are the perfect crafting tool for just about everything! With so many possibilities for creativity, there’s no reason why every crafter shouldn’t have a few stencils in their crafting stash.

If you want to take your stenciling skills up a notch, sign up for our Celebration: Stencil Techniques Online Cardmaking Class – we can’t wait to see what unique creations you come up with!
Be sure to check out more tips and ideas from Altenew’s All About Crafting! With all these crafting resources at your fingertips, what will YOU make today?


They are super fun, aren’t they?! Hope to see your stencil art soon, Debby! Make sure to tag us when you post them on social media. :)
The layered stencils are fast becoming my favorites! They are so fun! This is a great tutorial that I am for sure going to try!