


One Embossing Folder, Two Easy Ideas : Wanderlust Travel Inspired Cards.
There’s just something magical about embossing folders — they’re one of the most affordable tools in a card maker’s stash, yet they can deliver such a wide range of effects! With just one design, you can create clean, elegant backgrounds or add bold, textured detail, all without breaking the bank.
Hello Altenew friends, Hannelie here and today I’m sharing two travel-inspired cards made with the Wanderlust 3D Embossing Folder.
For the first card, I kept the embossing crisp and clean, letting the texture speak for itself. For the second, I took things up a notch by applying ink directly from the pad to highlight the raised areas — same folder, two very different looks!
I’m excited to share my creations with you, so let’s start creating!

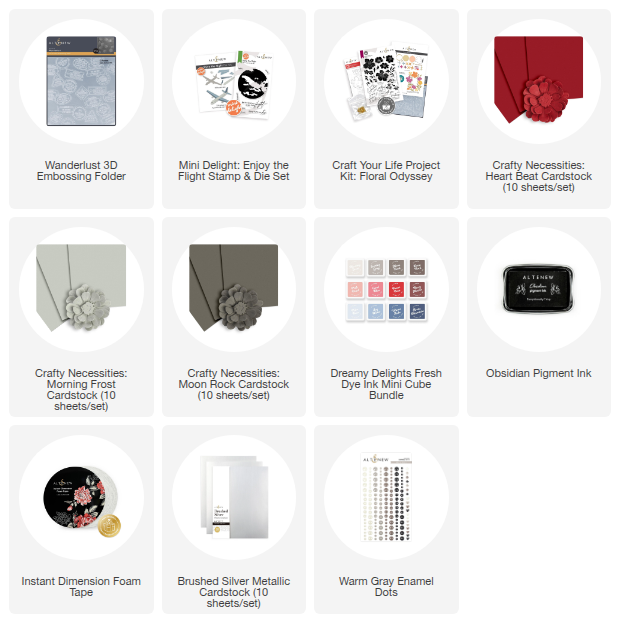
Supply list to make the “safe travels” card:
- White card stock
- Wanderlust 3D Embossing Folder
- Mini Delight - Enjoy the Flight (stamp & die set)
- Die-cutting machine
- Paper trimmer
- Colored cardstock: Heart Beat, Morning Frost, and Moon Rock
- Brushed Silver cardstock
- Rectangle dies
- Small circle die
- Obsidian Black Pigment Ink
- Warm Grey Enamel Dots
- Instant Dimension Foam Tape
“Safe Travels” Card — Step-by-Step
-
Prep the Card Base
Trim and fold white cardstock to create an A2 card base (4.25" × 5.5").
-
Emboss the Panel
Trim a second piece of white cardstock slightly smaller than the card front (e.g., 4" × 5.25"). Place it in the Wanderlust 3D Embossing Folder and run it through your die-cutting machine using the 3D embossing sandwich for your model.
-
Adhere the Background
Attach the embossed panel to the card base with your choice of adhesive.
-
Die-Cut the Focal Point
Die-cut the pieces from the Enjoy the Flight Die Set using Moon Rock, Heart Beat, and Brushed Silver cardstock. Assemble the motif, using the packaging image as a guide.
-
Create the Diagonal Striped Panel
Trim strips of Heart Beat, Morning Frost, and white cardstock to 1 cm wide (≈ 3/8"). Adhere the strips diagonally onto a sheet of plain printer paper to create a striped panel.
-
Die-Cut a Frame
Use two nesting rectangle dies to cut a frame from the striped panel (one inside the other).
-
Pop Up the Frame
Add Instant Dimension Foam Tape to the back of the frame and adhere it over the embossed panel to create a raised window effect.
-
Stamp the Sentiment
Stamp the “Safe Travels” sentiment in Obsidian Black using the Stampwheel (or an acrylic block). Use a small circle die to cut out the sentiment.
-
Assemble the Front
Adhere the focal point and the sentiment to the card front.
(Refer to photo for placement.)
-
Embellish
Finish with coordinating Enamel Dots.

Supply list to make the “anywhere with you” card:
- White card stock.
- Wanderlust 3D Embossing Folder.
- Mini Delight - Enjoy the Flight (die set).
- Floral Odyssey PK (sentiment).
- Heart Beat, Berry Mocha & Moon Rock Fresh Dye Ink.
- Die-cutting machine.
- Paper trimmer.
- Heart Beat Cardstock.
- Brushed Silver Cardstock.
- Obsidian Black Pigment Ink.
- Warm Gray Enamel Dots
- Instant Dimension Foam Tape.
“Anywhere with you” Card — Step-by-Step
1. Prep the Card Base
Trim and fold Heart Beat cardstock to create an A2 card base (4.25" × 5.5").
2. Emboss the Panel
Trim a piece of white cardstock slightly smaller than the card front (about 4" × 5.25"). Place it in the Wanderlust 3D Embossing Folder and run it through your die-cutting machine using the 3D embossing sandwich recommended for your machine.
3. Add Ink for Depth
Apply Heart Beat and Moon Rock inks diagonally in a swiping action across the panel directly from the ink pads. I also added a touch of Berry Mocha to enhance the embossed details and create subtle depth.
4. Create the Aperture
Use the base layer of the airplane die to cut an aperture in the embossed panel. To add visual interest, I divided the panel into two sections—roughly one-third and two-thirds. See the photo for reference.
5. Adhere the Panels
Attach the two embossed panels to the colored card base using Instant Dimension Foam Tape for a slight lift and dimension.
6. Die-Cut the Airplane
Cut the airplane from Brushed Silver cardstock. For this design, I aimed for a silhouette effect, so I skipped the detailed parts of the airplane.
7. Add the Focal Point
Adhere the airplane over the aperture using Instant Dimension Foam Tape, slightly offset for added visual interest and dimension.
8. Stamp the sentiment with Obsidian Black ink, using a stampwheel or acrylic block and use the coordinating die to cut it out.
9. Add the sentiment
Adhere the sentiment to the card front.
(Refer to photo for placement.)
10. Embellish
Finish with coordinating Enamel Dots

With one embossing folder, you can go from crisp and clean to bold and colorful in minutes — and both styles make a big impact.

The two techniques I shared today are really just the tip of the iceberg when it comes to embossing folders. From inking and debossing to adding metallic accents and watercolor washes, there are endless ways to use these.
I hope these travel themed cards inspire you to pull out an embossing folder from your own collection and try a new twist on it.
Happy crafting!


Leave a comment